I figured these mummy brie bites would be cute. I mean, you wrap puff pastry around little cheese rounds, add some eyes, call it a day. It took about one bite for me to realize I had completely underestimated them. The first one came out of the oven looking a little lopsided—one eye was sliding off, the pastry was puffed in a way that made it look more like a sad ghost than a mummy. But I popped it in my mouth anyway (hot cheese, no regrets), and honestly, I let out a sound I am not proud of.
That first bite was ridiculous. The pastry was shatteringly flaky, the brie had melted into this warm, buttery puddle, and the little bit of cranberry I had tucked inside cut through the richness just enough. I stood there at the counter, eating a misshapen cheese bite that looked like it had been through a battle, thinking, “This is the best thing I have made all month.” And that is the thing about this recipe—it delivers way more than its silly little face promises.
These easy mummy wrapped baked brie bites are exactly what a Halloween appetizer should be. They look fun and festive, but they taste genuinely incredible. The contrast between the flaky golden crust and the molten, creamy center is the kind of thing that makes people hover around the serving tray. I have brought them to two parties now, and both times, they disappeared before the main course even hit the table. Honestly, I think that is the best compliment a snack can get.
Why You’ll Love This Recipe
Let me tell you why these little guys are going to steal the show at your Halloween gathering. I have tested this recipe about four times now (tough job, I know), and every single batch confirmed what I suspected from the start—this is the appetizer that makes people forget about the candy bowl.
- Quick & Easy: These come together in about 30 minutes, start to finish. You can prep them in advance and pop them in the oven right before guests arrive. No stress, no fuss.
- Simple Ingredients: Puff pastry, brie, and a few pantry staples. No special trip to a fancy cheese shop required. You probably have most of this stuff already.
- Perfect for Halloween Parties: They look spooky and fun without being over-the-top. Adults love them, kids think they are hilarious, and everyone eats them.
- Crowd-Pleaser: I have yet to meet someone who does not go back for seconds. The combination of warm, melted cheese and flaky pastry is basically irresistible.
- Unbelievably Delicious: This is not one of those “cute but tastes like cardboard” Halloween snacks. The brie gets gloriously oozy, the pastry gets golden and crisp, and the whole thing is just next-level comfort food in a tiny package.
What makes these different from every other brie appetizer out there? It is the texture. Most baked brie recipes are just a wheel of cheese in the oven. These individual bites have way more crispy edge per bite, and the ratio of pastry to cheese is perfect. Plus, they look like little mummies, which is objectively hilarious and adorable. This is comfort food reimagined for a holiday party—silly on the outside, seriously good on the inside.
What Ingredients You Will Need
This recipe uses simple, everyday ingredients to create something that tastes way more impressive than it should. Most of these are probably already in your kitchen, which is exactly how I like my party recipes.
For the Mummy Brie Bites
- 1 sheet puff pastry, thawed (I prefer Pepperidge Farm or Dufour—Dufour is pricier but has a richer butter flavor; both work great here)
- 8 ounces brie cheese, cold (get a good quality double or triple cream brie; the creamier the better. Cold cheese is much easier to cut cleanly)
- 1 large egg (for the egg wash; adds that beautiful golden color to the pastry)
- 1 tablespoon water (to thin the egg wash slightly so it brushes evenly)
- 24 candy eyes (the little edible sugar eyes you find at baking supply stores or online; they make the mummy faces come alive)
- Flaky sea salt, for sprinkling (optional but highly recommended—it balances the richness of the cheese)
Optional Add-Ins (My Favorite Variations)
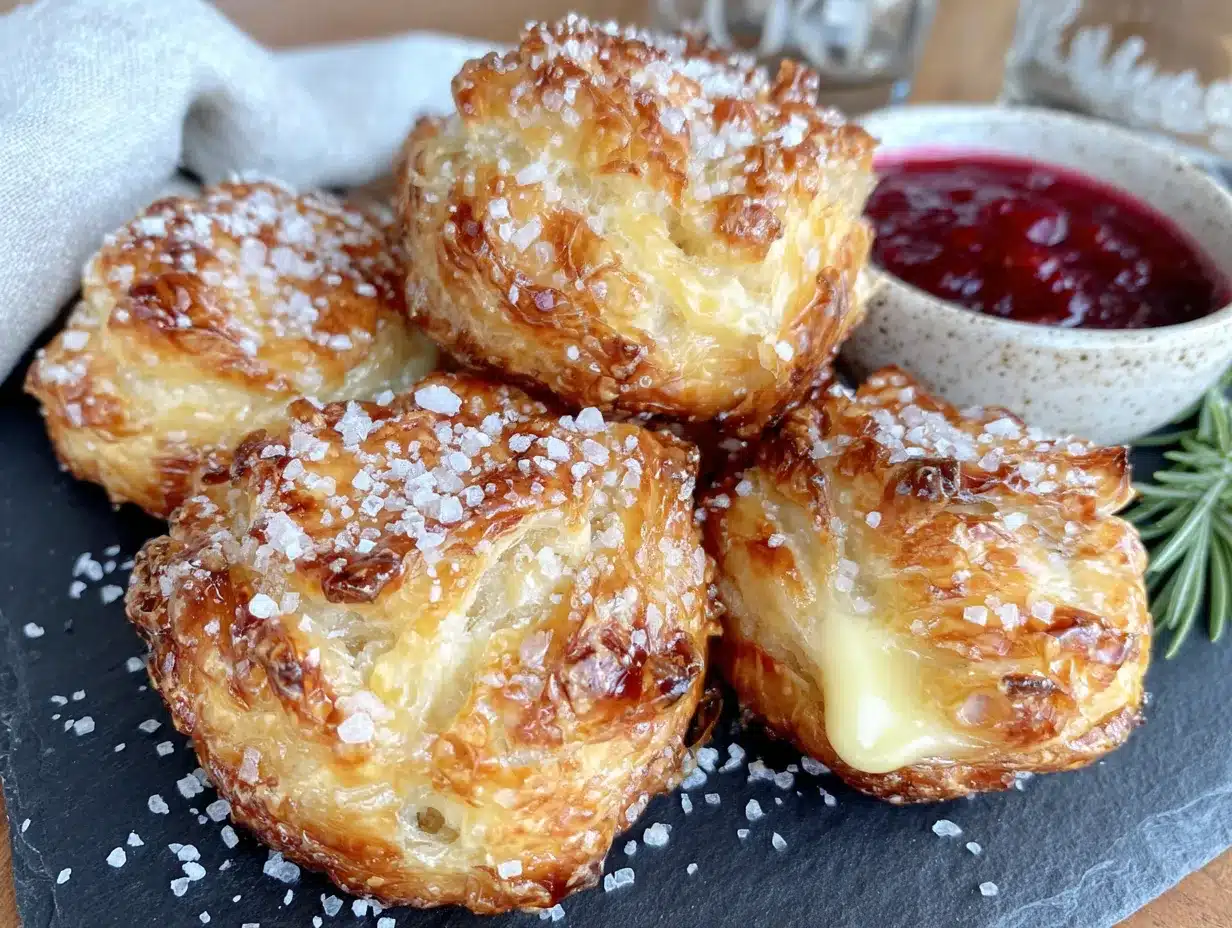
- 2 tablespoons cranberry sauce or fig jam (a tiny dollop under the brie adds a sweet-tart pop that cuts through the fat beautifully)
- Fresh thyme or rosemary leaves (a few leaves tucked inside add an herby, savory note that feels very grown-up)
- Honey for drizzling (a light drizzle after baking turns these into a sweet-savory masterpiece)
When choosing your brie, look for a wheel that feels slightly soft when you press it but is still firm enough to hold its shape. Avoid anything that is already oozing at room temperature—it will be too runny to cut into cubes. I have found that the Kirkland brand brie from Costco works really well for this recipe and is budget-friendly. If you want to go fancy, look for a French brie de meaux, but honestly, the regular grocery store brie works just fine.
For the puff pastry, make sure it is fully thawed in the refrigerator overnight or on the counter for about 30 minutes. If it is still cold and stiff, it will crack when you try to roll it. Too warm and it will be sticky and impossible to work with. Room temperature but still cool to the touch is the sweet spot.
Equipment Needed
You do not need much for this recipe, which is part of why I love it. Here is what you will need:
- Baking sheet (a standard half-sheet pan works perfectly; line it with parchment paper for easy cleanup)
- Parchment paper (non-negotiable if you want the pastry to release easily and not stick)
- Sharp knife or pizza cutter (for cutting the puff pastry into strips; a pizza cutter makes this step so much faster)
- Pastry brush (for the egg wash; a silicone one is easiest to clean)
- Small bowl (for whisking the egg wash)
- Cutting board (for working with the pastry)
- Ruler or measuring tape (optional, but helpful if you want perfectly even strips)
If you do not have a pastry brush, you can use a folded paper towel to dab the egg wash on. It is not as pretty, but it works in a pinch. Also, if you do not have candy eyes, you can use small dots of black olive or even black sesame seeds for a more natural look. I have done both, and honestly, the candy eyes are more fun for Halloween.
Preparation Method
Alright, let me walk you through this. I have made these enough times to know exactly where things can go wrong, so I will point out the tricky spots as we go.
Step 1: Preheat and Prep
Preheat your oven to 400°F (200°C). Line a baking sheet with parchment paper and set it aside. In a small bowl, whisk together the egg and water until smooth. Set this aside as well.
Step 2: Cut the Brie
Take your cold brie and cut it into 12 equal cubes, about 1/2 inch to 3/4 inch each. Keep the rind on—it helps the cheese hold its shape as it melts. I learned this the hard way after trying to remove the rind once and ending up with a sticky, messy situation. The rind softens as it bakes and becomes part of the gooey goodness, so do not skip it. If you want to add a tiny dollop of cranberry sauce or jam, now is the time to make a small indent in each cube and tuck it in.
Step 3: Prepare the Pastry
On a lightly floured surface, unfold your thawed puff pastry sheet. Use a sharp knife or pizza cutter to cut it into 12 long strips, each about 1/2 inch wide. You will have some shorter strips and some longer ones—that is totally fine. The longer strips work better for wrapping the mummies, so save those for the bigger cubes of brie.
Step 4: Wrap the Mummies
Place one brie cube in the center of a pastry strip. Wrap the strip around the cube, overlapping slightly as you go, like you are wrapping a tiny bandage. Leave a small gap in the front for the eyes. The pastry should cover most of the cheese, but a little peek of brie showing through is fine—it will look like a mummy that has seen better days. Place the wrapped bite seam-side down on the prepared baking sheet. Repeat with the remaining brie cubes and pastry strips. You should have 12 mummies total.
Step 5: Egg Wash and Bake
Brush each mummy generously with the egg wash. This is what gives them that gorgeous golden-brown color. Sprinkle a tiny pinch of flaky sea salt over the top if you are using it. Bake for 12 to 15 minutes, or until the pastry is puffed and deeply golden. The cheese should be bubbling slightly at the edges. Let them cool on the baking sheet for 2 to 3 minutes—they will be lava-hot straight out of the oven.
Step 6: Add the Eyes
While the bites are still warm (but not burning hot), gently press two candy eyes into the gap you left in the front. The warmth of the cheese will help them stick. If you wait too long and the cheese sets, the eyes will not stay put. I usually do this step while the bites are still on the baking sheet, right after the 2-minute cooling period.
Step 7: Serve
Transfer the mummy brie bites to a serving platter. Serve them warm—the cheese is at its best when it is still oozy and molten. If they cool down too much, the brie will start to firm up, and the magic is lost. Trust me on this one.
Cooking Tips & Techniques
Let me save you from the mistakes I made during my first few batches. These tips come from real experience—some of them learned through slightly tragic kitchen failures.
Keep the brie cold until the last minute. Warm brie is impossible to cut cleanly. It smears, it sticks to the knife, and the cubes end up looking like sad little blobs. Pop the brie in the freezer for about 10 minutes before cutting if your kitchen is warm. It makes a world of difference.
Do not overstuff the pastry. I tried to make these with larger cubes of brie once, thinking more cheese is always better. It is not. The pastry needs room to puff and crisp, and if the cheese cube is too big, the whole thing becomes a greasy, leaky mess. Stick to the 1/2 to 3/4 inch cubes.
Watch the oven like a hawk. Puff pastry can go from golden to burnt in about 60 seconds. I have a habit of getting distracted by my phone and pulling out a tray of charcoal mummies. Set a timer for 12 minutes and check them. If they are not golden enough, give them another minute or two, but stay close.
Use a pizza cutter for the pastry strips. I used a knife for my first batch and ended up with uneven strips that tore easily. A pizza cutter glides through the pastry cleanly and gives you nice, even strips. It is one of those small tools that makes a big difference.
Let them rest before serving. I know I said serve them warm, but there is a sweet spot. If you serve them straight out of the oven, the cheese will burn the roof of your mouth. Two to three minutes of cooling is enough to make them safe to eat while still keeping the cheese wonderfully oozy.
Variations & Adaptations
One of the best things about this recipe is how easy it is to tweak. Here are some variations I have tried and loved:
Savory Herb Version: Before wrapping the brie, roll the cube in chopped fresh thyme, rosemary, and a pinch of black pepper. The herbs get trapped between the cheese and the pastry, infusing everything with this incredible savory aroma. I did this for a Thanksgiving appetizer and it was a hit.
Sweet Honey Drizzle: After baking and adding the eyes, drizzle the warm bites with a little honey and sprinkle with flaky salt. The sweet-savory combo is absolutely addictive. This version is perfect if you are serving these as a dessert or a brunch item.
Spicy Kick: Add a tiny sliver of jalapeño or a drop of hot honey under the brie before wrapping. The heat cuts through the richness of the cheese beautifully. I made these for a game day party and they disappeared faster than the regular ones.
Gluten-Free Option: Use gluten-free puff pastry if you can find it. I have tested this with the Schar brand, and it works surprisingly well. The texture is slightly less flaky, but the overall effect is still delicious.
Vegetarian and Kid-Friendly: These are already vegetarian, but if you are serving them to kids, you can skip the salt and add a tiny piece of apple or pear under the brie for a sweet surprise. My niece loved the apple version—she called them “mummy apples.”
Serving & Storage Suggestions
These mummy brie bites are best served warm, straight from the oven. I recommend arranging them on a wooden board or a festive Halloween platter. A few strategically placed rosemary sprigs around the edges make them look like they are emerging from a spooky garden. You can also serve them alongside a bowl of warm marinara sauce or a honey drizzle for dipping.
For a full Halloween spread, I love pairing these with a batch of easy crescent dough mummy hot dogs for a fun, savory combo that covers all the bases. If you want something sweet to balance the richness, the perfect Halloween sugar cookies with royal icing make a great dessert option. And for the drinks, do not forget to whip up a batch of witch cauldron green punch—it is spooky, fun, and pairs surprisingly well with the savory cheese bites.
Storage: If you have leftovers (unlikely, but possible), store them in an airtight container in the refrigerator for up to 2 days. The pastry will lose its crispness, but they are still tasty.
Reheating: The best way to reheat these is in a 350°F oven for about 5 to 7 minutes. The microwave will make the pastry soggy, so avoid it if you can. The air fryer also works well—3 minutes at 350°F should do the trick.
Make-Ahead Tip: You can assemble the mummies up to 24 hours in advance. Just wrap the brie cubes in the pastry strips, place them on the parchment-lined baking sheet, cover loosely with plastic wrap, and refrigerate. Brush with egg wash and bake right before serving. This is a lifesaver for party prep.
Nutritional Information & Benefits
While these are definitely a treat (hello, butter and cheese), they are not as heavy as you might think. Each bite is relatively small, so you can enjoy a couple without feeling like you need a nap afterward.
Here is an approximate nutritional breakdown per bite (based on 12 servings):
| Nutrient | Amount |
|---|---|
| Calories | 185 |
| Total Fat | 13g |
| Saturated Fat | 7g |
| Cholesterol | 35mg |
| Sodium | 210mg |
| Carbohydrates | 12g |
| Protein | 6g |
| Calcium | 80mg |
Brie is actually a good source of calcium and protein, and puff pastry, while indulgent, provides a satisfying crunch that makes a little go a long way. If you are looking for a slightly lighter option, you can use reduced-fat brie or a low-fat cream cheese alternative, though the texture will be different.
Conclusion
These easy mummy wrapped baked brie bites are the kind of recipe that makes you look like a kitchen hero without actually having to work that hard. They are fun, festive, and honestly, they taste incredible. The combination of flaky pastry and molten brie is a classic for a reason, and wrapping them up like little mummies just makes them impossible to resist.
I hope you give these a try for your next Halloween party, game day gathering, or even just a random Tuesday when you need a little joy. Feel free to customize them with your favorite add-ins—cranberry, honey, herbs, whatever makes you happy. And if you come up with a variation I haven’t tried, please share it in the comments. I am always looking for new ideas.
Go ahead, make some mummies. Your guests will thank you.
Frequently Asked Questions
Can I use a different type of cheese?
Absolutely. Camembert is the closest substitute and works beautifully. You can also use a soft goat cheese or even a small cube of mozzarella for a stretchier texture. Just make sure the cheese is soft enough to melt but firm enough to hold its shape when cut.
Can I make these in an air fryer?
Yes! Preheat your air fryer to 375°F. Place the mummies in a single layer in the basket (you may need to work in batches). Cook for 8 to 10 minutes, or until the pastry is golden and the cheese is bubbly. The air fryer gives them an extra-crispy exterior.
How do I keep the candy eyes from falling off?
Press the eyes into the cheese while it is still warm and slightly melted. If the cheese has cooled too much, the eyes will not stick. You can also use a tiny dab of honey or corn syrup as “glue” if needed.
Can I freeze these before baking?
Yes. Assemble the mummies, place them on a parchment-lined baking sheet, and freeze until solid. Transfer them to a freezer bag or container. When ready to bake, place them frozen on a baking sheet, brush with egg wash, and add 3 to 5 minutes to the baking time.
What should I serve with these?
These are great on their own, but they pair wonderfully with a fresh salad, roasted vegetables, or a bowl of warm soup. For a Halloween party, serve them alongside crispy baked buffalo cauliflower bites for a complete appetizer spread that everyone will love.
Pin This Recipe!
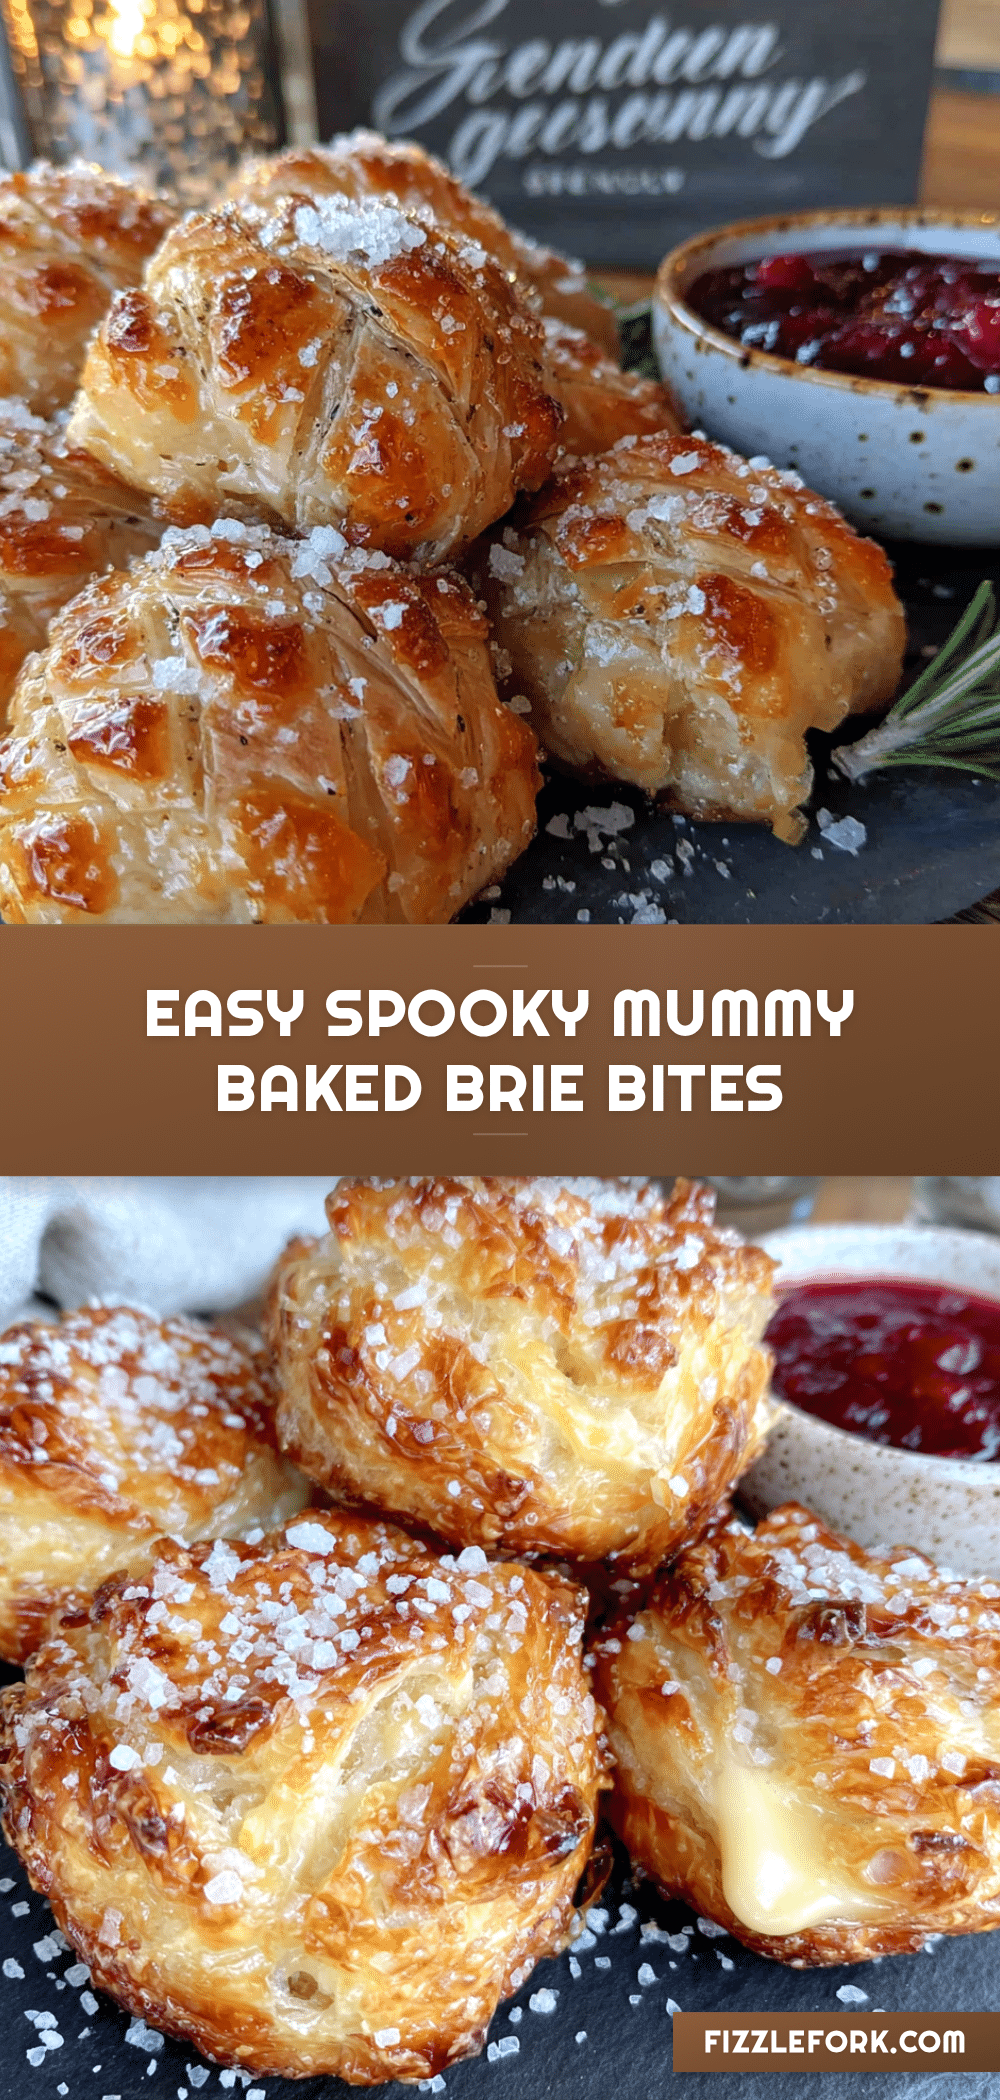
Easy Mummy Baked Brie Bites: Best Halloween Appetizer

These easy mummy wrapped baked brie bites are exactly what a Halloween appetizer should be. They look fun and festive, but they taste genuinely incredible with flaky golden crust and molten, creamy center.
- Prep Time: 15 minutes
- Cook Time: 15 minutes
- Total Time: 30 minutes
- Yield: 12 servings 1x
- Category: Appetizer
- Cuisine: American
Ingredients
- 1 sheet puff pastry, thawed
- 8 ounces brie cheese, cold
- 1 large egg
- 1 tablespoon water
- 24 candy eyes
- Flaky sea salt, for sprinkling (optional)
- 2 tablespoons cranberry sauce or fig jam (optional)
- Fresh thyme or rosemary leaves (optional)
- Honey for drizzling (optional)
Instructions
- Preheat your oven to 400°F (200°C). Line a baking sheet with parchment paper.
- In a small bowl, whisk together the egg and water until smooth. Set aside.
- Cut the cold brie into 12 equal cubes, about 1/2 inch to 3/4 inch each. Keep the rind on. If desired, make a small indent in each cube and add a tiny dollop of cranberry sauce or jam.
- On a lightly floured surface, unfold the thawed puff pastry sheet. Cut it into 12 long strips, each about 1/2 inch wide.
- Place one brie cube in the center of a pastry strip. Wrap the strip around the cube, overlapping slightly, leaving a small gap in the front for the eyes. Place seam-side down on the prepared baking sheet. Repeat with remaining brie and pastry strips.
- Brush each mummy generously with the egg wash. Sprinkle with flaky sea salt if using.
- Bake for 12 to 15 minutes, until the pastry is puffed and deeply golden. Let cool on the baking sheet for 2 to 3 minutes.
- While still warm, gently press two candy eyes into the gap in the front of each mummy.
- Transfer to a serving platter and serve warm.
Notes
Keep the brie cold until the last minute for easier cutting. Do not overstuff the pastry. Watch the oven closely as puff pastry can burn quickly. Let the bites rest for 2-3 minutes before serving to avoid burning your mouth. For make-ahead, assemble up to 24 hours in advance, refrigerate, then brush with egg wash and bake before serving.
Nutrition
- Serving Size: 1 bite
- Calories: 185
- Sugar: 1
- Sodium: 210
- Fat: 13
- Saturated Fat: 7
- Carbohydrates: 12
- Protein: 6
Keywords: Halloween appetizer, brie bites, mummy brie, puff pastry appetizer, easy Halloween recipe