I figured the whole “sushi” thing for kids was just a cute name slapped on a regular snack. It took about five minutes of watching my nephew devour these peanut butter banana sushi roll-ups for that assumption to fall apart completely. He’s a notoriously picky eater—the kind who inspects his food like he’s looking for contraband—and he ate six of them without a single complaint. That’s not normal.
Honestly, I was just trying to use up a slightly overripe banana and the last spoonful of peanut butter in the jar. I rolled it up, sliced it, and tossed it on a plate, fully expecting him to push them around and ask for a bag of chips instead. But something about those little coin-shaped bites is just… fun. They look like a treat, not a snack you’re being forced to eat.
Here’s the thing about this recipe—it’s almost too simple to call a recipe. You don’t need a stove, a knife (well, a butter knife at most), or any fancy ingredients. It’s the kind of thing you make when you’re hangry and need something in your mouth in under ten minutes. And it’s the kind of thing kids actually get excited about, which, let’s face it, is half the battle.
I’ve made these for after-school chaos, for road trips, and even as a weirdly satisfying midnight snack. They’re not fancy. They’re not groundbreaking. But they are exactly what you need when you want something sweet, satisfying, and fast. No fuss, no mess, just good.
Why You’ll Love This Recipe
Let’s be real—most “healthy” snacks feel like a compromise. You eat them because you should, not because you want to. These peanut butter banana sushi roll-ups are different. They taste like a treat, but they’re made from real, whole ingredients that actually keep you full.
- Ready in 10 Minutes: From start to finish, you’re looking at ten minutes, max. That’s faster than ordering takeout and way more satisfying.
- No Special Ingredients: You probably have everything in your kitchen right now. No trips to the store for obscure things you’ll never use again.
- Kid-Approved and Adult-Friendly: I’ve served these to toddlers, teenagers, and grown adults. They disappear every single time.
- Endlessly Customizable: This is more of a formula than a rigid recipe. Swap the peanut butter for almond butter, add some chocolate chips, or roll it in crushed granola. It works.
- Actually Satisfying: The combination of protein from the peanut butter, fiber from the banana, and carbs from the tortilla keeps you full for longer than a handful of crackers ever would.
What makes this version different from the thousand other banana roll-up recipes out there? It’s the texture. I use a flour tortilla that’s been lightly warmed so it’s pliable, then I spread the peanut butter all the way to the edges. No dry bites. No filling spilling out the sides. Every single piece has the perfect ratio of creamy, sweet, and chewy.
This is the snack that makes you feel like you’ve got your life together, even on days when you absolutely do not.
What Ingredients You Will Need
This recipe uses simple, pantry-friendly ingredients that come together to create something surprisingly satisfying. Here’s what you’ll need:
- 1 large flour tortilla (8-inch) — I prefer Mission or Guerrero for their flexibility. A burrito-sized tortilla also works if you want bigger roll-ups, just adjust the filling amount.
- 2 tablespoons creamy peanut butter — Use a natural peanut butter that’s just peanuts and salt for the best flavor. I’m partial to Jif Natural or Skippy Natural. Avoid the super-runny kind that separates easily, as it makes the tortilla soggy.
- 1 medium ripe banana — The banana should be ripe but still firm. Overly soft bananas will turn into mush when you roll them. Look for one with a few brown spots but that still holds its shape.
- 1 tablespoon honey or maple syrup (optional) — If your banana isn’t super sweet, a light drizzle adds a touch of extra sweetness. I use local honey when I have it.
- 2 tablespoons granola or crushed cereal (optional) — For crunch. I love using Honey Bunches of Oats or a simple oat-based granola. Crushed Cheerios work great for little kids.
- Pinch of cinnamon (optional) — A tiny sprinkle adds warmth and makes the whole thing taste bakery-fresh.
Ingredient Swaps: If you have a peanut allergy, sunflower seed butter or almond butter work perfectly. For a gluten-free version, use a gluten-free tortilla or even a large rice paper wrapper (just dip it in warm water first to soften). You can also swap the honey for agave nectar or skip it entirely if your banana is sweet enough.
Equipment Needed
You don’t need much for this one. Here’s the short list:
- Butter knife or offset spatula — For spreading the peanut butter evenly. A regular dinner knife works too, but an offset spatula makes it easier to get right to the edges.
- Cutting board — Any flat surface will do. I use a wooden board because it doesn’t slide around.
- Sharp knife — A serrated knife works best for slicing through the tortilla without squishing the banana. A chef’s knife works in a pinch, just use a gentle sawing motion.
- Small microwave-safe plate — For warming the tortilla. You can also use a dry skillet if you prefer.
- Parchment paper or wax paper (optional) — If you’re packing these for lunch, wrapping them in parchment keeps them from sticking together.
Budget Tip: Don’t have a serrated knife? Just use a sharp chef’s knife and a light hand. The key is to not press down too hard or the banana will squish out the sides.
Preparation Method
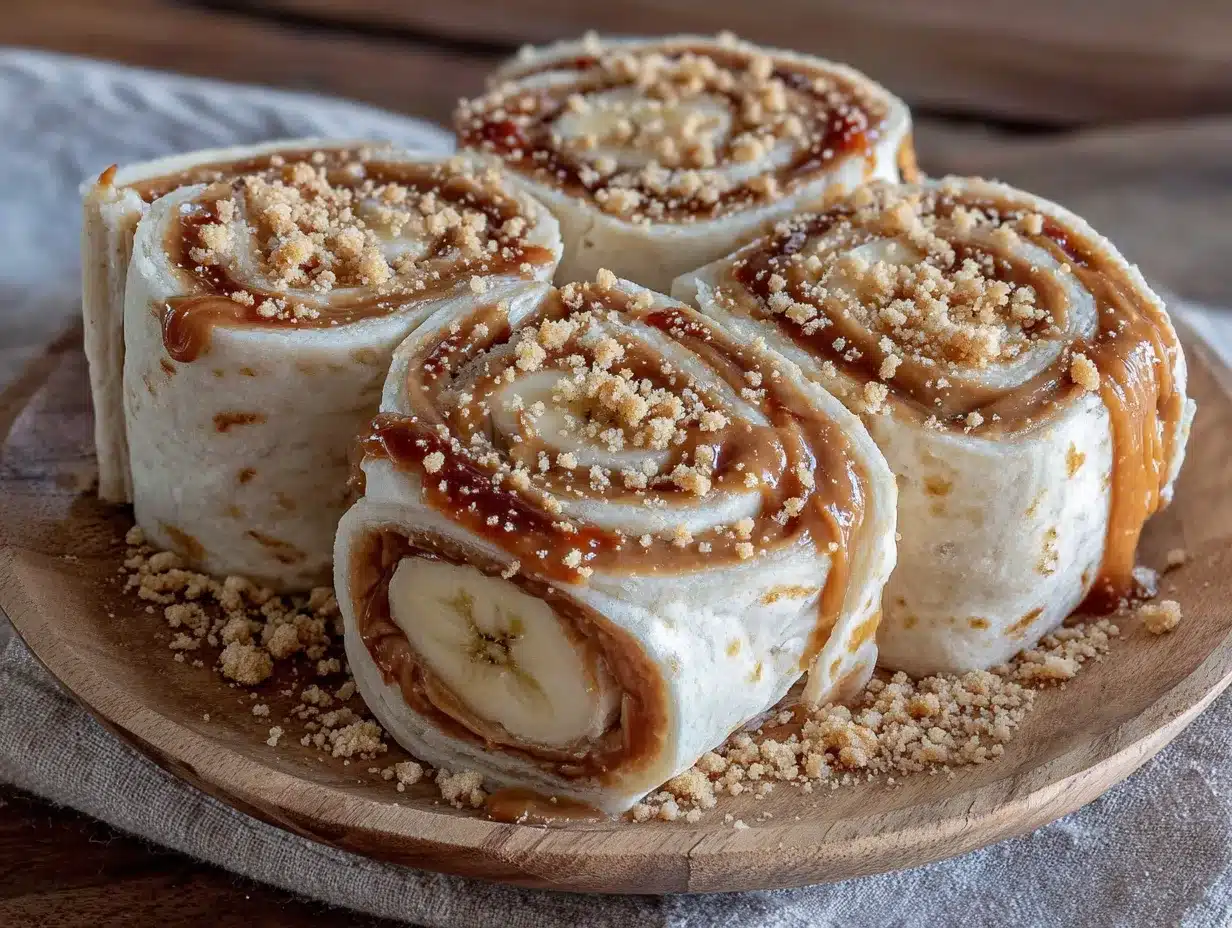
Follow these steps and you’ll have perfect little sushi-style roll-ups in no time.
- Warm the tortilla. Place your flour tortilla on a microwave-safe plate and microwave for 10-15 seconds. You want it just warm enough to be pliable, not hot. If you don’t have a microwave, you can heat it in a dry skillet over medium heat for about 20 seconds per side. A warm tortilla is way less likely to crack when you roll it.
- Spread the peanut butter. Using your butter knife or offset spatula, spread the 2 tablespoons of peanut butter evenly across the entire surface of the tortilla. Go all the way to the edges—this is what keeps every bite from being dry. If your peanut butter is too stiff to spread easily, microwave it for 10 seconds to soften it up.
- Add the banana. Peel your banana and place it at the bottom edge of the tortilla, about 1 inch from the edge. If your banana is too long for the tortilla, just break off the extra piece and eat it (cook’s privilege).
- Drizzle and sprinkle (optional). If you’re using honey or maple syrup, drizzle a thin line over the banana. Sprinkle your granola or crushed cereal over the peanut butter, and add a pinch of cinnamon if you want that extra warmth.
- Roll it up tight. Starting at the bottom edge where the banana is, roll the tortilla away from you, keeping it as tight as you can without squishing the banana. Tuck the edges in as you go. You want a snug, even log. If the tortilla starts to crack, it wasn’t warm enough—just press it back together and keep rolling.
- Slice into pieces. Place the rolled tortilla seam-side down on your cutting board. Using a sharp serrated knife, slice it into 1-inch pieces. A gentle sawing motion works best here. Don’t press straight down or you’ll flatten the banana. You should get about 6-8 pieces per tortilla.
- Serve immediately or pack for later. These are best eaten within a few hours. If you’re packing them for lunch, wrap them tightly in parchment paper or place them in an airtight container.
Cooking Tips & Techniques
I’ve made these roll-ups more times than I can count, and I’ve learned a few things the hard way. Here are my best tips:
Don’t skip warming the tortilla. I learned this one the hard way. A cold tortilla cracks when you roll it, and then your banana pokes out the side like a weird yellow flag. Ten seconds in the microwave makes all the difference.
Use a serrated knife for clean slices. A straight-edged knife will squish the banana and push the filling out. A serrated knife cuts through the tortilla cleanly without disturbing the banana. If you don’t have one, use a very sharp chef’s knife and a gentle sawing motion.
Don’t overfill. It’s tempting to add extra peanut butter or pile on the granola, but too much filling makes the roll-up impossible to close and messy to eat. Stick to the measurements, especially if you’re making these for little hands.
Keep the banana whole. I tried slicing the banana into strips once, thinking it would be easier to roll. It was a disaster. The strips shifted around, and the roll-up fell apart. A whole banana gives you structure and stability.
Make them ahead for busy mornings. You can prep these the night before, just wait to slice them until you’re ready to eat. Wrap the whole rolled tortilla in plastic wrap and store it in the fridge. Slice right before serving. They’ll keep for about 24 hours this way.
Variations & Adaptations
One of the best things about this recipe is how easy it is to change up. Here are some of my favorite variations:
- Chocolate Lover’s Version: Spread Nutella or chocolate peanut butter instead of regular peanut butter. Add a few mini chocolate chips before rolling. It’s basically dessert, and I’m not sorry.
- Crunchy Crunch Version: Use crunchy peanut butter and add a layer of crushed pretzels or crispy rice cereal for extra crunch. The salty-sweet combo is incredible.
- Berry Blast: Add a thin layer of strawberry jam or raspberry preserves under the peanut butter. The tartness of the berries cuts through the richness perfectly.
- Protein-Packed: Use a high-protein tortilla and add a sprinkle of hemp seeds or chia seeds before rolling. Great for post-workout snacks or filling school lunches.
- Vegan Option: Use a plant-based tortilla and maple syrup instead of honey. Most peanut butters are naturally vegan, but check the label to be sure.
- Low-Carb Version: Use a low-carb tortilla and sugar-free peanut butter. Skip the honey and granola. It’s still delicious and way more satisfying than a sad celery stick.
Serving & Storage Suggestions
How to Serve: These are best served at room temperature or slightly chilled. Arrange the slices on a plate with the cut sides facing up so you can see the pretty spiral pattern. They make a great addition to a lunchbox alongside some rainbow veggie hummus bento box components for a balanced meal.
What to Serve With: A glass of cold milk, a cup of hot tea, or a creamy homemade dragon drink on the side. For a more filling snack, pair them with some yogurt or a handful of almonds.
Storage: These are best eaten within a few hours of making them. If you need to store them, wrap the whole rolled tortilla (unsliced) tightly in plastic wrap and refrigerate for up to 24 hours. Slice just before serving. The tortilla will soften over time, so they won’t have that same fresh texture after a day.
Freezing: I don’t recommend freezing these. The banana gets mushy when thawed, and the tortilla turns soggy. If you want to prep ahead, just slice the banana and store it separately, then assemble fresh.
Reheating: These are meant to be eaten cold or at room temperature. If you want them warm, you can microwave the slices for 5-10 seconds, but don’t overdo it or the banana will turn to mush.
Nutritional Information & Benefits
Here’s an approximate breakdown for one serving (half of the recipe, about 3-4 pieces):
- Calories: 280
- Protein: 8g
- Carbohydrates: 38g
- Fiber: 4g
- Fat: 12g
- Sugar: 14g (naturally occurring)
Health Benefits: Bananas are packed with potassium, which helps regulate blood pressure and muscle function. Peanut butter provides healthy fats and protein that keep you full and satisfied. The whole wheat tortilla adds complex carbohydrates for steady energy. This is a snack that actually fuels your body instead of just filling your stomach.
Dietary Notes: This recipe can easily be made gluten-free, vegan, and dairy-free with simple substitutions. It’s naturally nutty, so it’s not suitable for those with peanut allergies unless you swap the peanut butter for a seed butter like sunflower or pumpkin seed butter.
Conclusion
These peanut butter banana sushi roll-ups are proof that you don’t need a complicated recipe to make something genuinely good. They’re fast, they’re flexible, and they’re the kind of snack that makes everyone happy—from the pickiest toddler to the busiest grown-up.
I love this recipe because it’s not fussy. It doesn’t demand perfect ingredients or precise technique. It just works. And on days when you’re running on empty and need something to eat before you lose your mind, that’s exactly what you need.
Try them this week. Swap in your favorite add-ins, get the kids involved in rolling, and don’t be surprised if you end up making them every single day. If you come up with a killer variation, I’d love to hear about it in the comments. And if you’re looking for more quick snack ideas, don’t miss our no-bake peanut butter oat energy bites or these healthy after-school apple nachos for more peanut butter goodness.
Happy snacking!
Frequently Asked Questions
Can I make these peanut butter banana sushi roll-ups ahead of time?
Yes! You can make the whole roll and wrap it tightly in plastic wrap, then refrigerate for up to 24 hours. Just wait to slice it until you’re ready to eat. The tortilla will soften a bit, but they’ll still taste great.
What if I don’t have a flour tortilla?
No problem! You can use a corn tortilla (warm it first so it doesn’t crack), a large lettuce leaf for a low-carb option, or even a crepe if you’re feeling fancy. Rice paper wrappers also work if you dip them in warm water first.
Can I use frozen bananas?
I wouldn’t recommend it for this recipe. Frozen bananas release a lot of water as they thaw, which will make your tortilla soggy. Stick with a fresh, ripe banana that’s still firm.
How do I keep the roll-ups from falling apart?
Make sure your tortilla is warm when you roll it, and roll it tight. Let it rest seam-side down for a minute before slicing. Using a serrated knife with a gentle sawing motion also helps keep everything intact.
Are these healthy enough for a school lunch?
Absolutely! They’re packed with protein, healthy fats, and natural sugars from the banana. Just skip the honey if you want to keep the sugar lower, and use a whole wheat tortilla for extra fiber. Pair them with some veggies or yogurt for a balanced lunch.
Pin This Recipe!
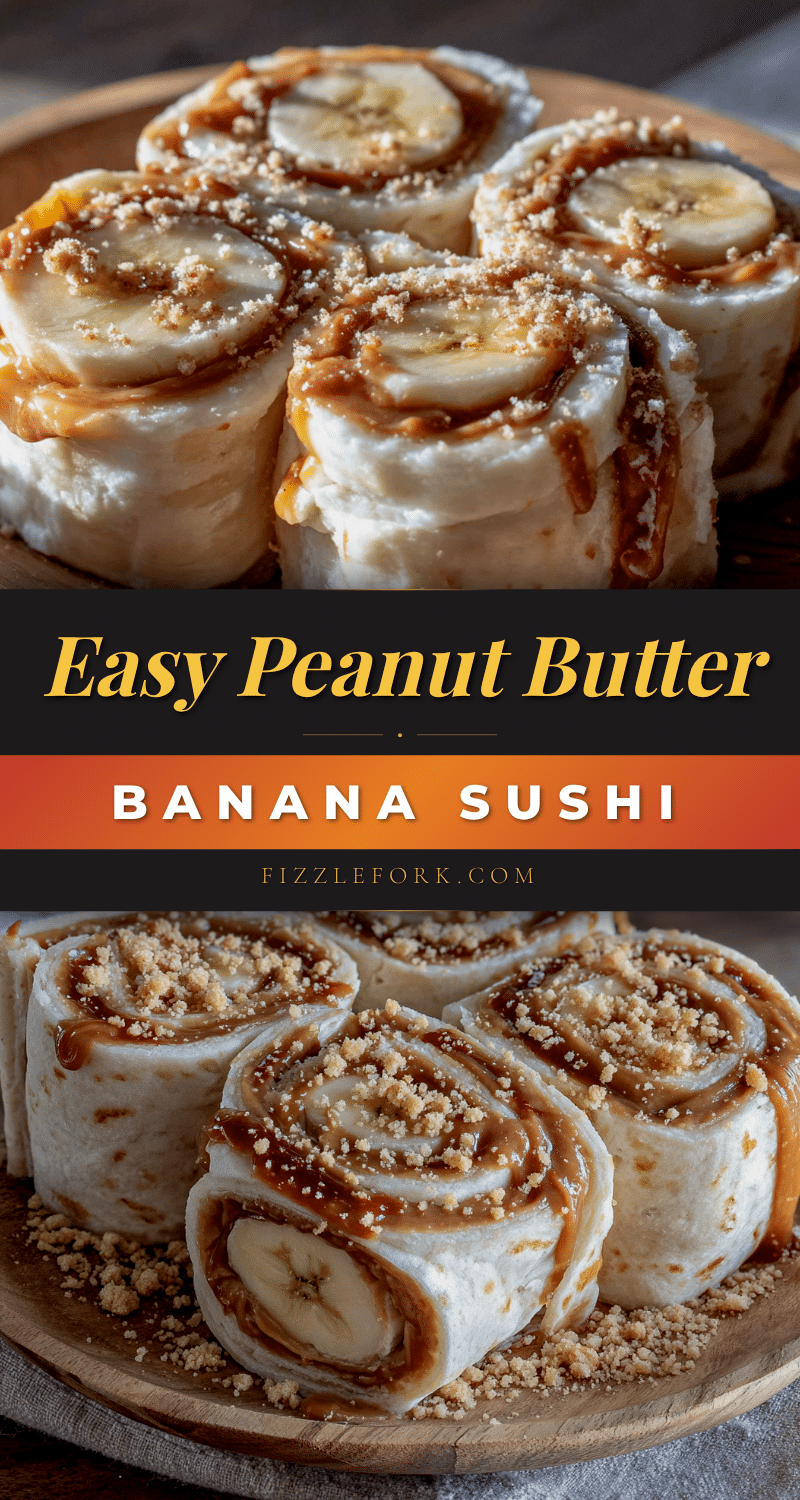
Easy Peanut Butter Banana Sushi Roll-Ups: Best 10-Minute Snack
These peanut butter banana sushi roll-ups are a quick, kid-friendly snack that comes together in just 10 minutes. Made with simple pantry ingredients, they’re perfect for after-school chaos, road trips, or a satisfying midnight snack.
- Prep Time: 5 minutes
- Cook Time: 5 minutes
- Total Time: 10 minutes
- Yield: 4 servings 1x
- Category: Snack
- Cuisine: American
Ingredients
- 1 large flour tortilla (8-inch)
- 2 tablespoons creamy peanut butter
- 1 medium ripe banana
- 1 tablespoon honey or maple syrup (optional)
- 2 tablespoons granola or crushed cereal (optional)
- Pinch of cinnamon (optional)
Instructions
- Warm the tortilla. Place your flour tortilla on a microwave-safe plate and microwave for 10-15 seconds. You want it just warm enough to be pliable, not hot. If you don’t have a microwave, you can heat it in a dry skillet over medium heat for about 20 seconds per side.
- Spread the peanut butter. Using your butter knife or offset spatula, spread the 2 tablespoons of peanut butter evenly across the entire surface of the tortilla. Go all the way to the edges—this is what keeps every bite from being dry. If your peanut butter is too stiff to spread easily, microwave it for 10 seconds to soften it up.
- Add the banana. Peel your banana and place it at the bottom edge of the tortilla, about 1 inch from the edge. If your banana is too long for the tortilla, just break off the extra piece and eat it (cook’s privilege).
- Drizzle and sprinkle (optional). If you’re using honey or maple syrup, drizzle a thin line over the banana. Sprinkle your granola or crushed cereal over the peanut butter, and add a pinch of cinnamon if you want that extra warmth.
- Roll it up tight. Starting at the bottom edge where the banana is, roll the tortilla away from you, keeping it as tight as you can without squishing the banana. Tuck the edges in as you go. You want a snug, even log. If the tortilla starts to crack, it wasn’t warm enough—just press it back together and keep rolling.
- Slice into pieces. Place the rolled tortilla seam-side down on your cutting board. Using a sharp serrated knife, slice it into 1-inch pieces. A gentle sawing motion works best here. Don’t press straight down or you’ll flatten the banana. You should get about 6-8 pieces per tortilla.
- Serve immediately or pack for later. These are best eaten within a few hours. If you’re packing them for lunch, wrap them tightly in parchment paper or place them in an airtight container.
Notes
Don’t skip warming the tortilla—it prevents cracking. Use a serrated knife for clean slices. Keep the banana whole for structure. For make-ahead, wrap the whole rolled tortilla in plastic wrap and refrigerate for up to 24 hours; slice just before serving.
Nutrition
- Serving Size: 3-4 pieces (half of
- Calories: 280
- Sugar: 14
- Sodium: 200
- Fat: 12
- Saturated Fat: 2
- Carbohydrates: 38
- Fiber: 4
- Protein: 8
Keywords: peanut butter banana sushi, banana roll-ups, easy snack, kid-friendly snack, 10-minute snack, no-cook snack, healthy snack


