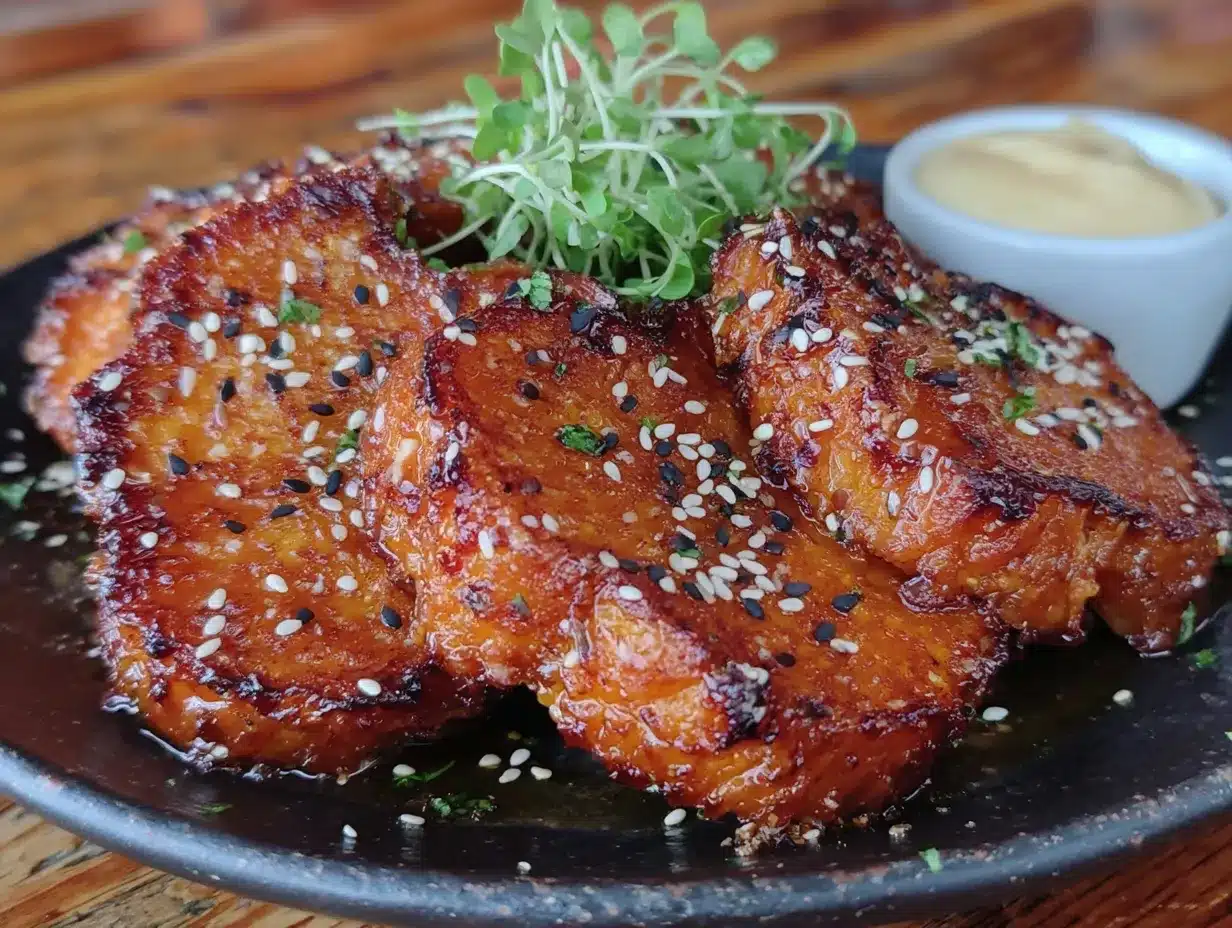
I did not trust miso in a roasted vegetable dish until a cold November evening when a friend practically shoved a wedge of this glazed kabocha squash under my nose. Honestly, the combination sounded like a gimmick—savory fermented bean paste meets sweet winter squash? I was ready to be polite and move on. But one bite stopped me mid-thought. The edges were caramelized into something almost brittle, the center was custard-soft, and that glaze had seeped into every ridge and crevice. It was salty, yes, but also sweet in a way that felt deep, not sugary. And there was this underlying umami richness that made the squash taste somehow more like itself.
I asked for the recipe on the spot, which I never do. She shrugged and said it was barely a recipe—just miso, maple syrup, rice vinegar, and a little oil. That was it. No complicated marinades, no long list of spices. I went home that night and made two squash worth of wedges, eating most of them standing over the counter while the pan was still too hot to touch. (I burned my finger on a caramelized edge and did not care.)
What got me, honestly, was how something so simple could feel so complete. The kabocha squash does not need much help—its natural sweetness is already there, its texture is already creamy. But the miso glaze coaxes out a savory side that most people do not even know squash has. It turns a humble side dish into the thing everyone reaches for first. And that is the kind of recipe I can get behind: one that does not try to be fancy, just honest and deeply good.
Why You’ll Love This Recipe
Let me tell you why these wedges have earned a permanent spot in my weekly rotation. I have tested this recipe at least a dozen times, tweaking the glaze ratio, adjusting the oven temperature, even trying it on different squash varieties. This version is the one that works every single time.
- Quick & Easy : From cutting board to table in about 35 minutes. The active prep time is maybe 10 minutes—perfect for a weeknight when you want something that tastes like you tried harder than you actually did.
- Simple Ingredients : You likely already have miso paste, maple syrup, and rice vinegar in your fridge. If not, they are easy to find and last forever. No specialty trips required.
- Perfect for Fall Gatherings : This dish fits right in alongside a holiday spread, a cozy Sunday dinner, or even a casual game day table. I have brought these wedges to potlucks and watched them disappear before the main course.
- Crowd-Pleaser : I have served these to picky kids, skeptical in-laws, and self-proclaimed squash haters. Every single person has asked for seconds. The glaze is that good.
- Unbelievably Delicious : The contrast between the caramelized, almost sticky exterior and the soft, creamy interior is next-level. It is comfort food that feels a little elevated but requires zero stress.
What makes this recipe different from every other roasted squash recipe out there is the balance. Most miso glazes lean too salty or too sweet. This one hits that perfect middle ground where the savory notes enhance the squash’s natural sweetness instead of overpowering it. Plus, kabocha squash does not need to be peeled—the skin is edible and becomes tender during roasting. That alone saves you about 10 minutes of wrestling with a vegetable peeler.
This is the kind of dish that makes you close your eyes after the first bite. It is simple enough for a Tuesday, special enough for a celebration, and honest enough to become a staple.
What Ingredients You Will Need
This recipe uses a short list of humble ingredients that work together to create something far greater than the sum of their parts. Here is everything you need and a little insight into why each one matters.
For the Kabocha Squash
- 1 medium kabocha squash (about 2 to 2.5 pounds) — Look for one that feels heavy for its size with firm, unblemished skin. The green skin with lighter green stripes is typical. You will cut it into wedges, seeds and all (well, remove the seeds and stringy bits).
- 2 tablespoons avocado oil (or any neutral oil with a high smoke point) — This helps the wedges crisp up without burning. Olive oil works too, but the flavor is slightly more pronounced.
- ½ teaspoon salt — I use fine sea salt. It draws out moisture and helps the caramelization process.
For the Miso Glaze
- 2 tablespoons white miso paste — White miso (shiro miso) is milder and slightly sweeter than red or brown miso. It blends beautifully without overwhelming the squash. I prefer the brand Hikari or Miso Master for consistent quality.
- 2 tablespoons maple syrup — Pure maple syrup, not pancake syrup. The real stuff adds a complexity that complements the miso perfectly. If you only have honey, it works, but the flavor profile shifts slightly.
- 1 tablespoon rice vinegar — This brightens the glaze and cuts through the richness. Unseasoned rice vinegar is best. If you only have apple cider vinegar, use a little less—it is stronger.
- 1 teaspoon toasted sesame oil — Just a touch for that nutty, aromatic finish. Do not skip this—it adds a layer of depth you will miss if you leave it out.
- 1 clove garlic, minced — Fresh garlic is non-negotiable here. The jarred stuff will not give you the same punch.
For Garnish (Optional but Recommended)
- 1 tablespoon toasted sesame seeds — Adds a nice crunch and visual appeal.
- 2 green onions, thinly sliced — A pop of freshness and color.
- Flaky sea salt — A sprinkle right before serving makes a difference.
Ingredient Selection Tip : When choosing kabocha squash, look for one with a deep green color and some orange patches—that indicates ripeness and sweetness. The skin should be hard, not soft or blemished. If you cannot find kabocha, buttercup squash or even acorn squash are decent substitutes, though the texture and sweetness will vary slightly.
Substitution Guidance : For a soy-free option, use chickpea miso instead of traditional soy-based miso. For a lower-sugar version, reduce the maple syrup to 1 tablespoon and add a splash of water to thin the glaze. The result will be less sweet but still deliciously savory.
Equipment Needed
You do not need a fancy kitchen to make these wedges. Here is what you will need:
- Baking sheet — A half-sheet pan (18×13 inches) is ideal. Line it with parchment paper for easy cleanup. If you do not have parchment, a silicone baking mat works too.
- Chef’s knife — A sharp 8-inch chef’s knife makes cutting through the dense squash much safer and easier. A dull knife is more dangerous—trust me on this.
- Cutting board — A sturdy wooden or plastic board. Place a damp paper towel underneath to keep it from slipping.
- Small bowl — For whisking the glaze ingredients together.
- Whisk or fork — To emulsify the miso glaze until smooth.
- Mixing bowl — Large enough to toss the squash wedges with oil and salt before glazing.
- Pastry brush (optional) — For brushing the glaze onto the wedges. A spoon works just fine too.
- Spatula — For flipping the wedges halfway through roasting.
Budget-Friendly Tip : If you do not own a pastry brush, use the back of a spoon to spread the glaze. It is less precise but gets the job done. I have done it that way more times than I care to admit.
Maintenance Note : Keep your chef’s knife sharp with a honing rod or sharpening stone. A sharp knife makes cutting kabocha squash feel almost effortless. A dull one makes it feel like a workout.
Preparation Method
Let me walk you through this step by step. I have included all the little details I wish someone had told me the first time I made these.
Step 1: Preheat and Prep
Preheat your oven to 400°F (200°C). Position the rack in the middle of the oven. While the oven heats, line your baking sheet with parchment paper. This is not strictly necessary, but it makes cleanup a breeze and prevents the glaze from sticking and burning onto the pan.
Step 2: Cut the Squash
Wash the kabocha squash well—the skin is edible, so you want it clean. Using a sharp chef’s knife, carefully cut the squash in half from stem to base. This is the trickiest part because kabocha is dense. Place the squash flat-side down on the cutting board for stability. Cut each half into 1-inch thick wedges. You should get about 12 to 16 wedges total, depending on the size of your squash. Scoop out the seeds and stringy pulp with a spoon. Do not throw the seeds away—you can roast them separately for a snack!
Safety Note: If the squash is too hard to cut, microwave the whole squash for 2 minutes to soften it slightly. Let it cool before cutting. This trick has saved me from many near-misses.
Step 3: Toss with Oil and Salt
Place the wedges in a large mixing bowl. Drizzle with the avocado oil and sprinkle with salt. Use your hands to toss everything together, making sure each wedge is lightly coated. This step helps the wedges crisp up evenly during roasting.
Step 4: Make the Miso Glaze
In a small bowl, combine the white miso paste, maple syrup, rice vinegar, toasted sesame oil, and minced garlic. Whisk until smooth. The mixture will be thick but should be spreadable. If it seems too thick, add a teaspoon of water and whisk again. Taste it—it should be savory-sweet with a little tang. Adjust with a pinch more maple syrup if you prefer it sweeter.
Step 5: Arrange and Glaze
Arrange the oiled squash wedges in a single layer on the prepared baking sheet. Make sure they are not touching—crowding the pan leads to steaming instead of caramelization. Using a pastry brush or the back of a spoon, brush the miso glaze generously over the top and sides of each wedge. Reserve about one-third of the glaze for later.
Step 6: Roast
Roast the wedges for 15 minutes. Remove the pan from the oven and carefully flip each wedge using a spatula. Brush the second side with the remaining glaze. Return the pan to the oven and roast for another 15 to 20 minutes, until the wedges are tender when pierced with a fork and the edges are deeply caramelized and slightly charred.
Sensory Cue: The kitchen should smell nutty and slightly sweet at this point. The wedges should look glossy, with dark brown spots on the edges. The skin will look wrinkled and soft—that is normal and desirable.
Step 7: Garnish and Serve
Remove the pan from the oven. Let the wedges cool on the pan for 2 to 3 minutes—this allows the glaze to set slightly. Transfer to a serving platter. Sprinkle with toasted sesame seeds, sliced green onions, and a pinch of flaky sea salt. Serve warm or at room temperature.
Personal Tip : I like to drizzle any glaze that pooled on the parchment paper over the wedges before garnishing. It is liquid gold, honestly. Do not waste it.
Cooking Tips & Techniques
Over the course of testing this recipe, I learned a few things the hard way. Here is what I wish I had known from the start.
Do not skip the oil under the glaze. The first time I made these, I brushed the miso glaze directly onto the raw wedges without oil. The glaze burned in spots and the squash came out unevenly cooked. The oil acts as a barrier and helps conduct heat evenly. Trust the process.
Cut the wedges uniformly. Thicker wedges take longer to cook; thinner ones dry out. Aim for about 1 inch thick at the widest part. If you end up with a mix, place the thicker wedges toward the outer edges of the baking sheet where heat circulates more.
Resist the urge to overcrowd the pan. I made this mistake during a holiday dinner when I tried to double the recipe on one sheet pan. The wedges steamed instead of caramelizing, and the glaze turned into a watery mess. Use two pans if you need to, and rotate them halfway through.
Let the wedges rest after roasting. I know it is tempting to eat them right away, but that 2-minute rest allows the glaze to firm up slightly. The wedges will still be hot, but the texture improves significantly.
Multitasking strategy : While the squash roasts, use that time to prepare the rest of your meal. These wedges pair beautifully with a simple protein like honey garlic butter salmon or lemon herb chicken thighs. The timing works out perfectly—the squash finishes around the same time as the main dish.
Common mistake : Using too much glaze. It is tempting to slather it on, but a thin, even layer is all you need. Too much glaze creates a sticky, overly salty coating that masks the squash’s natural flavor. Less is genuinely more here.
Variations & Adaptations
This recipe is flexible, and I have tried several variations over the months. Here are a few worth exploring.
Spicy Miso Glaze : Add 1 teaspoon of sriracha or gochujang to the glaze mixture. The heat cuts through the sweetness beautifully and adds a subtle kick. I made this version for a game day gathering, and it disappeared alongside a plate of buffalo cauliflower bites.
Ginger-Sesame Twist : Add 1 teaspoon of freshly grated ginger to the glaze. The ginger adds a warm, peppery note that complements the miso and sesame oil. This version is my personal favorite during the colder months.
Air Fryer Method : If you are short on time, the air fryer works beautifully. Preheat the air fryer to 375°F (190°C). Arrange the glazed wedges in a single layer in the basket (you may need to work in batches). Cook for 12 to 15 minutes, flipping halfway through. The edges get even crispier than the oven version. I have used this method when making a quick side for teriyaki chicken rice bowls.
Dairy-Free and Vegan : This recipe is already vegan as written. The miso glaze contains no animal products, and the squash is naturally plant-based. Just double-check your miso paste—some brands use fish-based ingredients, though most are soy-based and vegan-friendly.
Different Squash Options : If kabocha is not available, try buttercup squash (closest in texture) or butternut squash (sweeter, less creamy). Adjust cooking time as needed—butternut tends to cook faster, so check for doneness at the 25-minute mark.
Serving & Storage Suggestions
These wedges are versatile enough to fit into almost any meal. Here is how I like to serve and store them.
Serving Temperature : Serve warm, straight from the oven, when the edges are at their crispiest. They are also delicious at room temperature—perfect for potlucks or picnics. I have even eaten them cold straight from the fridge, and they were still good (do not judge me).
Presentation : Arrange the wedges on a large wooden board or a white platter. Sprinkle generously with sesame seeds and green onions. A pinch of flaky sea salt right before serving adds visual appeal and a final burst of flavor.
Complementary Dishes : These wedges pair well with roasted meats, grilled fish, or hearty grain bowls. I love serving them alongside chicken and wild rice soup for a cozy fall meal. They also work as a side for burgers or sliders—try them with pepperoni pizza sliders for an unexpected but delicious combo.
Storage : Store leftover wedges in an airtight container in the refrigerator for up to 4 days. The texture will soften slightly, but the flavor remains excellent.
Reheating : The best way to reheat these is in the oven or air fryer. Preheat to 375°F (190°C) and heat for 5 to 7 minutes, until warmed through and edges crisp up slightly. The microwave works in a pinch, but the wedges will be softer and lose some of their caramelized charm.
Flavor Development : Interestingly, the flavors deepen after a day in the fridge. The miso and maple marry together even more, creating a richer taste. I sometimes make a double batch just so I have leftovers for this reason.
Nutritional Information & Benefits
Kabocha squash is a nutritional powerhouse disguised as a humble winter vegetable. Here is a rough breakdown per serving (about 3 to 4 wedges, assuming 4 servings per squash):
- Calories: Approximately 180-200
- Total Fat: 9g
- Saturated Fat: 1g
- Sodium: 480mg (varies with miso brand)
- Total Carbohydrates: 28g
- Dietary Fiber: 4g
- Sugars: 12g (natural plus added maple syrup)
- Protein: 3g
- Vitamin A: 290% of the Daily Value
- Vitamin C: 25% of the Daily Value
- Potassium: 15% of the Daily Value
Health Benefits : Kabocha squash is incredibly rich in beta-carotene, which the body converts into vitamin A. This supports eye health, immune function, and skin health. It is also a good source of fiber, which aids digestion and helps keep you full. The miso paste adds probiotics (beneficial bacteria) that support gut health, though high heat during roasting may reduce their activity. Still, the flavor and nutritional profile are worth it.
Dietary Considerations : This recipe is naturally gluten-free, vegan, and dairy-free. It is also relatively low in calories for a side dish. If you are watching your sodium intake, use a low-sodium miso paste or reduce the added salt. The squash itself is naturally low in sodium.
Potential Allergens : Miso is made from soybeans, so this recipe is not suitable for those with soy allergies. Sesame oil is another common allergen. For a soy-free version, use chickpea miso; for sesame-free, substitute the sesame oil with avocado oil and skip the sesame seed garnish.
I personally love that this dish feels indulgent but is actually packed with nutrients. It is the kind of recipe that makes you feel good about eating your vegetables—no convincing required.
Conclusion
These savory sweet miso glazed kabocha squash wedges have become my go-to side dish for almost every occasion. They are simple enough for a quiet weeknight dinner, impressive enough for a holiday table, and flexible enough to adapt to whatever you have on hand. The combination of creamy squash, salty-sweet glaze, and nutty sesame is honestly addictive—in the best way.
I encourage you to make these your own. Play with the spice level, try different squash varieties, or experiment with the glaze ratio. Cooking should feel like a conversation, not a script. And this recipe is a great starting point.
I would love to hear how yours turn out. Did you add a little extra heat? Swap the maple for honey? Serve them alongside something unexpected? Drop a comment below and let me know. Your tweaks might inspire someone else’s next great meal.
Until next time, happy cooking—and do not forget to save a wedge for yourself before they disappear.
Frequently Asked Questions
Can I use a different type of miso paste?
Absolutely. White miso (shiro miso) is the mildest and sweetest, which works best here. Red miso is saltier and more pungent—use half the amount and adjust to taste. Yellow miso falls somewhere in between and works well too.
Do I need to peel the kabocha squash?
No! The skin is completely edible and becomes tender during roasting. It also holds the wedges together nicely. Just wash the squash thoroughly before cutting.
Can I make this recipe ahead of time?
Yes, with a small caveat. You can prep the squash wedges and the glaze separately up to a day in advance. Store the cut squash in the fridge and the glaze in an airtight container. When ready to cook, toss, glaze, and roast as directed. The texture is best fresh from the oven.
How do I prevent the glaze from burning?
Keep an eye on the wedges during the last 10 minutes of roasting. If the glaze starts to darken too quickly, tent the pan loosely with foil. Every oven runs slightly differently, so trust your eyes more than the timer.
What can I do with the leftover squash seeds?
Do not toss them! Rinse the seeds, pat them dry, toss with a little oil and salt, and roast at 350°F (175°C) for 10 to 12 minutes. They make a great snack or salad topper. I sometimes toss them with a pinch of the same miso glaze for extra flavor.
Pin This Recipe!
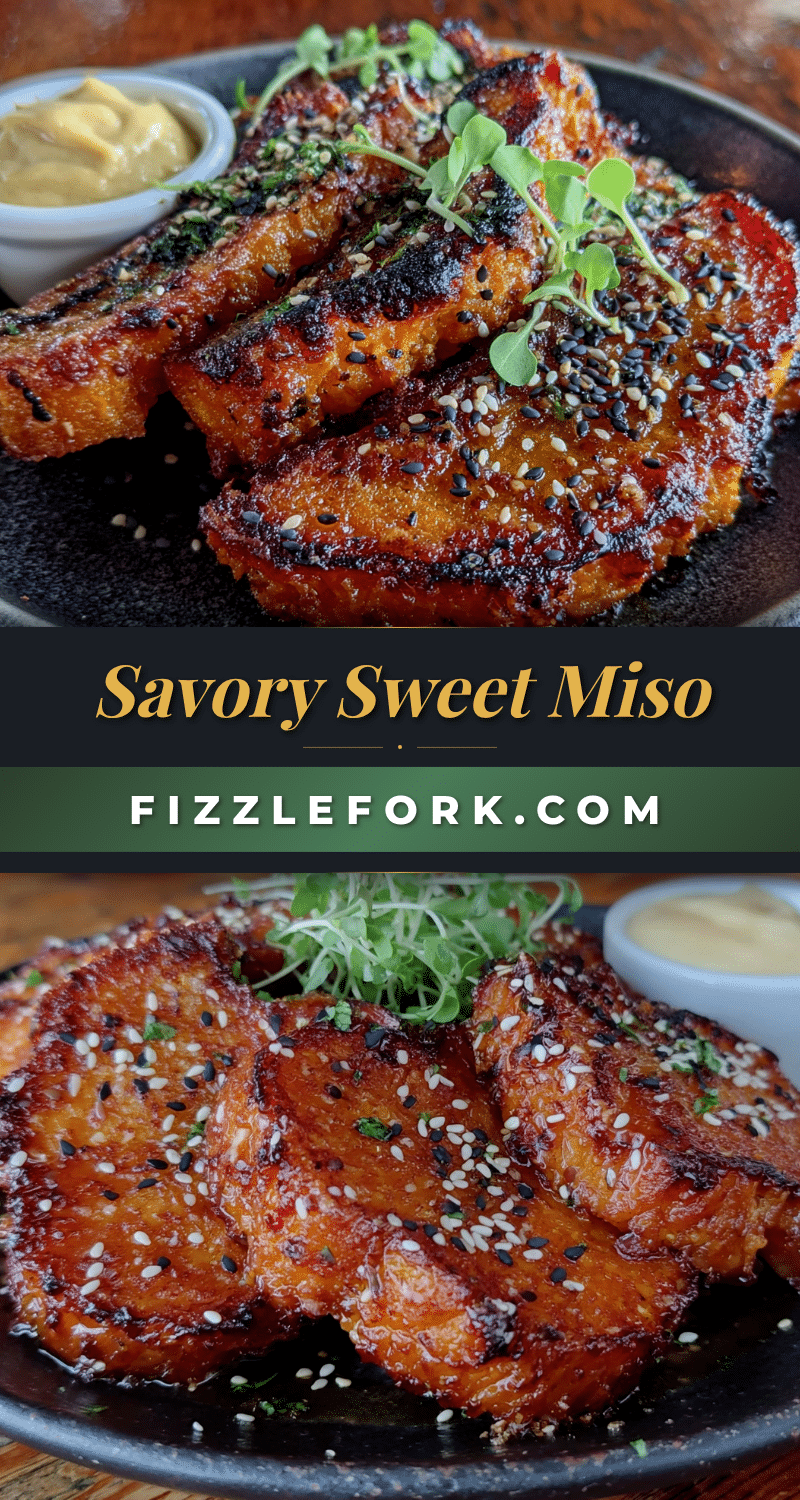
Easy Savory Sweet Miso Glazed Kabocha Squash Wedges Recipe
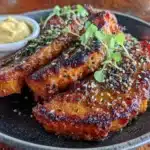
These miso glazed kabocha squash wedges are caramelized, creamy, and packed with umami. A simple yet impressive side dish that’s ready in about 35 minutes.
- Prep Time: 10 minutes
- Cook Time: 30 minutes
- Total Time: 40 minutes
- Yield: 4 servings 1x
- Category: Side Dish
- Cuisine: Japanese-inspired
Ingredients
- 1 medium kabocha squash (about 2 to 2.5 pounds)
- 2 tablespoons avocado oil (or any neutral oil with high smoke point)
- ½ teaspoon fine sea salt
- 2 tablespoons white miso paste
- 2 tablespoons pure maple syrup
- 1 tablespoon unseasoned rice vinegar
- 1 teaspoon toasted sesame oil
- 1 clove garlic, minced
- 1 tablespoon toasted sesame seeds (optional, for garnish)
- 2 green onions, thinly sliced (optional, for garnish)
- Flaky sea salt (optional, for garnish)
Instructions
- Preheat oven to 400°F (200°C). Line a baking sheet with parchment paper.
- Wash the kabocha squash. Using a sharp chef’s knife, cut the squash in half from stem to base. Place flat-side down and cut each half into 1-inch thick wedges. Scoop out seeds and stringy pulp.
- Place wedges in a large mixing bowl. Drizzle with avocado oil and sprinkle with salt. Toss to coat evenly.
- In a small bowl, whisk together white miso paste, maple syrup, rice vinegar, toasted sesame oil, and minced garlic until smooth. Reserve about one-third of the glaze for later.
- Arrange oiled wedges in a single layer on the prepared baking sheet, not touching. Brush generously with the miso glaze.
- Roast for 15 minutes. Remove from oven, flip wedges carefully, and brush with remaining glaze. Return to oven and roast for another 15–20 minutes, until tender and caramelized.
- Let cool on the pan for 2–3 minutes. Transfer to a platter, sprinkle with sesame seeds, green onions, and flaky sea salt. Serve warm or at room temperature.
Notes
Do not skip the oil under the glaze—it prevents burning and ensures even cooking. Cut wedges uniformly (about 1 inch thick) for even roasting. Avoid overcrowding the pan; use two pans if needed. Let wedges rest 2–3 minutes after roasting for better texture. For a spicier version, add 1 teaspoon sriracha or gochujang to the glaze. For an air fryer method, cook at 375°F (190°C) for 12–15 minutes, flipping halfway. Leftovers keep in the fridge for up to 4 days; reheat in oven or air fryer at 375°F for 5–7 minutes.
Nutrition
- Serving Size: 3–4 wedges
- Calories: 190
- Sugar: 12
- Sodium: 480
- Fat: 9
- Saturated Fat: 1
- Carbohydrates: 28
- Fiber: 4
- Protein: 3
Keywords: miso glazed kabocha squash, roasted kabocha squash, miso squash wedges, easy squash side dish, vegan squash recipe, gluten-free squash