My nephew Leo looked at the plate of apple slices, then at me, then back at the apples. “These don’t look like monsters,” he said, arms crossed. That was the challenge I needed. I grabbed the peanut butter, some slivered almonds, and a few mini chocolate chips I had stashed from baking. Ten minutes later, I slid a new plate across the counter. Leo picked one up, turned it over, and bit the bottom jaw clean off. He didn’t say anything for a second. Then he grabbed another one. And another. By the time his mom came to pick him up, he had eaten four monster mouths and asked if we could make them for his birthday party. That’s how this recipe became a regular thing at our house—not because I planned it, but because a seven-year-old approved it first.
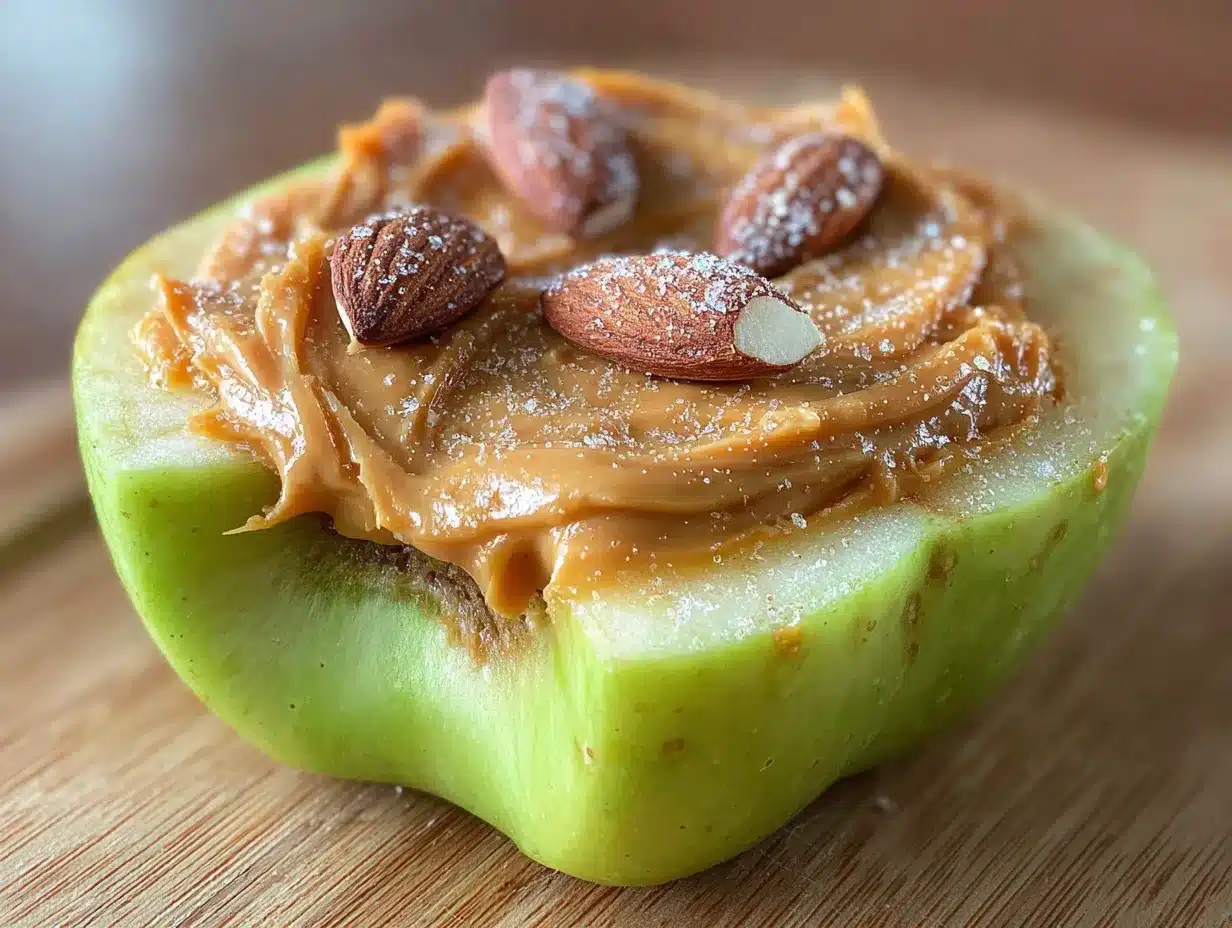
These fun monster mouth apple bites with peanut butter are exactly what they sound like. A crisp apple wedge becomes the top jaw, peanut butter acts like sticky monster gums, and a few simple toppings turn them into silly, edible creatures. They take maybe fifteen minutes to throw together, and they disappear faster than almost any snack I make. Honestly, I have brought them to playdates, school parties, and even a Halloween get-together where the grown-ups kept sneaking them off the tray. There is something about food that looks back at you that makes people smile, and these little guys deliver on that every single time.
What I love most about this snack is how unfussy it is. You do not need special cutters or fancy ingredients. You probably have everything in your kitchen right now. And if you have a kid who refuses to eat fruit, this might be the trick that changes things. It worked on Leo, and it has worked on plenty of other kids since. Sometimes the best recipes come from a moment of desperation and a handful of odds and ends.
Why You Will Love This Recipe
I have tested this snack about a dozen different ways, and I can tell you with confidence that this version works best. Here is why it has earned a permanent spot in my weekly rotation:
- Quick & Easy : You can put a whole plate of these together in under fifteen minutes. No baking, no stovetop, no waiting around.
- Simple Ingredients : Apples, peanut butter, and a few small toppings. That is it. You probably have everything already.
- Perfect for Parties : They work for Halloween, birthday parties, classroom snacks, or just a Tuesday afternoon that needs some fun.
- Crowd-Pleaser : Kids love the silly look, and adults love that they are actually eating something healthy. Everyone wins.
- Unbelievably Delicious : The creamy peanut butter against the crisp apple is a classic combo. Add a little crunch from seeds or chocolate, and it is next-level good.
What makes this recipe different from other apple snacks is the technique. I core the apple in a specific way so the wedges have a flat, stable surface. The peanut butter acts like edible glue, holding the toppings in place. It sounds simple, and it is, but the little details make these hold together better and look more like actual monster faces.
There is also something special about making food that makes people laugh. I have seen shy kids light up when they build their own monster mouth. I have watched parents take photos before anyone takes a bite. This recipe is not just good—it is the kind of snack that creates a moment. And honestly, we could all use more of those.
What Ingredients You Will Need
This recipe uses simple, wholesome ingredients that come together to make something genuinely fun. You do not need to hunt down specialty items or make a separate grocery trip. Here is what you will grab:
For the Apple Mouths
- 2 large apples (I prefer Honeycrisp or Fuji for sweetness and crunch, but Granny Smith works great if you want a tart contrast)
- 1/4 cup creamy peanut butter (natural peanut butter works fine, just stir it well first; avoid the no-stir kind with added sugar if you can)
- Slivered almonds (for teeth—about 8-12 pieces depending on how many mouths you make)
- Mini chocolate chips (for eyes, about 4-6 chips)
Optional Toppings for Variation
- Sunflower seeds (great alternative if you cannot use nuts)
- Raisins or dried cranberries (for a different eye look)
- Shredded coconut (makes the monster look fuzzy)
- Pomegranate seeds (look like little monster tongues, which is hilarious)
For the apples, pick ones that are firm and not mealy. A soft apple will not hold up well when you add the peanut butter and toppings. I usually buy Honeycrisp because they stay crisp for days in the fridge, and they are sweet enough that you do not need extra sugar. If you are making these for a party, you can prep the apple wedges a few hours ahead and toss them in a little lemon water to prevent browning. Just pat them dry before you add the peanut butter.
I recommend using a natural peanut butter like Justin’s or Smucker’s Natural for this recipe. The texture is a little looser, which makes it easier to spread without tearing the apple. If you only have the thick, no-stir kind, microwave it for about ten seconds to thin it out slightly. That small step makes a big difference when you are trying to get a clean layer on the apple wedge.
For a nut-free version, sunflower seed butter works beautifully. It has a similar spreadable texture and a mild flavor that pairs well with apples. Just be aware that sunflower seed butter can turn green if it sits out too long—that is a natural reaction, not a sign of spoilage, but it might look a little weird if you are serving these at a party.
Equipment Needed
You do not need much for this recipe, which is part of why I make it so often. Here is what you will want to have on hand:
- Sharp knife (a good chef’s knife or a paring knife works fine)
- Cutting board
- Apple corer (optional, but helpful if you have one; a small melon baller or a teaspoon also works to scoop out the seeds)
- Butter knife or small offset spatula (for spreading the peanut butter)
- Serving platter (a white plate makes the colors pop, but anything works)
If you do not have an apple corer, do not worry about it. I actually prefer using a paring knife because I can control exactly how much of the core I remove. A melon baller is another great option—it scoops out the seeds and the tough center in one clean motion. I picked one up at a dollar store years ago, and it is still going strong.
For the cutting board, make sure it is stable. Apples can roll around when you are cutting them, and a slippery surface is no fun. I put a damp paper towel under my cutting board to keep it from sliding. That is a trick I learned from watching cooking shows, and it works every time.
Preparation Method
Let me walk you through this step by step. I have made these so many times that I can do it with my eyes closed, but I will break it down so you get perfect monster mouths on your first try.
Step 1: Core the Apples
Start by washing your apples well. You are leaving the skin on, so give them a good scrub under running water. Pat them dry with a clean towel.
Place the apple on your cutting board with the stem pointing up. If you have an apple corer, press it straight down through the center and twist. Pull it out, and the core comes with it. If you are using a knife, cut the apple in half from top to bottom through the stem. Then cut each half in half again, giving you four quarters. Use a paring knife to cut out the tough center core and seeds from each quarter. You want a clean wedge with a flat inner surface.
Here is the trick I figured out after a few messy attempts: cut each quarter into two wedges, giving you eight wedges total per apple. Each wedge should be about half an inch thick at the widest part. Too thin, and they break when you spread the peanut butter. Too thick, and they are hard to bite into. Half an inch is the sweet spot.
Step 2: Spread the Peanut Butter
Take each apple wedge and spread a thin layer of peanut butter on the flat, cut side. This is the inner part of the apple that was facing the core. You want a layer about an eighth of an inch thick—enough to hold the toppings but not so much that it squishes out when you bite down.
I use a small butter knife for this. Start at the wider end of the wedge and spread toward the tip. Go slow at first. If you rush, you might tear the apple skin. Once you get the hang of it, you can do this pretty quickly. Natural peanut butter spreads more easily than the thick stuff, which is why I prefer it.
If you are making these ahead of time, stop here. You can prep the apple wedges and the peanut butter separately, then assemble right before serving. The apples will stay fresh in the fridge for a few hours if you toss them with a little lemon juice first.
Step 3: Add the Teeth
This is where the fun starts. Take your slivered almonds and press them into the peanut butter along the curved outer edge of the apple wedge. The almonds should stick out slightly, like teeth. I usually place three to five slivers per wedge, depending on the size of the apple.
Press them in firmly so they stay put. The peanut butter acts like glue, so as long as you push them in a little, they will not fall off. If you are using sunflower seeds instead, press them in the same way. They look like tiny monster teeth, and kids love that.
For a different look, you can use raw pumpkin seeds. They are wider and flatter than almonds, so they create a more cartoonish smile. I have done both, and honestly, I cannot pick a favorite.
Step 4: Make the Eyes
Now for the eyes. Take two mini chocolate chips and press them into the peanut butter near the wider end of the wedge, above the teeth. Position them so they look like eyes looking back at you. If the chocolate chips are too small, you can use regular chocolate chips cut in half, or even M&Ms for a colorful look.
Press them in gently but firmly. You want them to stick without sinking all the way into the peanut butter. The goal is for the eyes to be visible, not buried.
If you want the monster to look extra silly, place one eye slightly higher than the other. That gives it a derpy, lovable expression. My nephew insists on making every monster look slightly different, and honestly, that is part of the charm.
Step 5: Add Extra Details (Optional)
This is where you can get creative. A small dab of peanut butter on the tip of the wedge can hold a pomegranate seed for a tongue. A few shreds of coconut on top of the peanut butter make the monster look fuzzy. You can even use a tiny piece of dried cranberry for a silly little hat.
I have seen people use pretzel sticks for antennae, banana slices for ears, and even a drizzle of honey for slime. There are no rules here. If it looks fun and tastes good, go for it.
Step 6: Arrange and Serve
Place the finished monster mouths on a serving platter with the peanut butter side facing up so everyone can see the faces. I like to arrange them in a circle with all the teeth pointing outward, like a monster mouth wreath. It makes people laugh every time.
Serve immediately for the best texture. The apples will start to brown after about an hour, and the peanut butter can get a little soft if it is warm. If you are serving these at a party, assemble them right before the guests arrive. They hold up well for about thirty minutes at room temperature.
Cooking Tips & Techniques
I have made these monster mouth apple bites at least thirty times now, and I have learned a few things the hard way. Here are the tips that will save you from my mistakes:
Choose the right apple. I cannot stress this enough. A mealy apple will fall apart when you spread the peanut butter. A crisp apple holds its shape and gives that satisfying crunch. Honeycrisp, Fuji, and Pink Lady are my top picks. Granny Smith works if you want a tart flavor, but they are a little harder to find perfectly crisp.
Dry the apples well. After washing the apples, pat them completely dry. Any moisture on the surface will make the peanut butter slide off. I have had wedges where the peanut butter just slipped right off because I was in a hurry and did not dry them properly. Learn from my impatience.
Use room temperature peanut butter. Cold peanut butter is stiff and hard to spread. If you keep your peanut butter in the fridge, take it out about fifteen minutes before you start. Or microwave it for ten seconds. You want it spreadable but not runny.
Work in batches. Do not try to assemble all the wedges at once. Spread peanut butter on four wedges, add the teeth, add the eyes, then move on to the next batch. If you spread peanut butter on all sixteen wedges first, the first ones will start to dry out by the time you get to the eyes.
Keep a damp paper towel handy. Peanut butter gets sticky. A damp paper towel lets you wipe your fingers between steps without having to wash your hands a dozen times. This is one of those small kitchen habits that makes cooking so much less annoying.
Let kids help. This is not a technical tip, but it is an important one. Kids love building these. Let them arrange the teeth and eyes however they want. The monsters will look ridiculous and wonderful, and the kids will be so proud of what they made. I have seen picky eaters devour a snack they built themselves, even when they refused the same ingredients on a plate.
One time I forgot to core the apples before cutting them into wedges. I ended up with a bunch of random-shaped pieces that barely held together. It was a mess, and I had to start over. Now I always core first, wedge second. That order matters more than you would think.
Variations & Adaptations
One of the best things about this recipe is how easy it is to change up. Here are some variations I have tried and loved:
Halloween Monster Mouths
Use green apples and black sesame seeds for the teeth. Add a tiny dot of red food coloring mixed with a little honey for a bloody tongue effect. These are always a hit at Halloween parties. I brought them to a Halloween sugar cookies decorating party last year, and they were gone before the cookies were even frosted.
Nut-Free Version
Sunflower seed butter is the best substitute here. It spreads just like peanut butter and has a mild, nutty flavor. You can also use WowButter, which is made from soy and tastes very close to the real thing. Just check the label if you are serving kids with allergies.
Dairy-Free Version
This recipe is naturally dairy-free if you use a dairy-free chocolate chip for the eyes. Enjoy Life brand makes mini chocolate chips that are free of dairy, soy, and nuts. They work perfectly.
Fun Flavor Twists
Swap the peanut butter for almond butter, cashew butter, or even cookie butter if you are feeling indulgent. The flavor changes completely, and each version is delicious in its own way. I made a batch with Biscoff cookie butter once, and my husband ate half of them before I could stop him.
Savory Monster Mouths
This sounds weird, but trust me. Use cream cheese instead of peanut butter, and press in thin strips of red bell pepper for the tongue and sunflower seeds for the teeth. It is a totally different snack, but it works for a party where you want something less sweet.
Serving & Storage Suggestions
These monster mouth apple bites are best served fresh. The apples stay crisp, the peanut butter is perfectly spreadable, and the toppings stay in place. If you are serving them at a party, assemble them no more than thirty minutes before guests arrive.
For a fun presentation, arrange them on a round platter with all the teeth pointing outward. You can add a bowl of extra toppings on the side so guests can customize their own monsters. That is always a hit with kids.
These pair beautifully with other party snacks. I often serve them alongside crescent dough mummy hot dogs for a Halloween spread, or with pulled pork sliders for a game day party where you want a lighter option on the table.
If you have leftovers, store them in an airtight container in the refrigerator for up to 24 hours. The apples will brown a little, and the peanut butter will firm up, but they are still tasty. I do not recommend freezing them—the apples get mushy when thawed, and nobody wants a soggy monster mouth.
To refresh leftover bites, let them sit at room temperature for about ten minutes before serving. The peanut butter softens up, and the apples regain some of their crunch. They will not be as perfect as fresh ones, but they are still good enough to eat.
If you are making these for a school lunch, pack the apple wedges and the peanut butter separately. Let your child assemble them at lunchtime. That way the apples stay crisp and the peanut butter does not make everything soggy. I do this for my nephew all the time, and his teacher says he is always excited to build his monsters at lunch.
Nutritional Information & Benefits
These monster mouth apple bites are a surprisingly balanced snack. Here is the rough nutritional breakdown for one monster mouth (one wedge with peanut butter, three almond slivers, and two mini chocolate chips):
- Calories: approximately 95
- Protein: 3 grams
- Carbohydrates: 12 grams
- Fiber: 2 grams
- Fat: 5 grams
- Sugar: 8 grams (mostly from the apple)
Apples are packed with fiber and vitamin C. They are one of the few fruits that contain quercetin, a compound that supports immune health. I love that this snack gets kids to eat a whole apple wedge without any fuss.
Peanut butter adds protein and healthy fats that keep little bellies full. If you use natural peanut butter without added sugar, you get all the benefits without the extra sweeteners. The almonds provide vitamin E and magnesium, while the chocolate chips add a tiny bit of antioxidants—and a whole lot of fun.
This recipe is naturally gluten-free and dairy-free (depending on your chocolate chips). It is also vegetarian and can be made vegan if you use dairy-free chocolate chips. For nut-free diets, sunflower seed butter works perfectly.
If you are watching your sugar intake, use a tart apple like Granny Smith and skip the chocolate chips. You can use a small piece of dried apricot for the eyes instead. The snack will still be delicious and much lower in sugar.
Conclusion
These fun monster mouth apple bites with peanut butter have become a staple in my kitchen for one simple reason: they make people happy. I have seen grumpy toddlers smile, shy kids open up, and grown-ups laugh at a silly snack. That is not nothing. In a world where we are all trying to eat better and have more fun, this recipe delivers on both fronts.
I hope you make these and put your own spin on them. Use different nut butters, try new toppings, let your kids go wild with the designs. The best version of this recipe is the one that makes you smile when you put it on the table. And honestly, if you make these for a party, do not be surprised if they disappear faster than anything else you serve.
If you try this recipe, I would love to hear about it. Leave a comment below and tell me what toppings you used, or tag me in your photos. Did your kids love them? Did you come up with a monster design I have not thought of? Share your creations—I am always looking for new ideas. And if you have a picky eater at home, let me know if this snack worked its magic on them too. Happy snacking, friends!
Frequently Asked Questions
Can I make these ahead of time for a party?
You can prep the apple wedges up to four hours ahead. Toss them in a bowl of water with a squeeze of lemon juice to prevent browning, then pat them dry before assembling. I recommend adding the peanut butter and toppings no more than thirty minutes before serving for the best texture.
What if I do not have slivered almonds for the teeth?
No problem at all. Sunflower seeds, pumpkin seeds, or even small pretzel sticks cut into pieces work great. You can also use white chocolate chips flipped upside down for a toothy look. Get creative with whatever you have in your pantry.
Can I use a different nut butter?
Absolutely. Almond butter, cashew butter, and sunflower seed butter all work well. Cookie butter or Nutella are delicious for a sweeter treat, though they are not as healthy. Just make sure whatever you use is spreadable at room temperature.
How do I stop the apples from turning brown?
If you are prepping the wedges ahead of time, soak them in a bowl of cold water with a tablespoon of lemon juice for about five minutes. Drain and pat dry. This buys you a few hours before the browning starts. For best results, assemble these right before serving.
Are these safe for kids with nut allergies?
Yes, with the right substitutions. Use sunflower seed butter or soy-based WowButter instead of peanut butter, and skip the almonds. Use dairy-free chocolate chips for the eyes. Always check labels to make sure your ingredients are processed in a nut-free facility if allergies are a concern.
Pin This Recipe!
Fun Monster Mouth Apple Bites: Easy Peanut Butter Snack
Crisp apple wedges become silly monster mouths with peanut butter gums, almond teeth, and chocolate chip eyes. A quick, no-bake snack that kids love to help make and devour.
- Prep Time: 15 minutes
- Cook Time: 0 minutes
- Total Time: 15 minutes
- Yield: 8 servings 1x
- Category: Snack
- Cuisine: American
Ingredients
- 2 large apples (Honeycrisp or Fuji recommended)
- 1/4 cup creamy peanut butter (natural preferred)
- 8–12 slivered almonds
- 4–6 mini chocolate chips
- Sunflower seeds (optional, for nut-free version)
- Raisins or dried cranberries (optional, for eyes)
- Shredded coconut (optional, for fuzzy monsters)
- Pomegranate seeds (optional, for tongues)
Instructions
- Wash and dry apples. Core each apple using an apple corer or by cutting into quarters and removing the core with a paring knife.
- Cut each quarter into two wedges, about 1/2 inch thick at the widest part, to yield 8 wedges per apple.
- Spread a thin layer (about 1/8 inch) of peanut butter on the flat, cut side of each apple wedge.
- Press slivered almonds into the peanut butter along the curved outer edge to form teeth (3-5 per wedge).
- Press two mini chocolate chips into the peanut butter near the wider end of the wedge for eyes.
- Optional: Add pomegranate seeds for tongues, coconut for fuzziness, or other toppings as desired.
- Arrange on a serving platter with peanut butter side up. Serve immediately for best texture.
Notes
For best results, use crisp apples like Honeycrisp or Fuji. Dry apples thoroughly after washing to prevent peanut butter from sliding. Use room temperature peanut butter for easier spreading. Assemble no more than 30 minutes before serving to prevent browning. For nut-free version, use sunflower seed butter and skip almonds.
Nutrition
- Serving Size: 1 monster mouth (1 w
- Calories: 95
- Sugar: 8
- Sodium: 50
- Fat: 5
- Saturated Fat: 1
- Carbohydrates: 12
- Fiber: 2
- Protein: 3
Keywords: apple bites, monster mouth, peanut butter snack, kid-friendly, no-bake, Halloween snack, healthy snack