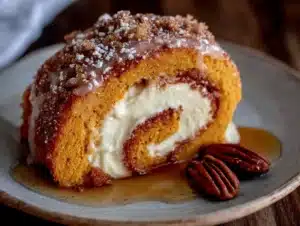
By the fourth time I made a pumpkin roll in one week, my kitchen looked like a powdered sugar bomb had gone off. There was flour on the dog, a smear of cream cheese filling on the cabinet handle, and three rolled-up towels on the counter serving as makeshift “cake rollers” because I was convinced my technique was the problem. Spoiler: it wasn’t the towels.
I had this idea that a pumpkin roll was one of those things you just had to accept would crack. Like, that’s part of its charm, right? Wrong. After that fourth attempt—where the cake split right down the middle as I unrolled it, spilling filling everywhere like a sad, orange confession—I got stubborn. I spent the next two weekends testing every variable. Oven temperature. Flour type. Egg temperature. The roll direction (yes, that’s a thing). I even tried rolling it while humming, because at that point, I was desperate for any variable I could control.
What I landed on is this recipe. It’s not magic. It’s just a few specific choices that make all the difference between a pumpkin roll that looks like it belongs on a bakery shelf and one that looks like it fought a losing battle with gravity. The texture is tender but sturdy enough to hold that luscious cream cheese filling without squishing out the sides. And the flavor? It’s the kind of spiced, creamy, autumnal perfection that makes you close your eyes on the first bite. This is the one that finally made me stop baking.
Why You’ll Love This Recipe
Let me be honest with you. I’ve tested pumpkin roll recipes from blogs, cookbooks, and even that one aunt who claims hers never cracks. Most of them crack. Some of them taste dry. A few have that weird spongy texture that reminds me of a hotel breakfast omelet. This one is different.
- No-Crack Guarantee (Seriously): The technique here is built around preventing cracks. From the specific flour-to-egg ratio to the way we roll it while warm, every step is designed to give you a flexible, forgiving cake that rolls like a dream.
- Perfect Cream Cheese Filling: Not too sweet, not too tangy, and stable enough to hold its shape when you slice it. The secret is a touch of heavy cream and letting the cream cheese come to actual room temperature.
- Simple Ingredients: You probably have everything in your pantry right now. No weird stabilizers, no specialty flours, just real ingredients that work together.
- Holiday-Worthy Presentation: This is the dessert that gets the “wait, you made that?” reaction. It looks impressive, but honestly, it’s easier than a layer cake.
- Make-Ahead Friendly: You can make this a day or two ahead, and it actually gets better as the flavors meld. Perfect for Thanksgiving or any fall gathering.
I’ve tested this with beginner bakers and experienced ones, and the feedback is always the same: this is the pumpkin roll recipe that finally works. It’s the one I bring to Friendsgiving, the one I teach in my virtual baking classes, and the one my husband now requests instead of pumpkin pie. It’s comfort food that looks like you spent hours on it—but between us, the hardest part is waiting for it to chill.
What Ingredients You Will Need
This recipe uses simple, everyday ingredients, but a few details matter. Here’s what you need and why each ingredient plays a role in that perfect, no-crack pumpkin roll.
For the Pumpkin Cake
- ¾ cup all-purpose flour (120g) — Standard all-purpose flour gives the cake enough structure without making it tough. Spoon and level it into your measuring cup; don’t scoop directly or you’ll pack in too much.
- 1 teaspoon baking powder — Helps the cake rise evenly. Make sure it’s fresh.
- 1 teaspoon baking soda — Works with the acidity in the pumpkin to create a tender crumb.
- 2 teaspoons pumpkin pie spice — I use store-bought for convenience, but you can mix your own with cinnamon, nutmeg, ginger, and cloves.
- ½ teaspoon salt — Balances the sweetness and enhances the spices.
- 3 large eggs, room temperature — Room-temperature eggs incorporate more air when beaten, giving the cake a lighter texture. Cold eggs can make the batter lumpy.
- 1 cup granulated sugar (200g) — Adds sweetness and helps with browning.
- ⅔ cup pumpkin puree (160g) — Not pumpkin pie filling! Make sure you grab 100% pure pumpkin puree. Libby’s is my go-to because it’s consistently thick and not watery.
- 1 teaspoon vanilla extract — Enhances the warm spices.
- Powdered sugar, for dusting the kitchen towel — This is non-negotiable. It prevents the cake from sticking to the towel as you roll it.
For the Cream Cheese Filling
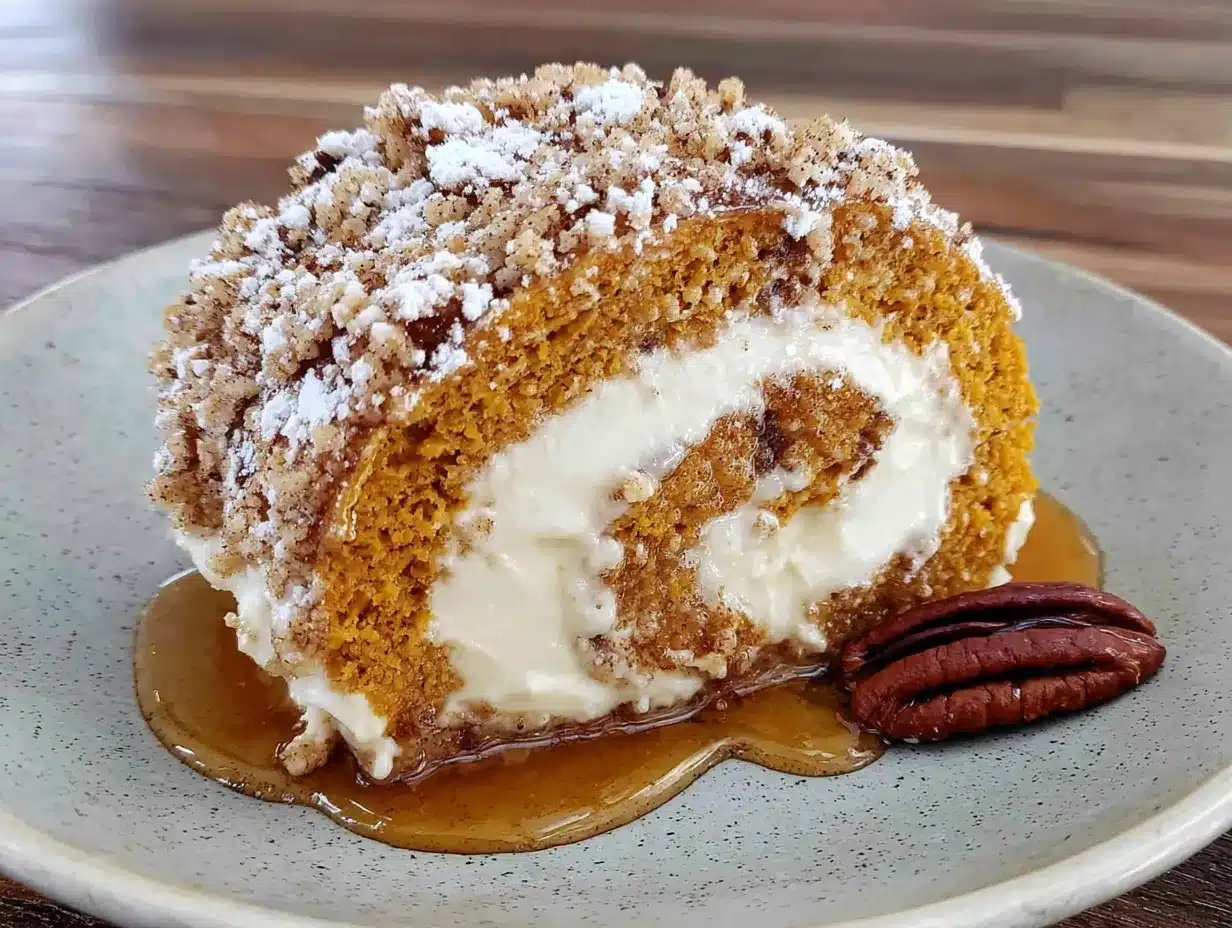
- 8 ounces cream cheese (226g), softened — Full-fat, block-style cream cheese is essential. The spreadable kind in a tub has too much water and will make your filling runny. Let it sit on the counter for at least 30 minutes.
- ¼ cup unsalted butter (57g), softened — Adds richness and helps the filling set up firmly.
- 1 cup powdered sugar (120g), sifted — Sifting prevents lumps. Trust me on this one.
- 1 teaspoon vanilla extract — Pure vanilla, not imitation, for the best flavor.
- 1 tablespoon heavy cream (15ml) — Just enough to make the filling silky without making it loose.
The beauty of this ingredient list is its simplicity. You don’t need a specialty baking aisle. Just good, fresh ingredients that work together to create something greater than the sum of their parts. If you’re looking for another fall dessert that uses similar pantry staples, my make-ahead pumpkin pie with bourbon brown sugar whipped cream is another crowd-pleaser that uses pumpkin puree and warm spices.
Equipment Needed
- 10×15-inch jelly roll pan (also called a half-sheet pan) — This is the standard size for a pumpkin roll. A 9×13 pan is too small and will make the cake too thick to roll.
- Parchment paper — Line the pan with parchment, leaving an overhang on the long sides. This makes lifting the cake out a breeze.
- Clean kitchen towel — A thin, lint-free towel works best. Avoid terry cloth or textured towels that might leave marks on the cake.
- Electric mixer (hand or stand) — You can whisk by hand, but an electric mixer makes beating the eggs to the right consistency much easier.
- Sifter or fine-mesh strainer — For sifting the powdered sugar and flour. It makes a difference in texture.
- Spatula — For spreading the batter evenly and smoothing the filling.
- Cooling rack — Helps the cake cool evenly after the initial roll.
If you don’t have a jelly roll pan, check your local thrift store. I found mine for three dollars, and it’s one of the most-used pans in my kitchen. You can also use a heavy-duty 10×15-inch baking sheet, just make sure it has sides at least 1 inch high. For those who love baking fall desserts, having the right pan makes all the difference—just like having a good sourdough starter changes your bread game entirely.
Preparation Method
This is where the magic happens. Follow these steps carefully, and you’ll have a perfect pumpkin roll every time.
Step 1: Preheat and Prep
Preheat your oven to 350°F (175°C). Line your jelly roll pan with parchment paper, leaving about 2 inches of overhang on the two long sides. Lightly spray the parchment with non-stick cooking spray. This double-layer of non-stick insurance is worth it.
Step 2: Mix the Dry Ingredients
In a medium bowl, whisk together the flour, baking powder, baking soda, pumpkin pie spice, and salt. Set this aside. Whisking aerates the flour and distributes the leavening agents evenly.
Step 3: Beat the Eggs and Sugar
In a large bowl, beat the eggs and granulated sugar together with an electric mixer on medium-high speed for 2-3 minutes. The mixture should become thick, pale, and ribbon-like—when you lift the beaters, the batter should fall back into the bowl in a slow, dissolving ribbon. This step is crucial. The air you beat in now is what gives the cake its lift and flexibility.
Step 4: Add Pumpkin and Vanilla
Add the pumpkin puree and vanilla extract to the egg mixture. Beat on low speed just until combined. Don’t overmix here; you want to keep as much air in the batter as possible.
Step 5: Fold in the Dry Ingredients
Add the dry ingredients to the wet mixture in two additions, folding gently with a spatula after each. Fold until you no longer see streaks of flour. A few small lumps are okay—overmixing will develop gluten and make the cake tough.
Step 6: Bake
Pour the batter into the prepared pan and spread it evenly with an offset spatula. It will seem like a thin layer—that’s correct. Bake for 12-15 minutes, or until the top springs back when lightly touched and the edges just start to pull away from the pan. Don’t overbake. Dry cake cracks.
Step 7: The First Roll
While the cake bakes, lay your clean kitchen towel flat on the counter and dust it generously with powdered sugar. As soon as the cake comes out of the oven, run a knife around the edges to loosen it. Invert the cake onto the prepared towel. Carefully peel off the parchment paper. Starting at one short end, roll the cake and towel together tightly. Let it cool completely on a wire rack, seam-side down. This takes about 1 hour. Rolling it while warm “trains” the cake to hold that shape.
Step 8: Make the Filling
While the cake cools, make the filling. In a medium bowl, beat the softened cream cheese and butter together until smooth and creamy, about 2 minutes. Add the sifted powdered sugar, vanilla extract, and heavy cream. Beat on low speed until combined, then increase to medium and beat for 1 minute until fluffy. Don’t overbeat or the filling can become thin.
Step 9: Fill and Roll Again
Once the cake is completely cool, carefully unroll it. It will want to curl back up—that’s normal. Spread the cream cheese filling evenly over the cake, leaving a ½-inch border on all sides. Re-roll the cake (without the towel this time) as tightly as you can without squeezing the filling out the sides. Wrap the roll tightly in plastic wrap and refrigerate for at least 2 hours, or overnight. Chilling sets the filling and makes slicing clean.
Step 10: Slice and Serve
When ready to serve, trim the ends for a clean look. Slice into 1-inch rounds using a sharp, serrated knife. Wipe the knife clean between slices for the prettiest presentation. Dust with powdered sugar just before serving.
Cooking Tips & Techniques
I’ve made every mistake in the book so you don’t have to. Here’s what I learned the hard way.
Don’t overbake. This is the number one cause of cracks. The cake should be just set and lightly golden. If the edges look dark or the top feels dry, you’ve gone too far. Set a timer for 12 minutes and check it. Every oven runs differently, so get to know yours.
Roll it while it’s hot. This is non-negotiable. The cake is most pliable when it’s warm. If you wait until it cools, it will crack when you try to roll it. I’ve done this. It’s heartbreaking. Don’t be like me.
Use a thin kitchen towel. A thick, fluffy towel will leave indentations on the cake. A thin cotton or linen towel works best. And don’t use a towel with fabric softener residue—it can transfer to the cake and affect the taste.
Let the cream cheese soften properly. Cold cream cheese creates lumps that won’t beat out. Leave it on the counter for at least 30 minutes. If you’re in a hurry, cut it into small cubes and let it sit for 15 minutes.
Chill before slicing. I know you want to dig in. But if you slice it before the filling sets, you’ll get a messy, oozing situation. Two hours minimum. Overnight is better. The flavors actually meld and improve overnight, kind of like a good cozy Dutch oven soup that tastes better the next day.
Variations & Adaptations
Once you’ve mastered the basic recipe, feel free to play around. Here are some variations I’ve tried and loved.
Gluten-Free Version: Swap the all-purpose flour with a 1:1 gluten-free baking flour blend that contains xanthan gum. I’ve tested this with King Arthur Measure for Measure and it works beautifully. The texture is slightly more delicate, so handle it gently.
Dairy-Free Filling: Use dairy-free cream cheese (like Kite Hill or Violife) and vegan butter. The filling won’t be quite as firm, so chill it for at least 4 hours before slicing. It still tastes amazing.
Spice It Up: Add ¼ teaspoon of ground cardamom or a pinch of white pepper to the dry ingredients for a more complex spice profile. I did this accidentally once (grabbed the wrong jar) and it was a happy accident.
Chocolate Pumpkin Roll: Replace 2 tablespoons of the flour with unsweetened cocoa powder. The chocolate-pumpkin combination is surprisingly good, and it looks gorgeous with the white cream cheese filling.
Maple Cream Cheese Filling: Replace the vanilla extract with 1 tablespoon of pure maple syrup and reduce the powdered sugar by 2 tablespoons. The maple flavor pairs beautifully with pumpkin.
If you’re hosting a fall gathering, this pumpkin roll pairs wonderfully with other seasonal favorites. Try serving it alongside my roasted butternut squash soup with crispy sage brown butter for a complete autumn menu.
Serving & Storage Suggestions
This pumpkin roll is best served chilled, straight from the refrigerator. The cold filling contrasts beautifully with the tender cake. Slice it into 1-inch rounds and arrange them on a platter. A light dusting of powdered sugar and a few fresh cranberries or candied pecans make for a stunning presentation.
For drinks, it pairs beautifully with a hot cup of coffee, a spiced chai latte, or even a glass of cold milk. If you’re serving it after a heavy meal, keep the portions modest—this dessert is rich and satisfying.
Storage: Wrap the pumpkin roll tightly in plastic wrap and store it in the refrigerator for up to 5 days. The flavors actually improve after the first day. You can also freeze it for up to 3 months. Wrap it in plastic wrap, then a layer of aluminum foil, and thaw it overnight in the refrigerator before serving.
Reheating: I don’t recommend reheating this dessert. It’s meant to be served cold. If you absolutely must warm it up, microwave individual slices for 10-15 seconds, but the filling will soften significantly.
Make-Ahead Tip: This is the ultimate make-ahead dessert for Thanksgiving. Bake and roll the cake (without filling) up to 2 days ahead. Keep it wrapped in the towel in the refrigerator. Fill and re-roll the day you plan to serve it. This actually makes the cake even more flexible and less likely to crack.
Nutritional Information & Benefits
Per slice (based on 10 slices per roll):
- Calories: 285
- Fat: 14g
- Carbohydrates: 36g
- Protein: 5g
- Fiber: 1g
- Sugar: 28g
While this is definitely a treat, pumpkin itself is packed with vitamin A, fiber, and antioxidants. The cream cheese filling adds calcium and protein. It’s not health food, but it’s a dessert made with real ingredients—no preservatives, no artificial flavors, nothing you can’t pronounce.
For those watching their sugar intake, you can reduce the sugar in the cake to ¾ cup without affecting the texture too much. The filling is harder to adjust because powdered sugar provides structure as well as sweetness. But honestly, this is a once-in-a-while indulgence, and it’s worth every bite.
Conclusion
This pumpkin roll is the dessert that finally made me stop chasing perfection and start enjoying the process. It’s beautiful without being fussy, impressive without being complicated, and delicious in that deeply satisfying way that only a well-made homemade dessert can be. The no-crack technique works because it’s built on understanding how the cake behaves, not on luck or wishful thinking.
I hope you make this for your next fall gathering, your Thanksgiving table, or just because it’s Tuesday and you deserve something special. Don’t be afraid to make it your own—add extra spice, swap in a different filling, or double the recipe because one roll is never enough. And when you make it, I’d love to hear how it turns out. Drop a comment below, tag me in your photos, or tell me about your own pumpkin roll adventures. Happy baking, friends!
Frequently Asked Questions
Why did my pumpkin roll crack?
The most common cause is overbaking. The cake should be just set and spring back when touched. Overbaking dries out the cake, making it brittle. Other causes include rolling it when it’s too cool, or not rolling it tightly enough the first time. If it cracks, don’t worry—dust it with powdered sugar and call it “rustic.” Nobody will know but you.
Can I use pumpkin pie filling instead of pumpkin puree?
No. Pumpkin pie filling has added sugar and spices, plus stabilizers that will throw off the texture of the cake. Always use 100% pure pumpkin puree. Libby’s is the most reliable brand, but any store brand works as long as it’s pure pumpkin.
How do I get clean slices?
Use a sharp serrated knife and wipe it clean between each slice. Chilling the roll for at least 2 hours (or overnight) makes slicing much easier. For the prettiest presentation, trim about ½ inch off each end before slicing—those ends are usually uneven and messy.
Can I make this ahead of time?
Absolutely. You can bake and roll the cake (without filling) up to 2 days ahead. Keep it wrapped in the towel in the refrigerator. Fill and re-roll it the day you plan to serve. Or, you can fully assemble the pumpkin roll and refrigerate it for up to 2 days before serving. The flavors actually meld and improve overnight.
My cream cheese filling is too runny. What went wrong?
Most likely, the cream cheese or butter wasn’t fully softened, or you overbeat the mixture. Cream cheese should be at room temperature—soft enough that a finger pressed into it leaves an indent. If you overbeat it, the filling can become thin and soupy. Next time, beat just until smooth and fluffy, then stop. If it’s already runny, chill it for 30 minutes before spreading. It will firm up as it sits.
Pin This Recipe!
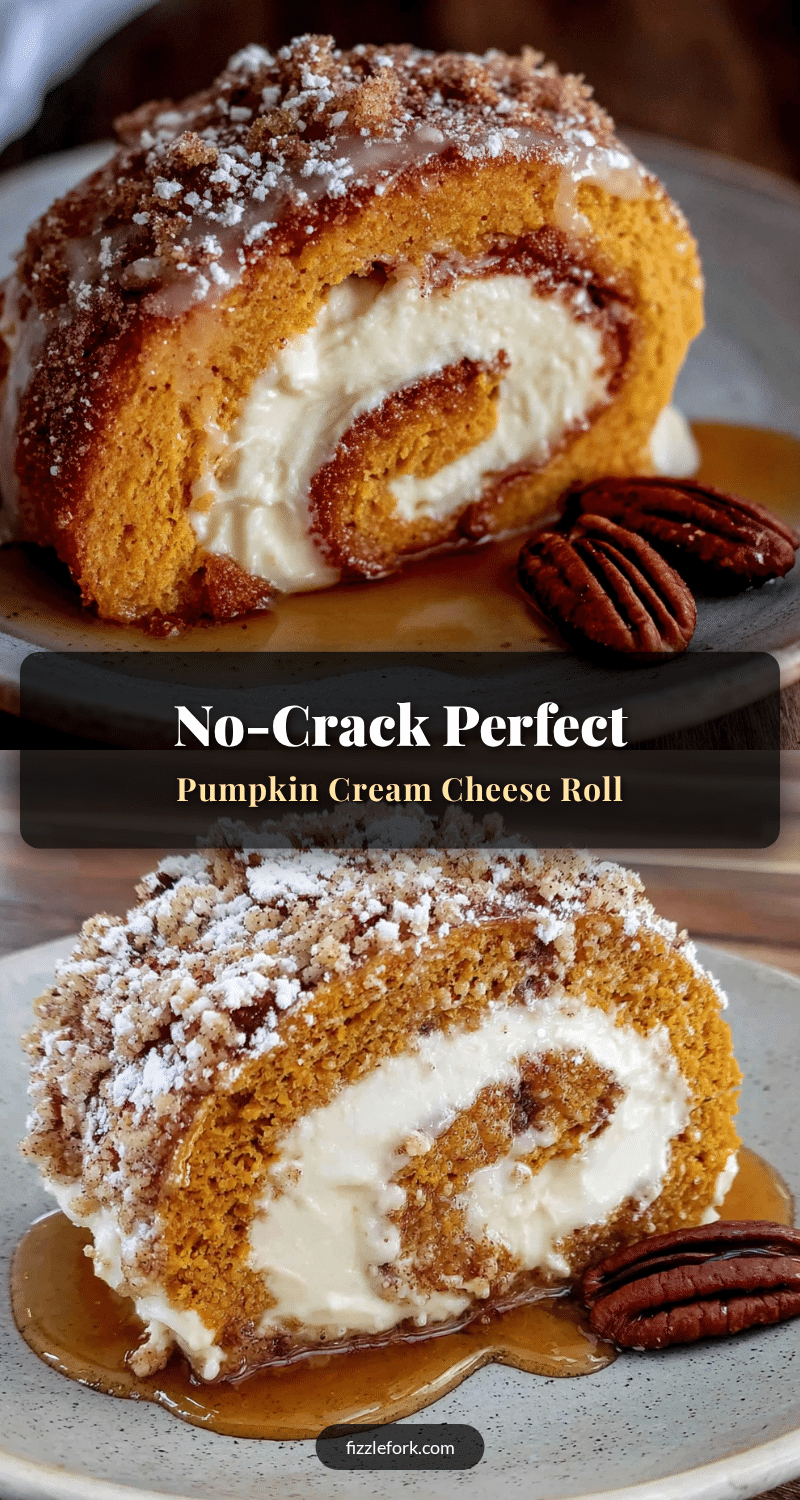
Perfect No-Crack Pumpkin Roll: Easy Cream Cheese Filling

A foolproof pumpkin roll recipe with a tender, flexible cake and luscious cream cheese filling that never cracks. Perfect for fall gatherings and Thanksgiving.
- Prep Time: 30 minutes
- Cook Time: 15 minutes
- Total Time: 3 hours 45 minutes (includes cooling and chilling)
- Yield: 10 servings 1x
- Category: Dessert
- Cuisine: American
Ingredients
- ¾ cup all-purpose flour (120g)
- 1 teaspoon baking powder
- 1 teaspoon baking soda
- 2 teaspoons pumpkin pie spice
- ½ teaspoon salt
- 3 large eggs, room temperature
- 1 cup granulated sugar (200g)
- ⅔ cup pumpkin puree (160g)
- 1 teaspoon vanilla extract
- Powdered sugar, for dusting
- 8 ounces cream cheese (226g), softened
- ¼ cup unsalted butter (57g), softened
- 1 cup powdered sugar (120g), sifted
- 1 teaspoon vanilla extract
- 1 tablespoon heavy cream (15ml)
Instructions
- Preheat oven to 350°F (175°C). Line a 10×15-inch jelly roll pan with parchment paper, leaving 2 inches overhang on long sides. Lightly spray parchment with non-stick cooking spray.
- In a medium bowl, whisk together flour, baking powder, baking soda, pumpkin pie spice, and salt. Set aside.
- In a large bowl, beat eggs and granulated sugar with an electric mixer on medium-high speed for 2-3 minutes until thick, pale, and ribbon-like.
- Add pumpkin puree and vanilla extract to egg mixture. Beat on low speed just until combined.
- Fold dry ingredients into wet mixture in two additions, folding gently with a spatula until no streaks of flour remain.
- Pour batter into prepared pan and spread evenly. Bake for 12-15 minutes until top springs back when lightly touched and edges start to pull away from pan.
- While cake bakes, lay a clean kitchen towel flat and dust generously with powdered sugar. As soon as cake comes out of oven, run a knife around edges to loosen. Invert cake onto prepared towel. Carefully peel off parchment paper.
- Starting at one short end, roll cake and towel together tightly. Let cool completely on a wire rack, seam-side down, about 1 hour.
- For filling: Beat softened cream cheese and butter together until smooth and creamy, about 2 minutes. Add sifted powdered sugar, vanilla extract, and heavy cream. Beat on low until combined, then medium for 1 minute until fluffy.
- Once cake is completely cool, carefully unroll. Spread cream cheese filling evenly over cake, leaving ½-inch border on all sides. Re-roll cake (without towel) tightly. Wrap in plastic wrap and refrigerate at least 2 hours or overnight.
- When ready to serve, trim ends for clean look. Slice into 1-inch rounds using a sharp serrated knife, wiping knife clean between slices. Dust with powdered sugar just before serving.
Notes
Don’t overbake – this is the number one cause of cracks. Roll the cake while it’s hot for best flexibility. Use a thin, lint-free kitchen towel. Let cream cheese soften properly for at least 30 minutes. Chill before slicing for clean cuts. Can be made ahead and stored in refrigerator for up to 5 days or frozen for up to 3 months.
Nutrition
- Serving Size: 1 slice
- Calories: 285
- Sugar: 28
- Sodium: 280
- Fat: 14
- Saturated Fat: 8
- Carbohydrates: 36
- Fiber: 1
- Protein: 5
Keywords: pumpkin roll, pumpkin dessert, no-crack pumpkin roll, cream cheese filling, fall dessert, Thanksgiving dessert, pumpkin cake roll