My sister took one bite of these Peppermint Bark Cheesecake Bars and just stared at the plate for a solid ten seconds. She didn’t say anything, which for her is pretty unusual honestly. Then she asked if I could make two pans for the family Christmas party, and I knew I had stumbled onto something good. These bars started as a happy accident when I had leftover peppermint candies from a failed hot cocoa station experiment, and now they are the first thing people ask me to bring every December.
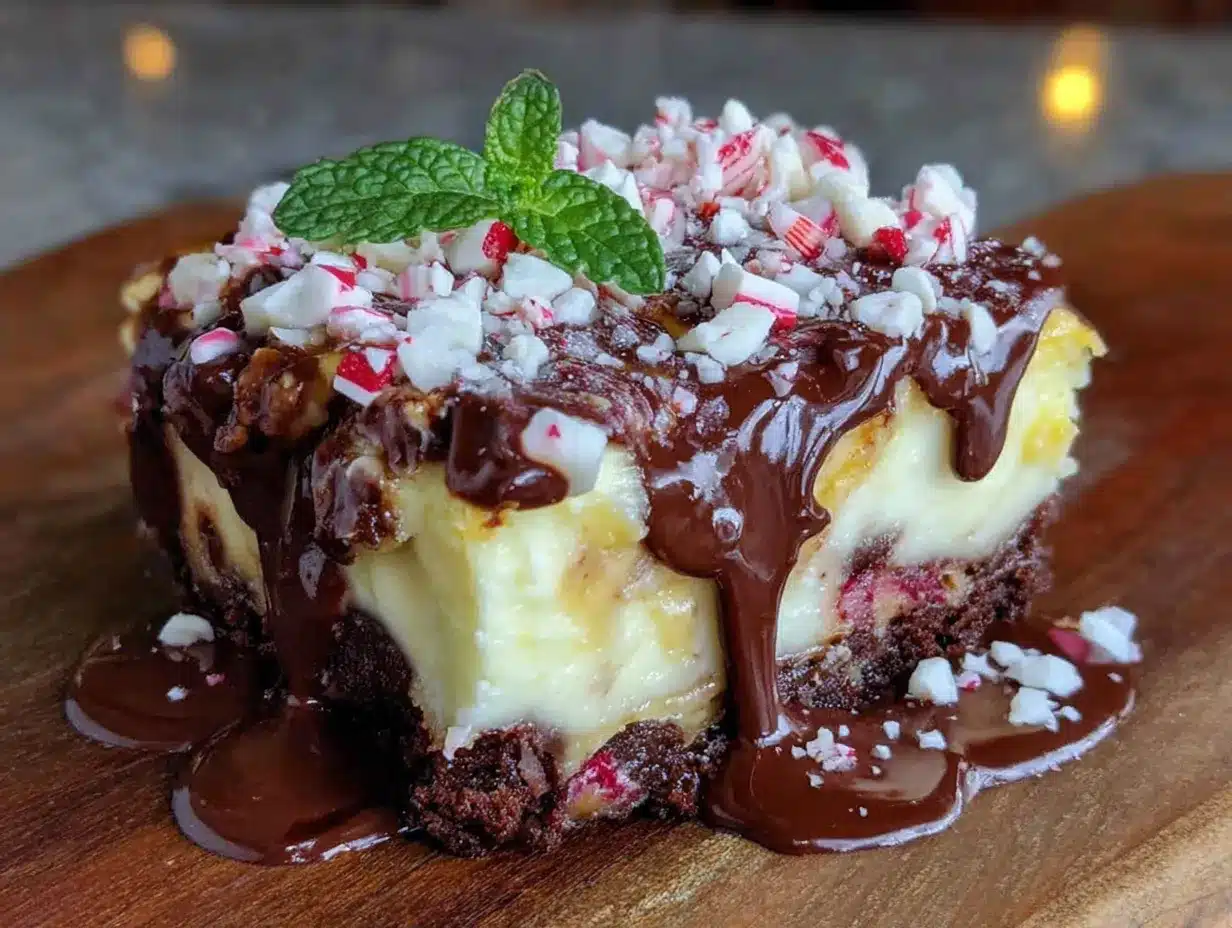
The thing about holiday desserts is they have to look impressive without making you want to hide in the kitchen all day. That is exactly what these cheesecake bars deliver. A buttery chocolate cookie crust, a creamy peppermint cheesecake filling, and a crackly chocolate topping studded with crushed candy canes. They slice clean, they travel well, and they make people light up when they see them on the dessert table. I have brought them to cookie swaps, potlucks, and casual family dinners, and they disappear faster than anything else every single time.
Perfect Peppermint Bark Cheesecake Bars are the kind of dessert that feels fancy but is secretly simple to put together. No water bath, no complicated techniques, just straightforward steps that work. I have tested this recipe four times to get the texture exactly right, and I can tell you with confidence that anyone can make these. The contrast between the cool mint filling and the rich chocolate topping is what keeps people coming back for another square. And honestly, that first bite where the crunch of the crust meets the creamy center and the snappy chocolate top all at once is something special.
Why You Will Love This Recipe
I have made a lot of holiday desserts over the years, and these bars check every box I look for when I want something that actually delivers. Here is why they have become my go-to for the season.
- No Water Bath Needed: Traditional cheesecake requires a fussy water bath that always stresses me out. These bars bake low and slow with a simple pan of water on the rack below, giving you that same creamy texture without the risk of water seeping into your crust.
- Perfect for Make-Ahead: These bars actually taste better after a day in the fridge. The flavors meld together, and the texture sets up perfectly. I make mine two days before any event and just add the topping the morning I serve them.
- Simple Ingredients: You probably have most of these in your kitchen already. No hunting down specialty stores or ordering things online. Cream cheese, butter, sugar, chocolate chips, and candy canes. That is the whole list.
- Crowd-Pleaser Across Ages: Kids love the candy cane crunch on top, and adults appreciate the sophisticated peppermint flavor that is not too sweet. I have watched three generations of my family go back for seconds at the same table.
- Beautiful Without Effort: The natural layers of this dessert look stunning without any decorating skills. The white cheesecake against the dark chocolate with red and white peppermint pieces looks like something from a bakery window.
What makes these bars different from other peppermint desserts I have tried is the texture balance. The crust stays crunchy even after a few days, the cheesecake filling is dense and velvety without being heavy, and the chocolate topping snaps when you bite through it. I spent a lot of time figuring out how to keep the peppermint flavor present without making it taste like toothpaste, and the secret is using both peppermint extract and crushed candy canes in the right proportions. This is not just another holiday dessert. It is the one people will ask you to bring year after year.
What Ingredients You Will Need
This recipe relies on a short list of quality ingredients that work together to create something greater than the sum of their parts. I have tested substitutions where they work and flagged the places where you really want to stick with the original.
For the Crust
- Chocolate sandwich cookies (like Oreos), about 24 cookies, crushed into fine crumbs. You want the whole cookie including the cream filling. This gives you a crust that tastes like a chocolate wafer with just enough sweetness.
- Unsalted butter, 5 tablespoons, melted. I use salted butter in a pinch and just skip the pinch of salt I normally add. But unsalted gives you more control over the final flavor.
- Granulated sugar, 2 tablespoons. This seems like a small amount, but it helps the crust hold together and adds a little extra sweetness against the tangy cheesecake.
For the Cheesecake Filling
- Full-fat cream cheese, 24 ounces (three 8-ounce blocks), softened to room temperature. This is non-negotiable. Low-fat cream cheese changes the texture completely, and cold cream cheese will leave you with lumpy batter no matter how long you beat it.
- Granulated sugar, 3/4 cup. I have tried reducing this to 1/2 cup and the filling was noticeably less creamy. The sugar does more than sweeten here, it helps create that silky texture.
- Sour cream, 1/2 cup, room temperature. This adds tang and keeps the cheesecake from being too dense. Full-fat Greek yogurt works as a substitute if that is what you have.
- Vanilla extract, 1 teaspoon. Pure vanilla makes a difference here. The artificial stuff has a chemical note that stands out against the peppermint.
- Peppermint extract, 1/2 teaspoon. Start with less and taste your batter. Different brands vary in strength, and you can always add more but you cannot take it out.
- Large eggs, 3, room temperature. Cold eggs will seize up your cream cheese mixture and leave you with lumps. Let them sit on the counter for an hour before you start.
- Red food coloring, optional but recommended. I use about 4 drops of gel food coloring to create a subtle pink swirl through the filling. Liquid food coloring works too, just use a few more drops.
For the Topping
- Semi-sweet chocolate chips, 1 cup. I prefer Ghirardelli or Guittard for the smoothest melt. The quality of your chocolate really shows here since it is the star of the top layer.
- Coconut oil, 1 tablespoon. This helps the chocolate set with a nice snap and keeps it from being too hard to cut through. Vegetable oil works in a pinch but coconut oil gives a cleaner finish.
- Crushed candy canes, about 6 regular-sized candy canes, crushed into small pieces. You want some fine powder and some small chunks for texture. I put mine in a zip-top bag and hit them with a rolling pin.
Equipment Needed
You do not need a lot of fancy tools for these bars, which is part of why I love making them. Here is what I use and what you can substitute if you are missing something.
- 9×13-inch baking pan. Glass or metal both work fine. I prefer metal because it heats up faster and gives a more even bake on the crust. If you use glass, expect the crust to take a few extra minutes to set.
- Electric hand mixer or stand mixer. You can mix the cheesecake filling by hand if you have strong arms and patience, but an electric mixer makes it much easier to get that smooth, lump-free texture. I have done it both ways and the mixer wins every time.
- Food processor or zip-top bag and rolling pin. For crushing the cookies and candy canes. The food processor is faster and gives you more consistent crumbs, but the bag method works great and lets you release some stress at the same time.
- Parchment paper. This is your best friend for getting the bars out of the pan cleanly. Leave overhang on two sides so you can lift the whole thing out like a handle.
- Medium saucepan or microwave-safe bowl. For melting the chocolate topping. I use the microwave in 30-second bursts because I always burn chocolate on the stove. Do what works for you.
- Offset spatula. Not required but helpful for smoothing the cheesecake layer and spreading the chocolate evenly. A regular spatula works fine too.
Preparation Method
Take your cream cheese, eggs, and sour cream out of the refrigerator about an hour before you start. This makes a bigger difference than you might think. Cold ingredients create a lumpy, grainy cheesecake that never quite smooths out no matter how long you beat it.
- Preheat your oven to 325°F. Line your 9×13 pan with parchment paper, leaving a couple inches of overhang on the long sides. This creates handles that let you lift the whole cheesecake out later for clean slicing.
- Make the crust. Crush your chocolate sandwich cookies into fine crumbs. I use a food processor for this, pulsing until the cookies resemble wet sand. If you are using the bag method, put the cookies in a zip-top bag, squeeze out the air, and go to town with a rolling pin. Transfer the crumbs to a medium bowl, add the melted butter and sugar, and stir with a fork until every crumb is moistened. Press the mixture firmly into the bottom of your prepared pan. I use the bottom of a measuring cup to get it even and compact. Bake for 10 minutes, then set aside to cool slightly while you make the filling.
- Start the cheesecake filling. In a large bowl, beat the softened cream cheese with an electric mixer on medium speed until it is completely smooth with no lumps. This takes about 2 minutes. Scrape down the sides and bottom of the bowl with a spatula at least once. Add the sugar and beat for another 2 minutes until the mixture is light and fluffy.
- Add the wet ingredients. Mix in the sour cream, vanilla extract, and peppermint extract until combined. Add the eggs one at a time, beating on low speed after each addition just until the yolk disappears into the batter. Overmixing at this stage incorporates too much air and can cause cracks in your cheesecake. Scrape the bowl well between each addition.
- Create the swirl effect. Reserve about 1/2 cup of the plain cheesecake batter in a small bowl. Add a few drops of red food coloring to this reserved batter and stir until you reach your desired shade of pink. Pour the white cheesecake batter over your pre-baked crust and smooth the top with a spatula. Drop spoonfuls of the pink batter randomly across the surface, then use a knife or skewer to gently swirl them together. Do not over-swirl or you will lose the distinct pink ribbons.
- Bake with a steam trick. Place your pan on the middle rack of the oven. Put a separate oven-safe dish filled with hot water on the rack directly below. This creates steam that keeps the cheesecake moist and prevents cracking. Bake for 35 to 40 minutes until the edges are set but the center still jiggles slightly when you gently shake the pan. The center will continue to set as it cools.
- Cool slowly. Turn off the oven, crack the door open, and let the cheesecake sit inside for 30 minutes. This gradual cooling prevents the sudden temperature change that causes cracks. After 30 minutes, remove the pan from the oven and let it cool completely on a wire rack, about 1 hour. Then transfer to the refrigerator and chill for at least 4 hours, though overnight is better. The cheesecake needs this time to fully set up.
- Add the topping. Once the cheesecake is fully chilled and set, make the chocolate layer. Combine the semi-sweet chocolate chips and coconut oil in a microwave-safe bowl. Microwave in 30-second intervals, stirring between each, until the chocolate is completely smooth and glossy. Let it cool for 2 to 3 minutes so it is warm but not hot. Pour the melted chocolate over the chilled cheesecake and spread it evenly with an offset spatula. Immediately sprinkle the crushed candy canes over the chocolate before it sets. Press them in very gently so they stick.
- Final chill. Return the pan to the refrigerator for at least 30 minutes to let the chocolate harden completely. Once set, use the parchment paper overhang to lift the entire cheesecake out of the pan. Place it on a cutting board and use a sharp knife to slice into bars. Wipe the knife clean between cuts for the cleanest edges. I cut mine into 24 squares, but you can go bigger or smaller depending on your crowd.
Cooking Tips and Techniques
I have made this recipe about eight times now, and I have learned a few things the hard way so you do not have to. Here are the tips that make the biggest difference.
Room temperature ingredients are not optional. I know it is tempting to skip this step when you are in a hurry, but cold cream cheese creates lumps that never fully disappear. Cold eggs seize up the batter and give you a dense, heavy texture. Set everything out on the counter an hour before you start, and your cheesecake will be silky and smooth every time.
Do not overmix after adding the eggs. This was my biggest mistake early on. I would beat the batter until it looked perfectly smooth, but that incorporated too much air. The cheesecake would puff up in the oven and then collapse, leaving cracks across the surface. Mix on low speed and stop as soon as the yolk disappears. A few small streaks are fine and will smooth out during baking.
Let the chocolate cool before pouring. The first time I made these bars, I poured hot melted chocolate directly onto the cold cheesecake. It created a warm layer that melted the top of the cheesecake and left a messy, uneven surface. Let the melted chocolate sit for a few minutes until it is warm to the touch but not hot. It will spread smoothly and set cleanly.
Crush candy canes strategically. You want a mix of fine powder and small chunks for the topping. The powder sticks to the chocolate and creates that pretty red tint, while the chunks give you the satisfying crunch. I crush mine in a bag with a rolling pin, then pick out a few larger pieces to place strategically on top for visual appeal.
Use a sharp knife for clean slices. Run your knife under hot water, dry it off, and make one smooth cut through the bars. Wipe the blade clean between each cut. This gives you those beautiful, bakery-style edges that make people think you spent hours decorating.
Variations and Adaptations
One of the best things about this recipe is how flexible it is. I have tried several variations over the past few months, and here are the ones that worked best.
Dark chocolate peppermint bars. Swap the semi-sweet chocolate chips for dark chocolate chips in the topping. The bitterness of the dark chocolate balances the sweet cheesecake and candy canes beautifully. I use 60 percent cacao chocolate for a noticeable but not overwhelming dark chocolate flavor.
Gluten-free version. Use gluten-free chocolate sandwich cookies for the crust. Most major brands make a gluten-free version now, and they work exactly the same way. The rest of the ingredients are naturally gluten-free, so this is an easy adaptation that tastes just like the original.
Mint chocolate chip twist. Fold 1/2 cup of mini chocolate chips into the cheesecake batter before pouring it over the crust. This gives you little pockets of chocolate throughout the creamy filling, which is amazing if you love the combination of mint and chocolate in every bite.
White chocolate peppermint bars. Use white chocolate chips instead of semi-sweet for the topping. The white chocolate creates a more traditional peppermint bark look with the red and white candy canes standing out against the pale topping. This version is sweeter, so I reduce the sugar in the cheesecake filling to 1/2 cup.
Individual mini cheesecakes. Line a muffin tin with paper liners and press the crust mixture into the bottom of each cup. Fill with cheesecake batter and bake for about 18 to 20 minutes. Top with chocolate and candy canes as directed. These are perfect for parties where people want to grab and go without slicing.
Serving and Storage Suggestions
These bars are versatile enough to fit into any holiday gathering, from casual cookie swaps to formal dinner parties. Here is how I serve and store them for the best results.
Serving temperature matters. Take the bars out of the refrigerator about 15 minutes before serving. This takes the chill off and allows the cheesecake to soften slightly, which makes the texture creamier and the flavors more pronounced. If you serve them straight from the fridge, the cheesecake will be firm and the mint flavor will be muted.
Presentation ideas. Arrange the bars on a white platter or cake stand to make the red and white colors pop. Sprinkle a few extra crushed candy canes around the plate for a festive touch. I sometimes add a small sprig of fresh mint next to the stack for a pop of green that looks beautiful in photos.
Pairing suggestions. These bars are wonderful with a cup of hot coffee or a mug of rich hot chocolate. For holiday parties, I set them out next to a plate of homemade pumpkin bagels with everything seasoning for a sweet and savory spread that covers all tastes. They also pair surprisingly well with a glass of cold milk or a peppermint mocha.
Refrigerator storage. Store the bars in an airtight container in the refrigerator for up to 5 days. Layer them between sheets of parchment paper so the chocolate topping does not stick together. The texture actually improves after a day or two as the flavors meld together.
Freezer instructions. These bars freeze beautifully. Once the chocolate topping is fully set, cut the bars and place them on a baking sheet in the freezer for 1 hour. Transfer the frozen bars to a freezer-safe container with parchment paper between layers. They will keep for up to 3 months. Thaw in the refrigerator overnight before serving.
Flavor development note. The peppermint flavor intensifies over time. If you are making these for a specific event, I recommend making them two days ahead. The first day the mint is subtle and the chocolate is dominant. By the second day, the peppermint has spread through the cheesecake and the balance is perfect.
Nutritional Information and Benefits
Let me be honest with you. These are a holiday treat and they taste like it. But I do want you to know what is in each serving so you can plan accordingly.
Per serving (based on 24 bars): Approximately 285 calories, 18 grams of fat, 28 grams of carbohydrates, 5 grams of protein, and 22 grams of sugar. These numbers will vary based on the exact brands you use and whether you make any substitutions.
Health highlights. The cream cheese and sour cream provide calcium and a small amount of protein. The dark chocolate in the topping contains antioxidants, especially if you use a higher cacao percentage. The peppermint itself can aid digestion, which is nice after a heavy holiday meal.
Dietary considerations. This recipe contains dairy, gluten, and eggs. For a gluten-free version, use gluten-free chocolate sandwich cookies as mentioned above. For a dairy-free version, I have had success using dairy-free cream cheese and a plant-based butter substitute, though the texture is slightly less creamy. I have not tested an egg-free version, so I cannot vouch for the results there.
My perspective. I believe in enjoying holiday treats without guilt. These bars are meant to be a special occasion dessert, not an everyday snack. I make them a few times during December, savor every bite, and do not stress about the numbers. Food is about joy and connection, and these bars deliver both.
Conclusion
These Perfect Peppermint Bark Cheesecake Bars have become my signature holiday dessert, and I think they will become yours too. They combine everything people love about peppermint bark and cheesecake into one easy bar that looks like you spent hours on it. The crunchy chocolate cookie crust, the creamy mint filling with those pretty pink swirls, and the snappy chocolate topping studded with candy cane pieces come together to create something truly special.
I love that this recipe lets you customize based on what you have and what your crowd likes. Swap the chocolate, change up the swirl color, make them mini or full-sized. The base recipe is forgiving and flexible, which is exactly what you want during the busy holiday season. I have brought these to countless gatherings now, and they never fail to get that happy surprised reaction when people take their first bite.
If you make these bars, I would love to hear how they turn out. Drop a comment below and tell me about your crowd and whether they disappeared as fast as mine always do. Did you try any of the variations? Did you come up with your own twist? The best part of sharing recipes is hearing how other people make them their own. Happy baking, and I hope these bars bring as much joy to your holiday table as they have to mine.
Frequently Asked Questions
Can I use pre-crushed candy canes from the store?
You can, but I do not recommend it. Pre-crushed candy canes tend to be ground too fine and turn into mostly powder. The texture is not the same, and you lose that satisfying crunch on top. Crushing your own candy canes in a bag with a rolling pin takes about 2 minutes and gives you the perfect mix of fine pieces and small chunks.
Why did my cheesecake crack on top?
Cracks usually happen from one of three things. Overmixing the batter after adding the eggs incorporates too much air. Baking at too high a temperature causes the cheesecake to puff up and then collapse. Cooling too quickly creates thermal shock. Follow the low and slow baking method, use the water dish trick, and let the cheesecake cool gradually in the oven with the door cracked open. The chocolate topping will cover small cracks anyway.
Can I make these bars without the pink swirl?
Absolutely. The pink swirl is purely for visual appeal and does not change the flavor at all. If you prefer a uniform white cheesecake layer or if you do not have food coloring on hand, just pour all the batter over the crust and skip the swirling step. The bars will still taste exactly the same.
How do I get clean slices without the chocolate cracking?
Let the bars sit at room temperature for about 10 minutes before slicing. Use a sharp knife and run it under hot water, drying it between each cut. The warmth helps the knife glide through the chocolate without shattering it. Wipe the blade clean after every single cut for the neatest edges.
Can I use mint extract instead of peppermint extract?
Mint extract and peppermint extract are different. Peppermint extract has a cleaner, cooler, more intense mint flavor that works perfectly in this dessert. Mint extract often has a greener, slightly more herbal note that can taste artificial in a sweet cheesecake. Stick with peppermint extract for the best results. You can find it in the baking aisle of any grocery store.
Pin This Recipe!
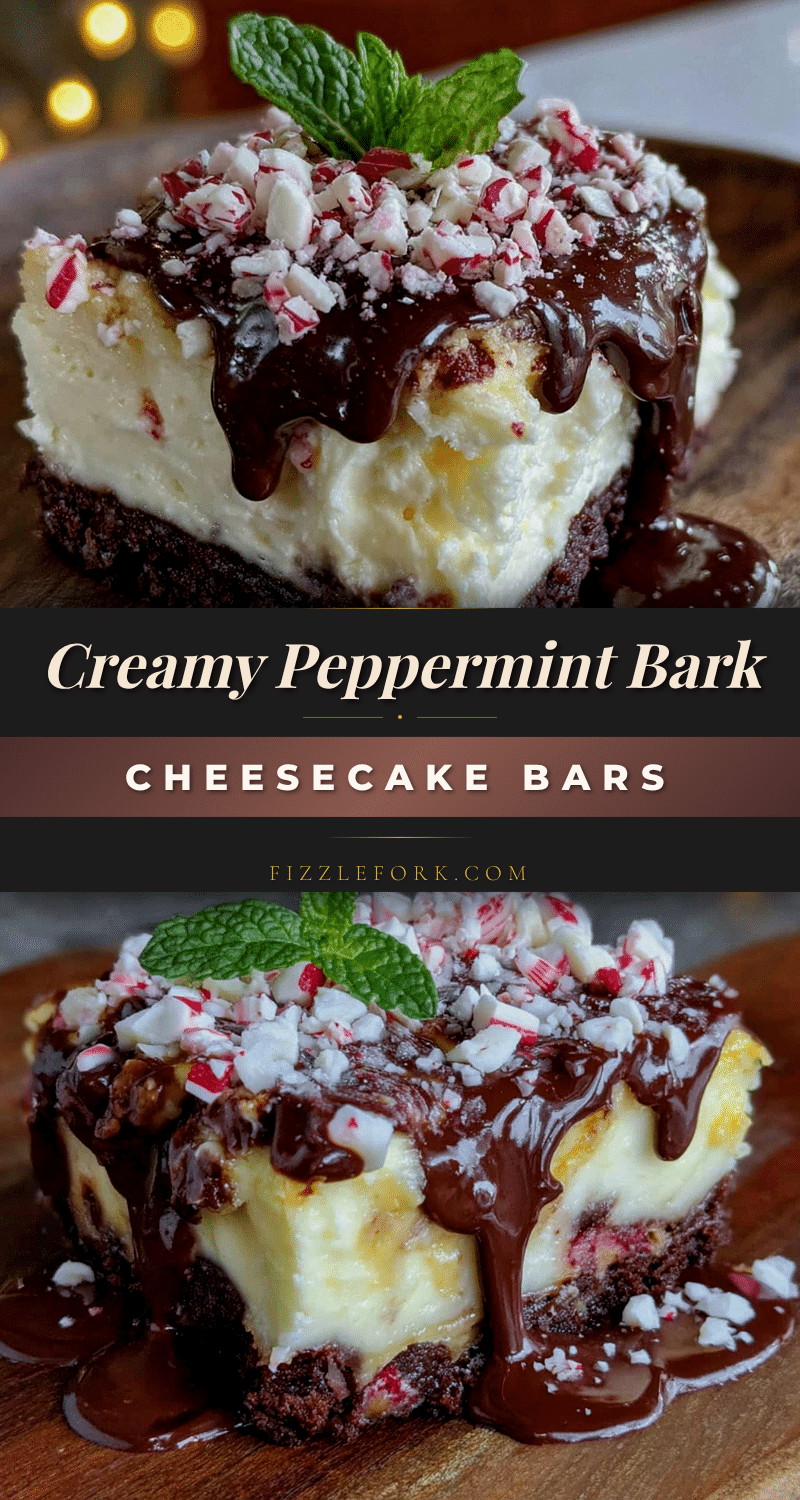
Perfect Peppermint Bark Cheesecake Bars – Easy Holiday Dessert
These Peppermint Bark Cheesecake Bars combine a buttery chocolate cookie crust, a creamy peppermint cheesecake filling, and a crackly chocolate topping studded with crushed candy canes. They are easy to make, no water bath required, and perfect for holiday gatherings.
- Prep Time: 20 minutes
- Cook Time: 40 minutes
- Total Time: 5 hours (includes chilling)
- Yield: 24 servings 1x
- Category: Dessert
- Cuisine: American
Ingredients
- 24 chocolate sandwich cookies (like Oreos), crushed into fine crumbs
- 5 tablespoons unsalted butter, melted
- 2 tablespoons granulated sugar
- 24 ounces full-fat cream cheese, softened to room temperature
- 3/4 cup granulated sugar
- 1/2 cup sour cream, room temperature
- 1 teaspoon vanilla extract
- 1/2 teaspoon peppermint extract
- 3 large eggs, room temperature
- 4 drops red food coloring (optional)
- 1 cup semi-sweet chocolate chips
- 1 tablespoon coconut oil
- 6 regular-sized candy canes, crushed
Instructions
- Preheat your oven to 325°F. Line a 9×13-inch baking pan with parchment paper, leaving overhang on the long sides.
- Make the crust: Crush the chocolate sandwich cookies into fine crumbs. In a medium bowl, combine the crumbs, melted butter, and 2 tablespoons sugar. Stir until moistened. Press firmly into the bottom of the prepared pan. Bake for 10 minutes, then set aside to cool slightly.
- Start the cheesecake filling: In a large bowl, beat the softened cream cheese with an electric mixer on medium speed until smooth, about 2 minutes. Scrape down the sides. Add 3/4 cup sugar and beat for another 2 minutes until light and fluffy.
- Mix in the sour cream, vanilla extract, and peppermint extract until combined. Add the eggs one at a time, beating on low speed after each addition just until incorporated. Scrape the bowl well.
- Reserve about 1/2 cup of the plain cheesecake batter in a small bowl. Add red food coloring to this reserved batter and stir until desired shade of pink. Pour the white batter over the crust and smooth the top. Drop spoonfuls of pink batter randomly on top, then gently swirl with a knife or skewer.
- Place the pan on the middle oven rack. Put a separate oven-safe dish filled with hot water on the rack below. Bake for 35 to 40 minutes until edges are set but center still jiggles slightly.
- Turn off the oven, crack the door open, and let the cheesecake sit inside for 30 minutes. Remove and cool completely on a wire rack, about 1 hour. Refrigerate for at least 4 hours, preferably overnight.
- For the topping: Combine chocolate chips and coconut oil in a microwave-safe bowl. Microwave in 30-second intervals, stirring between each, until smooth. Let cool for 2-3 minutes. Pour over chilled cheesecake and spread evenly. Immediately sprinkle crushed candy canes on top, pressing gently.
- Return to refrigerator for at least 30 minutes to set the chocolate. Use parchment overhang to lift the cheesecake out. Slice into bars with a sharp knife, wiping clean between cuts.
Notes
Room temperature ingredients are essential for a smooth cheesecake. Do not overmix after adding eggs. Let chocolate cool slightly before pouring to avoid melting the cheesecake. For clean slices, let bars sit at room temperature for 10 minutes and use a hot, dry knife.
Nutrition
- Serving Size: 1 bar
- Calories: 285
- Sugar: 22
- Sodium: 180
- Fat: 18
- Saturated Fat: 10
- Carbohydrates: 28
- Fiber: 1
- Protein: 5
Keywords: peppermint bark, cheesecake bars, holiday dessert, Christmas dessert, no-bake topping, easy cheesecake