I was digging through a dusty box of old postcards at a flea market last fall—not exactly the place you’d expect to find a life-changing recipe. The woman running the booth, probably in her seventies with flour dusted on her apron, saw me eyeing a set of vintage Christmas cards. She didn’t ask if I wanted to buy them. Instead, she leaned in and said, “You know, the best eggnog I ever made came from a recipe my grandmother scribbled on the back of one of those.” I wasn’t expecting cooking advice from a flea market vendor, but there I was, standing between a stack of chipped teacups and a box of rusty cookie cutters, listening to her describe exactly how to make Quick Homemade Eggnog with Fresh Nutmeg. She told me her secret was skipping the stovetop custard method most people swear by—too fussy, she said, especially when you’re trying to get dinner on the table and the kids are losing their minds. I jotted her notes on a napkin I found in my coat pocket, and honestly, I almost forgot about them until Thanksgiving rolled around. The first time I made it, I burned the milk because I was texting my sister about pie crusts. But even with that little mishap, the flavor was incredible. That’s when I knew this one was special. It’s the kind of recipe that works with your schedule, not against it, and maybe you’ve been there—standing in your kitchen at 9 p.m. on a Tuesday, realizing you promised to bring something to the holiday party tomorrow. This eggnog is for those nights.
Why You’ll Love This Recipe
Let me tell you why this Quick Homemade Eggnog with Fresh Nutmeg has become my go-to for every holiday season. I’ve tested this recipe at least a dozen times—sometimes with whole milk, once accidentally with almond milk (don’t recommend it), and even doubled it for a crowd of twenty. It always delivers, and here’s why you’ll feel the same way:
- Quick & Easy: Comes together in under 10 minutes of active prep, no stovetop stirring required. Perfect for those weeknights when you need something festive but don’t have an hour to babysit a saucepan.
- Simple Ingredients: You probably already have eggs, milk, cream, sugar, and vanilla in your kitchen. The only special purchase is fresh nutmeg, and trust me, it’s worth the 30-second grating effort.
- Perfect for Holiday Prep: This is a make-ahead dream. You can whip it up three days before your party and it only gets better as the flavors meld together in the fridge.
- Crowd-Pleaser: I’ve served this to everyone from my picky seven-year-old nephew to my aunt who claims she “doesn’t like eggnog.” She asked for seconds.
- Unbelievably Delicious: The fresh nutmeg makes all the difference. It’s warm, aromatic, and nothing like that dusty ground stuff from the back of your spice cabinet.
What sets this recipe apart is the technique. Instead of tempering eggs on the stove—which is fussy and easy to mess up—we use a blender to emulsify everything. It’s foolproof, even if you’re distracted by a sink full of dishes or a toddler asking for juice. This isn’t just another eggnog recipe; it’s the one that makes you close your eyes after that first sip and think, “Why didn’t I make this sooner?”
What Ingredients You Will Need
This recipe uses simple, everyday ingredients to create something that tastes way more special than it should. Most of these are pantry staples, especially if you keep a well-stocked kitchen during the holidays. Here’s what you’ll need:
For the Eggnog Base
- 4 large eggs, at room temperature (cold eggs don’t emulsify as well)
- 1/2 cup granulated sugar (you can reduce to 1/3 cup if you prefer less sweet)
- 2 cups whole milk (adds richness—don’t use skim here)
- 1 cup heavy cream (for that luxurious texture)
- 1 teaspoon vanilla extract (use pure, not imitation, if you can)
- 1/2 teaspoon ground cinnamon (I prefer Saigon cinnamon for its warmth)
- 1/4 teaspoon ground cloves (just a pinch—it’s potent)
- 1 whole fresh nutmeg, for grating (you’ll use about 1/2 to 1 teaspoon)
- Pinch of salt (balances the sweetness and brightens flavors)
For Serving (Optional but Recommended)

- Additional fresh nutmeg, for grating on top
- Cinnamon sticks, for garnish
- Whipped cream (because why not?)
- Bourbon, rum, or brandy, if you’re making it adult-friendly (about 1-2 ounces per serving)
I recommend using organic, pasture-raised eggs if you can find them. The yolks are richer and give the eggnog a beautiful golden color. For the milk, I’ve tested this with 2% and it works, but whole milk really gives that velvety mouthfeel you want. If you’re dairy-sensitive, you can substitute oat milk for the milk and coconut cream for the heavy cream—just know the texture will be slightly thinner. Also, don’t skip the salt. I know it sounds weird in a sweet drink, but it makes all the flavors pop. Trust me on this one.
Equipment Needed
You don’t need fancy tools for this recipe, which is exactly why I love it for busy weeknights. Here’s what you’ll need:
- Blender (a standard countertop blender works perfectly; an immersion blender with a whisk attachment also works, but it takes a bit longer to emulsify)
- Fine-mesh strainer (this is non-negotiable—it catches any stray bits of egg white or spice clumps)
- Large mixing bowl or pitcher (for straining and storing)
- Microplane or fine grater (for the fresh nutmeg—a regular box grater works but you’ll get bigger flakes)
- Measuring cups and spoons
- Whisk (for a quick stir before serving)
- Airtight container or glass jar (for storing in the fridge)
If you don’t have a blender, you can whisk everything vigorously by hand, but you’ll want to whisk the eggs and sugar for a good 3-4 minutes until they’re pale and thick before adding the liquids. I’ve done it that way when my blender was in the dishwasher, and it works—it’s just more arm work. Also, a good microplane is worth the investment. I’ve had mine for years and use it for garlic, ginger, citrus zest, and of course, nutmeg. The cheap ones dull quickly and make grating a chore.
Preparation Method
Here’s how to make this Quick Homemade Eggnog with Fresh Nutmeg. The whole process takes about 10 minutes of active time, plus chilling. I’ve broken it down so you can follow along without any hiccups.
- Grate your fresh nutmeg first. Take a whole nutmeg seed and run it across your microplane until you have about 1/2 to 1 teaspoon of freshly grated nutmeg. You’ll know you have enough when you can smell it from arm’s length—that’s how you know it’s fresh. Set it aside. (Pro tip: Grate more than you need and store the extra in a tiny jar for up to a week.)
- Separate your eggs. Crack the eggs and separate the yolks from the whites. You only need the yolks for this recipe. Save the whites for an omelet or meringue cookies later. Place the yolks in your blender pitcher. (If a little bit of white gets in, it’s fine—the strainer will catch any bits later.)
- Blend the yolks and sugar. Add the sugar to the yolks in the blender. Blend on medium speed for about 30 seconds, until the mixture is pale yellow and slightly thickened. You’ll see it lighten in color—that’s the sugar dissolving into the yolks. This step is crucial because it creates the emulsion that makes your eggnog creamy.
- Add the dairy and spices. Pour in the milk, heavy cream, vanilla extract, cinnamon, cloves, the grated nutmeg, and a pinch of salt. Blend on low speed for another 20-30 seconds, just until everything is combined. Don’t over-blend or you’ll incorporate too much air and the texture will be frothy instead of silky.
- Taste and adjust. Here’s where you get to be the boss. Dip a spoon in and taste it. Does it need more sugar? More nutmeg? A tiny bit more salt? Adjust now before you chill it. I usually add an extra pinch of nutmeg because I love that warm, aromatic kick.
- Strain the mixture. Place your fine-mesh strainer over a large bowl or pitcher. Pour the eggnog through the strainer to catch any bits of egg white that snuck in or any clumps of spice. This takes about 30 seconds and makes a huge difference in texture. Use a spatula to gently stir the mixture in the strainer if it’s moving slowly.
- Chill thoroughly. Transfer the strained eggnog to an airtight container or glass jar. Refrigerate for at least 2 hours, but overnight is better. The flavors meld and mellow as it chills—the raw egg taste disappears and the spices become more rounded. I promise, it’s worth the wait.
- Serve with style. When you’re ready to serve, give the eggnog a good stir or whisk (the cream can separate slightly as it sits). Pour into glasses, grate fresh nutmeg on top, and add a cinnamon stick for garnish. If you’re adding alcohol, stir it in just before serving.
A quick note: If you’re nervous about using raw eggs, use pasteurized eggs from the grocery store. They’re heated to kill bacteria without cooking the egg. I’ve been making this recipe for years without any issues, but I always recommend pasteurized eggs for anyone with a compromised immune system, pregnant women, or the elderly.
Cooking Tips & Techniques
I’ve made this Quick Homemade Eggnog with Fresh Nutmeg enough times to learn a few things the hard way. Here are my best tips so you don’t have to repeat my mistakes:
Don’t skip the straining step. I know it’s an extra dish to wash, but the first time I made this, I thought I could skip it. Big mistake. There were tiny bits of cooked egg white (from the blender blades heating up) floating in my eggnog, and the texture was grainy. The strainer catches all of that and gives you that velvety smoothness that makes homemade eggnog so much better than store-bought.
Grate your nutmeg fresh every time. I cannot stress this enough. Pre-ground nutmeg loses its volatile oils within weeks and tastes like dusty cardboard. Fresh nutmeg has a bright, piney, almost citrusy aroma that transforms this drink. I keep whole nutmegs in a little jar in my spice drawer and they last for months. A single nutmeg will make several batches of this recipe.
Let it rest overnight for best flavor. I know the “quick” in the title might make you want to serve it immediately, but trust me on this. The raw egg taste that some people find off-putting completely disappears after 12-24 hours in the fridge. The spices also have time to marry and mellow. I always make mine the day before I plan to serve it.
If you’re adding alcohol, do it at serving time. Don’t add booze to the whole batch unless you’re sure everyone wants it. I’ve made that mistake—half my guests wanted virgin eggnog and the other half wanted spiked. Now I keep the base plain and let people customize their own glass. Bourbon, dark rum, and brandy all work beautifully. My personal favorite is bourbon—its vanilla notes complement the nutmeg perfectly.
Temperature matters. This eggnog is meant to be served cold, but don’t pour it straight from the fridge if it’s been sitting for more than a day. Give it a good stir first because the cream can thicken and separate slightly. If it’s too thick, you can thin it with a splash of milk. And don’t serve it over ice—that waters down the flavor. Just pour it straight up into chilled glasses.
Variations & Adaptations
One of the best things about this Quick Homemade Eggnog with Fresh Nutmeg is how easy it is to adapt. Here are some variations I’ve tried and loved:
Dairy-Free Version: Substitute the whole milk with full-fat oat milk or cashew milk, and use canned coconut cream instead of heavy cream. The coconut flavor is subtle and actually complements the spices nicely. I made this for a friend who’s lactose intolerant and she said it was the best eggnog she’d had in years. Just know it will be slightly thinner than the original.
Spiced Chai Eggnog: Steep two chai tea bags in the milk for 5 minutes before blending (let it cool first). The chai spices—cardamom, ginger, cinnamon—add another layer of warmth that’s incredible with the fresh nutmeg. I tried this on a whim one December afternoon and now it’s my secret holiday party trick.
Vegan Option: Use silken tofu as the base instead of eggs. Blend 1 block (12-14 ounces) of silken tofu with the milk, cream alternatives, sugar, and spices until completely smooth. It sounds weird, I know, but the texture is surprisingly close to traditional eggnog. You’ll need to add a bit more sweetener since tofu is neutral.
Pumpkin Spice Eggnog: Add 1/4 cup pumpkin puree and an extra 1/2 teaspoon pumpkin pie spice to the blender. This turns your eggnog into a fall-inspired treat that’s perfect for Thanksgiving or cozy October nights. I made this last year when I had leftover pumpkin puree and it was a hit.
Lower-Sugar Version: Reduce the sugar to 1/4 cup and add 2 tablespoons of maple syrup or honey. The maple flavor pairs beautifully with the nutmeg and cinnamon. You can also use a monk fruit sweetener if you’re watching your sugar intake, but start with less—it’s sweeter than sugar.
Serving & Storage Suggestions
This eggnog is best served cold, straight from the fridge, in small glasses or mugs. I like to use punch cups or small mason jars for a rustic look. Grate a little fresh nutmeg on top of each serving right before you bring it to the table—the aroma is intoxicating and tells your guests something special is coming.
For presentation, I sometimes add a cinnamon stick as a stirrer and a dollop of lightly sweetened whipped cream. If I’m feeling fancy, I’ll rim the glasses with a mixture of cinnamon and sugar. Just dip the rim in a little water or egg white, then into the cinnamon-sugar mix. It adds a nice touch and a little extra sweetness with each sip.
Storage: Keep your eggnog in an airtight container in the refrigerator for up to 4 days. The flavor actually improves after the first day as the spices meld. Before serving each time, give it a good stir because the cream can separate slightly. Do not freeze this eggnog—the texture will become grainy and watery when thawed.
Reheating Note: This recipe is designed to be served cold, but if you want a warm version, gently heat it in a saucepan over low heat, stirring constantly. Do not boil it or you’ll scramble the eggs. I’ve done this on chilly winter mornings and it’s like drinking a hug. Add a shot of bourbon and it’s basically dessert for breakfast. No judgment here.
Nutritional Information & Benefits
Here’s the honest truth about this Quick Homemade Eggnog with Fresh Nutmeg: it’s a treat, not a health food. But that doesn’t mean it’s empty calories. Here’s what you’re getting in each serving (based on 6 servings, without alcohol):
- Calories: Approximately 290 per 6-ounce serving
- Protein: 6 grams (from the eggs and milk)
- Fat: 20 grams (mostly from the cream and egg yolks)
- Carbohydrates: 22 grams (mostly from sugar)
- Calcium: 15% of your daily needs (from the milk)
- Vitamin D: 10% of your daily needs (from the eggs and fortified milk)
The eggs provide high-quality protein and choline, which is important for brain health. Fresh nutmeg contains antioxidants and has been used in traditional medicine for its anti-inflammatory properties. The cinnamon can help regulate blood sugar levels. Of course, the heavy cream and sugar mean this isn’t something you’d drink every day, but as a holiday indulgence, it’s a delightful way to treat yourself. If you’re watching your sugar intake, use the reduced-sugar variation I mentioned earlier. And if you have a nut allergy, note that this recipe is naturally nut-free as written.
Conclusion
So there you have it—my favorite Quick Homemade Eggnog with Fresh Nutmeg, born from a flea market conversation and perfected through a few happy accidents in my kitchen. This recipe has become a December staple in my house, and I genuinely look forward to making it every year. It’s quick enough for a Tuesday night, special enough for a holiday party, and forgiving enough for even the most distracted cook (trust me, I’ve tested that theory).
I hope you give it a try and make it your own. Maybe you’ll add a pinch of cardamom like my friend Sarah does, or serve it warm on a snowy evening. However you customize it, I’d love to hear about it. Leave a comment below and tell me how your eggnog turned out—did you add bourbon? Try the dairy-free version? Forget to strain it and learn the hard way like I did? Share your stories, your photos, and your adaptations. That’s what makes cooking so beautiful—everyone brings their own twist. Now go make some eggnog and enjoy every single sip. You deserve it.
Frequently Asked Questions
Can I make this eggnog without a blender?
Absolutely. You can whisk the egg yolks and sugar by hand for 3-4 minutes until pale and thick, then slowly whisk in the remaining ingredients. The texture might be slightly less smooth, but it will still taste delicious. Just be sure to strain it well.
How far ahead can I make this eggnog?
You can make it up to 4 days in advance. The flavor actually improves after the first day as the spices meld and the raw egg taste fades. Store it in an airtight container in the refrigerator and give it a good stir before serving.
Is it safe to use raw eggs in this recipe?
If you’re concerned about raw eggs, use pasteurized eggs from the grocery store. They are heated to kill bacteria without cooking the egg. For anyone with a compromised immune system, pregnant women, young children, or the elderly, pasteurized eggs are recommended.
Can I freeze homemade eggnog?
I don’t recommend freezing this eggnog. The texture becomes grainy and watery when thawed because the dairy and eggs separate. It’s best to make it fresh and enjoy it within 4 days.
What’s the best alcohol to add to this eggnog?
Bourbon, dark rum, and brandy are all excellent choices. Bourbon adds a lovely vanilla note that complements the nutmeg, while dark rum brings a subtle molasses sweetness. Add about 1-2 ounces per serving, stirred in just before serving.
Pin This Recipe!
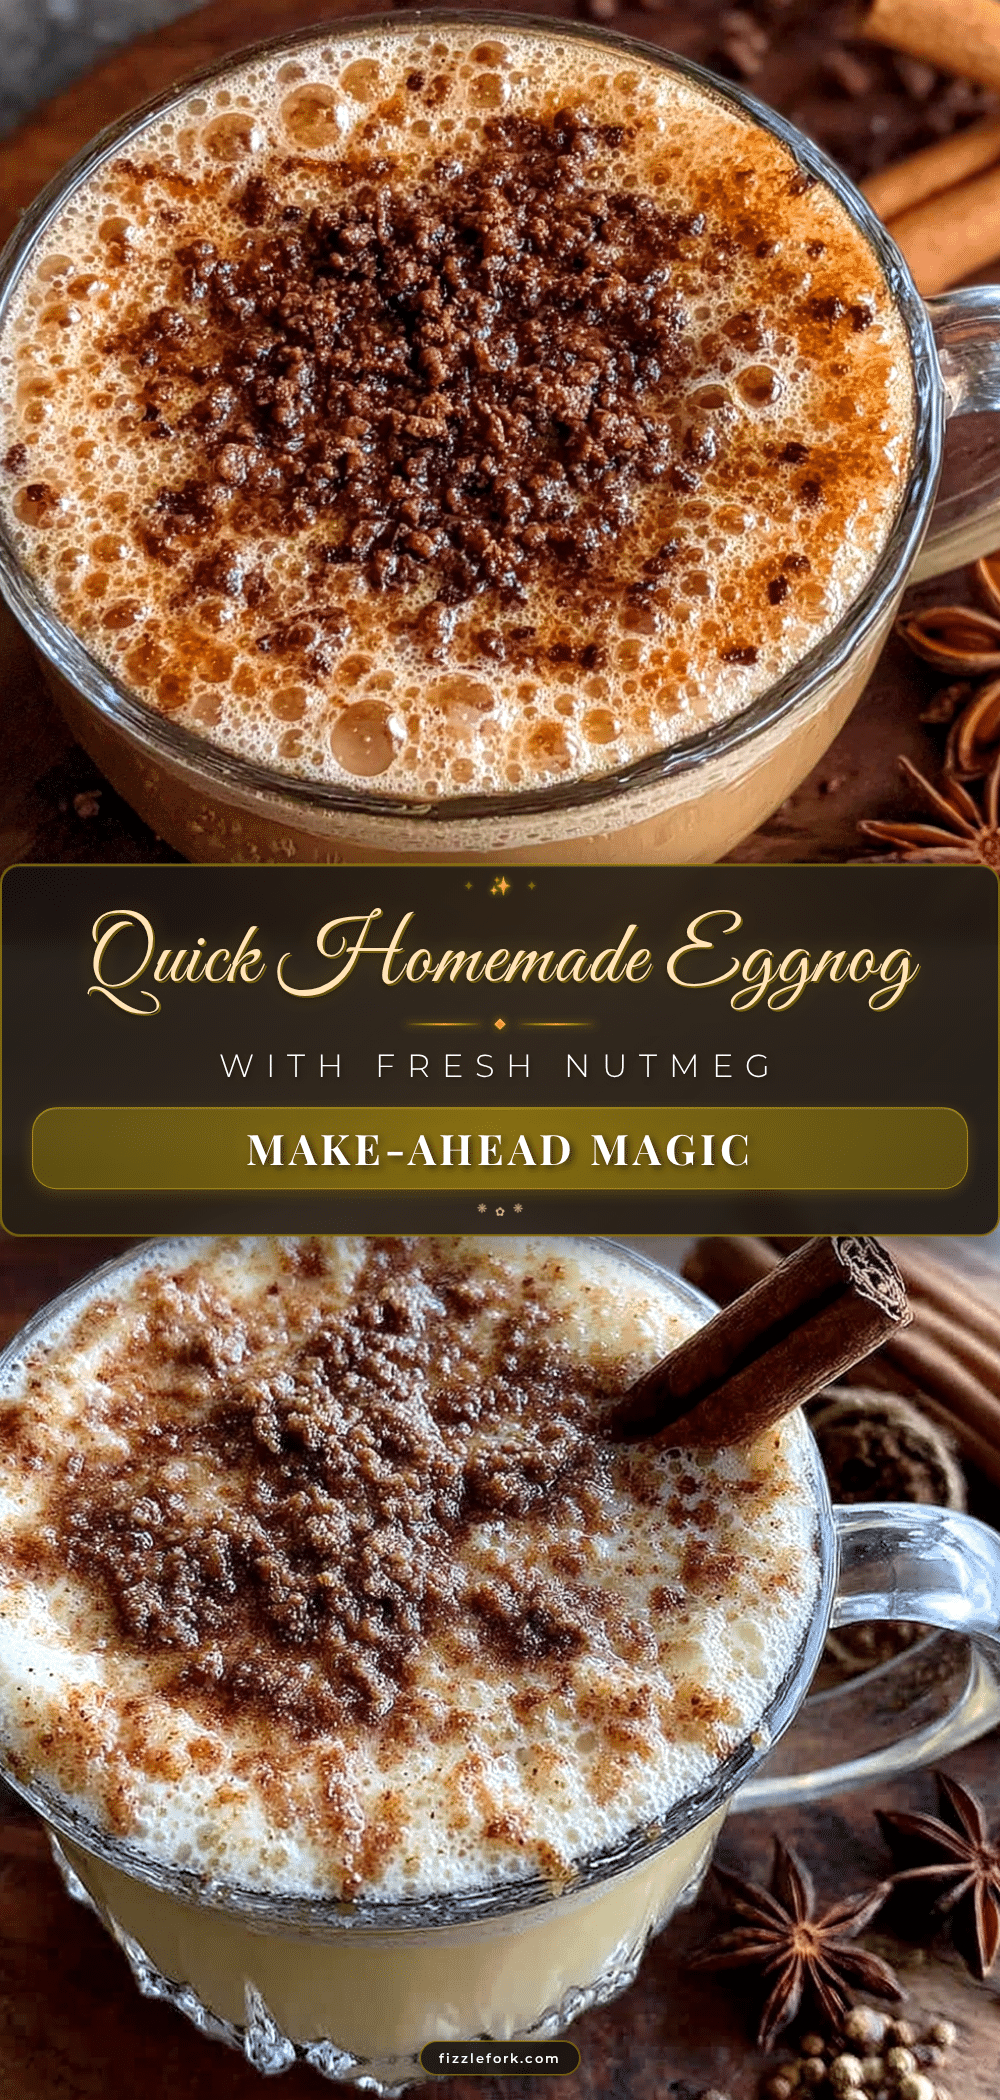
Quick Homemade Eggnog with Fresh Nutmeg

A quick and easy homemade eggnog recipe that comes together in under 10 minutes of active prep, no stovetop stirring required. Made with fresh nutmeg and simple ingredients, this make-ahead holiday drink is perfect for busy weeknights and festive gatherings.
- Prep Time: 10 minutes
- Cook Time: 0 minutes
- Total Time: 2 hours 10 minutes (includes chilling time)
- Yield: 6 servings 1x
- Category: Beverage
- Cuisine: American
Ingredients
- 4 large eggs, at room temperature
- 1/2 cup granulated sugar (can reduce to 1/3 cup)
- 2 cups whole milk
- 1 cup heavy cream
- 1 teaspoon vanilla extract (pure preferred)
- 1/2 teaspoon ground cinnamon (Saigon preferred)
- 1/4 teaspoon ground cloves
- 1 whole fresh nutmeg (for grating, about 1/2 to 1 teaspoon)
- Pinch of salt
- Additional fresh nutmeg for garnish (optional)
- Cinnamon sticks for garnish (optional)
- Whipped cream for serving (optional)
- Bourbon, rum, or brandy for adult version (optional, 1-2 ounces per serving)
Instructions
- Grate fresh nutmeg using a microplane until you have about 1/2 to 1 teaspoon. Set aside.
- Separate eggs, placing only the yolks in the blender pitcher. Save whites for another use.
- Add sugar to the yolks in the blender. Blend on medium speed for about 30 seconds until pale yellow and slightly thickened.
- Add milk, heavy cream, vanilla extract, cinnamon, cloves, grated nutmeg, and a pinch of salt. Blend on low speed for 20-30 seconds until combined. Do not over-blend.
- Taste and adjust sweetness or spices as desired.
- Place a fine-mesh strainer over a large bowl or pitcher. Pour the eggnog through the strainer to catch any bits of egg white or spice clumps.
- Transfer strained eggnog to an airtight container. Refrigerate for at least 2 hours, preferably overnight.
- Before serving, stir or whisk the eggnog. Pour into glasses, garnish with fresh grated nutmeg and a cinnamon stick. Add alcohol if desired just before serving.
Notes
For best flavor, let the eggnog rest overnight in the refrigerator. The raw egg taste disappears and spices meld. Use pasteurized eggs if concerned about raw eggs. Do not freeze. For a warm version, gently heat on low, stirring constantly, but do not boil. Add alcohol per serving, not to the whole batch.
Nutrition
- Serving Size: 6 ounces
- Calories: 290
- Sugar: 20
- Sodium: 80
- Fat: 20
- Saturated Fat: 12
- Carbohydrates: 22
- Protein: 6
Keywords: homemade eggnog, quick eggnog, fresh nutmeg eggnog, holiday drink, make-ahead eggnog, Christmas eggnog, easy eggnog recipe


