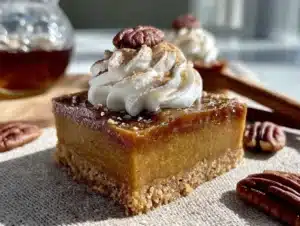
I was standing in the checkout line at the hardware store last October—of all places—when the woman ahead of me unloaded her cart and a wave of cinnamon and nutmeg hit me from her bag of pumpkin-shaped candles. And suddenly I was eight years old, sitting cross-legged on my neighbor Mrs. Kowalski’s linoleum kitchen floor, watching her roll out dough with a bottle she used because her rolling pin handle had snapped off years ago. She’d let me press my thumb into the scraps. I’d forgotten that. Completely forgotten her. But the smell unlocked it all—the way she hummed off-key, the chipped yellow bowl she mixed everything in, and the pumpkin bars she’d slide across the counter with a wink. “These don’t need a pie plate,” she’d say. “That’s the whole point.” I bought a bag of sugar that day instead of the lightbulbs I came for, went home, and started trying to remember what those bars tasted like. This is as close as I’ve gotten. Honestly, I think she’d approve of the shortcut.
Why You’ll Love This Recipe
Let me be real with you—I’ve tested this recipe on a Tuesday night after a full day of work, and it worked. No rolling pins, no pie weights, no blind baking. That’s the whole point, just like Mrs. Kowalski said.
- Quick & Easy : You’re looking at about 15 minutes of active prep. The oven does the rest. From start to finish, you’re about an hour away from pumpkin pie bars that taste like you spent all afternoon on them.
- Simple Ingredients : Butter, flour, sugar, pumpkin puree, eggs, and pantry spices. That’s it. No trip to a specialty store. No hunting for obscure ingredients.
- Perfect for Weeknights : These bars are made for the kind of evening where you still want something homemade but don’t have the energy for a full production. They’re also great for Thanksgiving if you want one less pie to roll out.
- Crowd-Pleaser : I brought these to a potluck last month and three people asked for the recipe before I’d even set the plate down. Kids love the bar format. Adults love the buttery crust.
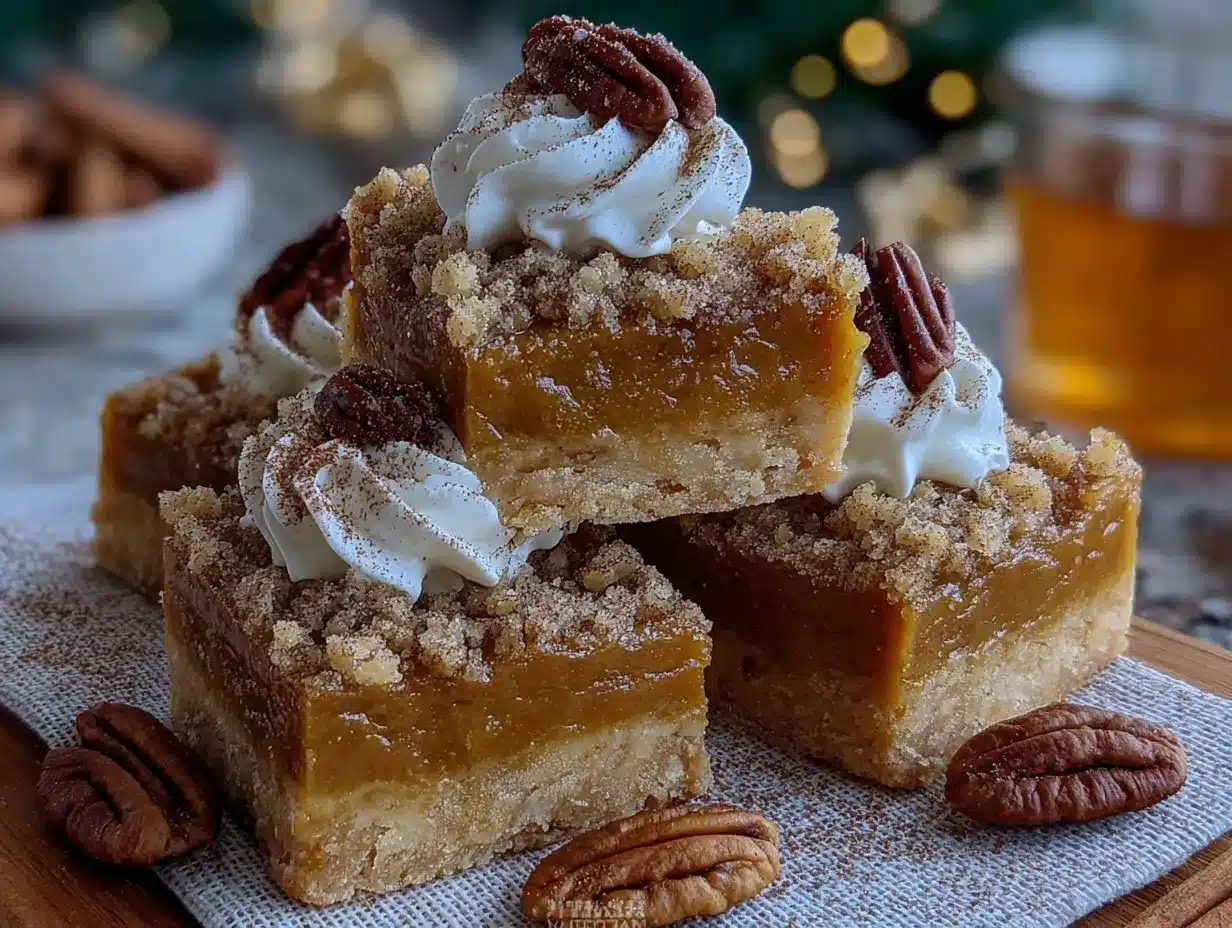
- Unbelievably Delicious : The shortbread crust is the secret weapon here. It’s crisp, buttery, and sturdy enough to hold the pumpkin filling without getting soggy. The filling itself is silky and spiced just right—not too sweet, not too heavy.
This isn’t just another pumpkin dessert. It’s the one that makes you close your eyes after the first bite, because it tastes exactly like fall should taste, but without the hassle of a traditional pie.
What Ingredients You Will Need
This recipe uses simple, honest ingredients that most of you probably already have in your kitchen. The magic comes from how they work together—the buttery crust supporting the creamy, spiced filling.
For the Buttery Shortbread Crust
- 1 ½ cups all-purpose flour (I prefer Gold Medal for consistent results)
- ½ cup powdered sugar (not granulated—powdered sugar gives the crust that melt-in-your-mouth texture)
- ¾ cup cold unsalted butter, cut into small cubes (Kerrygold is my go-to, but any good butter works)
- ¼ teaspoon salt (fine sea salt, not kosher for this one)
For the Pumpkin Filling
- 1 can (15 oz) pumpkin puree (not pumpkin pie filling—make sure it’s 100% pumpkin. Libby’s is reliable)
- ¾ cup granulated sugar
- ¼ cup packed light brown sugar (adds moisture and a hint of molasses depth)
- 2 large eggs, room temperature (cold eggs can make the filling seize up a bit)
- 1 cup heavy cream (you can substitute half-and-half in a pinch, but the filling won’t be as silky)
- 1 teaspoon vanilla extract (pure, not imitation, if you have it)
- 1 ½ teaspoons ground cinnamon
- ½ teaspoon ground ginger
- ½ teaspoon ground nutmeg (freshly grated if you’re feeling fancy)
- ¼ teaspoon ground cloves
- ¼ teaspoon salt
A quick note on the spices—I’ve seen recipes call for pumpkin pie spice, and you can use 2 teaspoons of that instead of the individual spices if that’s what you have. But honestly, mixing your own gives you more control. I like a little extra ginger in mine. It cuts through the richness.
For the butter, make sure it’s cold. That’s non-negotiable for a good shortbread crust. If your butter is too soft, the crust will spread and lose its structure. You want those little pea-sized chunks of butter throughout the flour mixture. That’s what creates the flaky, tender texture.
Equipment Needed
You don’t need much for these pumpkin pie bars, which is part of the appeal. Here’s what you’ll need:
- A 9×13-inch baking pan (metal or glass both work, but metal gives a crisper crust)
- Parchment paper (trust me on this—it makes lifting the bars out so much easier)
- A food processor or pastry cutter (I use my food processor because it’s faster, but a pastry cutter and a bowl work fine)
- A large mixing bowl
- A whisk
- A spatula
- A fork (for pricking the crust)
If you don’t have a food processor, don’t worry. I made these bars for years using just my hands and a pastry cutter. The key is to work quickly so the butter doesn’t warm up. If you’re using your hands, run them under cold water first.
One thing I’ve learned the hard way—use good parchment paper. The cheap stuff can stick or tear when you’re trying to lift the bars out. I splurge on the pre-cut sheets with the wire edge. They fit perfectly in a 9×13 pan.
Preparation Method
Alright, let’s make these pumpkin pie bars. I’ve broken this down so you can move through it without stress. The whole thing takes about 15 minutes of active work.
- Preheat your oven to 350°F (175°C). Line your 9×13-inch baking pan with parchment paper, leaving some overhang on the long sides. This creates handles so you can lift the bars out later. Lightly spray the parchment with non-stick spray, just to be safe.
- Make the shortbread crust. In a food processor, combine the flour, powdered sugar, and salt. Pulse a few times to mix. Add the cold butter cubes and pulse until the mixture looks like coarse meal with some pea-sized butter pieces still visible. Don’t over-process—you want some texture. If you’re doing this by hand, cut the butter into the flour mixture using a pastry cutter until you get the same consistency.
- Press the crust into the pan. Dump the crust mixture into your prepared pan. Press it down firmly and evenly. I use the bottom of a measuring cup to get it flat. Make sure you press into the corners too. Prick the crust all over with a fork—this prevents it from puffing up while it bakes.
- Bake the crust. Bake for 15-18 minutes, until the edges are just starting to turn golden. The center will still look pale. That’s fine. Let it cool on a wire rack for 10 minutes while you make the filling. Don’t turn off the oven.
- Make the pumpkin filling. In a large bowl, whisk together the pumpkin puree, granulated sugar, and brown sugar until smooth. Add the eggs one at a time, whisking well after each. Pour in the heavy cream and vanilla extract, and whisk until everything is combined and silky.
- Add the spices. Sprinkle the cinnamon, ginger, nutmeg, cloves, and salt over the filling. Whisk until fully incorporated. Taste the filling—yes, it’s safe to taste raw as long as you’re using pasteurized eggs. Adjust the spices if you want more kick. I usually add a pinch more ginger here.
- Pour the filling over the crust. Pour the pumpkin filling over the pre-baked crust. Gently tilt the pan to spread it evenly, or use a spatula. Don’t pour too fast or you’ll disturb the crust.
- Bake the bars. Bake for 40-45 minutes, until the filling is set around the edges but still slightly jiggly in the center. It should look matte, not shiny. A knife inserted an inch from the center should come out mostly clean. The center will continue to set as it cools.
- Cool completely. This is the hardest part. Let the bars cool on a wire rack for at least 1 hour at room temperature, then refrigerate for at least 2 hours before cutting. I know you want to dig in immediately, but the bars need this time to set properly. If you cut them too soon, the filling will be runny.
- Cut and serve. Use the parchment handles to lift the bars out of the pan. Place on a cutting board and slice into squares. I usually get 12-16 bars depending on how big you want them. Wipe your knife clean between cuts for neat edges.
Cooking Tips & Techniques
I’ve made these pumpkin pie bars more times than I can count, and I’ve definitely made my share of mistakes. Here’s what I’ve learned:
Don’t skip the pre-bake on the crust. I tried skipping this once because I was in a hurry. Big mistake. The crust came out soggy and the bottom never fully crisped. That 15-minute pre-bake is what gives you that sturdy, buttery base that actually holds up to the filling.
Watch your oven temperature. Ovens run hot or cold more often than you’d think. I keep an oven thermometer inside mine because I’ve learned the hard way that 350°F on the dial isn’t always 350°F inside. If your bars are browning too fast on top but still jiggly in the center, tent them loosely with foil for the last 10 minutes.
Room temperature eggs matter. I know it’s tempting to use eggs straight from the fridge, but cold eggs can make your filling lumpy and affect the texture. Leave them on the counter for 30 minutes before you start, or put them in a bowl of warm water for 5 minutes.
Press the crust firmly. Loose crust means crumbly bars that fall apart when you try to pick them up. Use the bottom of a glass or measuring cup to really compact it. I press until the surface looks smooth and uniform.
Let them cool completely. I cannot stress this enough. I once cut into these bars after just an hour because I couldn’t wait, and the filling oozed out like a sad pudding. Patience pays off here. The overnight chill in the fridge is even better if you can plan ahead.
Variations & Adaptations
One of the best things about these pumpkin pie bars is how adaptable they are. Here are some variations I’ve tried and loved:
Gluten-Free Version
Swap the all-purpose flour for a 1:1 gluten-free baking flour blend. I’ve used Bob’s Red Mill and King Arthur Measure for Measure with great results. The texture is slightly more delicate, so press the crust firmly and let it cool completely before cutting.
Dairy-Free Version
Use cold vegan butter in the crust (I like Miyoko’s) and replace the heavy cream with full-fat coconut cream. The coconut flavor is subtle and actually pairs beautifully with the pumpkin spices. Just make sure you use the thick part of the coconut cream, not the watery liquid.
Spiced-Up Version
Add a pinch of cayenne pepper or chipotle powder to the filling for a warm, smoky kick. I tried this on a whim last year and it was surprisingly good. The heat balances the sweetness without being overwhelming.
Maple Pumpkin Bars
Replace the granulated sugar with maple sugar and add 2 tablespoons of maple syrup to the filling. Reduce the heavy cream by 2 tablespoons to compensate for the extra liquid. The maple flavor deepens the fall vibes in a really nice way.
Chocolate Drizzle
After the bars have cooled and set, drizzle melted dark chocolate over the top. Let it set before cutting. The bitterness of the dark chocolate cuts through the sweetness of the pumpkin filling. I did this for a holiday party and they disappeared first.
Serving & Storage Suggestions
These pumpkin pie bars are best served cold or at room temperature. I actually prefer them straight from the fridge—the filling firms up beautifully and the crust stays crisp.
Serving ideas: Top each bar with a dollop of whipped cream and a sprinkle of cinnamon. For a more decadent treat, add a scoop of vanilla ice cream and a drizzle of caramel sauce. I’ve also served them with a side of warm apple cider for a cozy fall dessert.
Storage: Keep the bars in an airtight container in the refrigerator for up to 5 days. Layer them with parchment paper between each layer so they don’t stick together. The flavor actually improves after a day or two as the spices meld together.
Freezing: These freeze beautifully. Cut the bars into squares, place them on a baking sheet in a single layer, and freeze until solid (about 2 hours). Then transfer to a freezer-safe container or zip-top bag. They’ll keep for up to 3 months. Thaw in the refrigerator overnight before serving.
Reheating: If you prefer warm bars, microwave individual squares for 15-20 seconds. Don’t overdo it or the crust will get soft. Alternatively, warm them in a 300°F oven for 5-7 minutes.
Nutritional Information & Benefits
Here’s the nutritional breakdown for one bar (based on 12 servings):
- Calories: 320
- Fat: 18g
- Carbohydrates: 38g
- Fiber: 2g
- Sugar: 24g
- Protein: 4g
Pumpkin is packed with vitamin A (over 200% of your daily needs in one serving), which is great for eye health and immune function. The fiber in pumpkin also helps with digestion and keeps you feeling full longer.
The shortbread crust adds some indulgence, but the bars are portion-controlled—one square is plenty satisfying. If you’re watching your sugar intake, you can reduce the granulated sugar to ½ cup without affecting the texture too much.
Dietary notes: These bars contain gluten, dairy, and eggs. For gluten-free or dairy-free options, check the variations section above. They’re not suitable for a vegan diet as written, but the dairy-free version gets close.
Conclusion
These quick pumpkin pie bars have become my go-to fall dessert for a reason. They deliver everything I love about pumpkin pie—the silky filling, the warm spices, that nostalgic taste of autumn—but without the fuss of rolling out dough or worrying about a soggy bottom crust.
The buttery shortbread crust is the real star here. It’s sturdy enough to hold up to the filling, crisp enough to add texture, and so simple to make that you’ll wonder why you ever bothered with traditional pie crust.
I hope these bars become a tradition in your kitchen the way they have in mine. Whether you’re making them for a weeknight treat, a holiday gathering, or just because the air has that crisp fall smell, they never disappoint.
If you try these pumpkin pie bars, I’d love to hear how they turned out. Leave a comment below and let me know if you added your own twist. And if you’re looking for more easy fall desserts, check out my recipe for apple cider donut cake—it’s another weeknight winner that comes together fast.
Happy baking, friends. And maybe buy a few extra lightbulbs while you’re at the hardware store.
Frequently Asked Questions
Can I use pumpkin pie filling instead of pumpkin puree?
No, don’t do that. Pumpkin pie filling already has sugar and spices added, so your bars will come out too sweet and the spice balance will be off. Stick with 100% pumpkin puree for the best results.
Why did my crust turn out soggy?
This usually happens when the crust isn’t pre-baked long enough, or when the filling is poured over the crust while it’s still too hot. Let the crust cool for at least 10 minutes after pre-baking before adding the filling.
Can I make these bars ahead of time?
Absolutely. These bars actually taste better the next day. Make them a day ahead, let them cool completely, and store them in the refrigerator. They’ll be perfectly set and the flavors will have melded together beautifully.
How do I know when the bars are done baking?
The edges should look set and matte, while the center will still have a slight jiggle. A knife inserted about an inch from the center should come out mostly clean. The center will continue to set as the bars cool.
Can I use a different size pan?
You can use an 8×8-inch pan for thicker bars, but you’ll need to increase the baking time by about 10-15 minutes. A 9×13-inch pan gives you the best ratio of crust to filling and the most even baking.
Pin This Recipe!
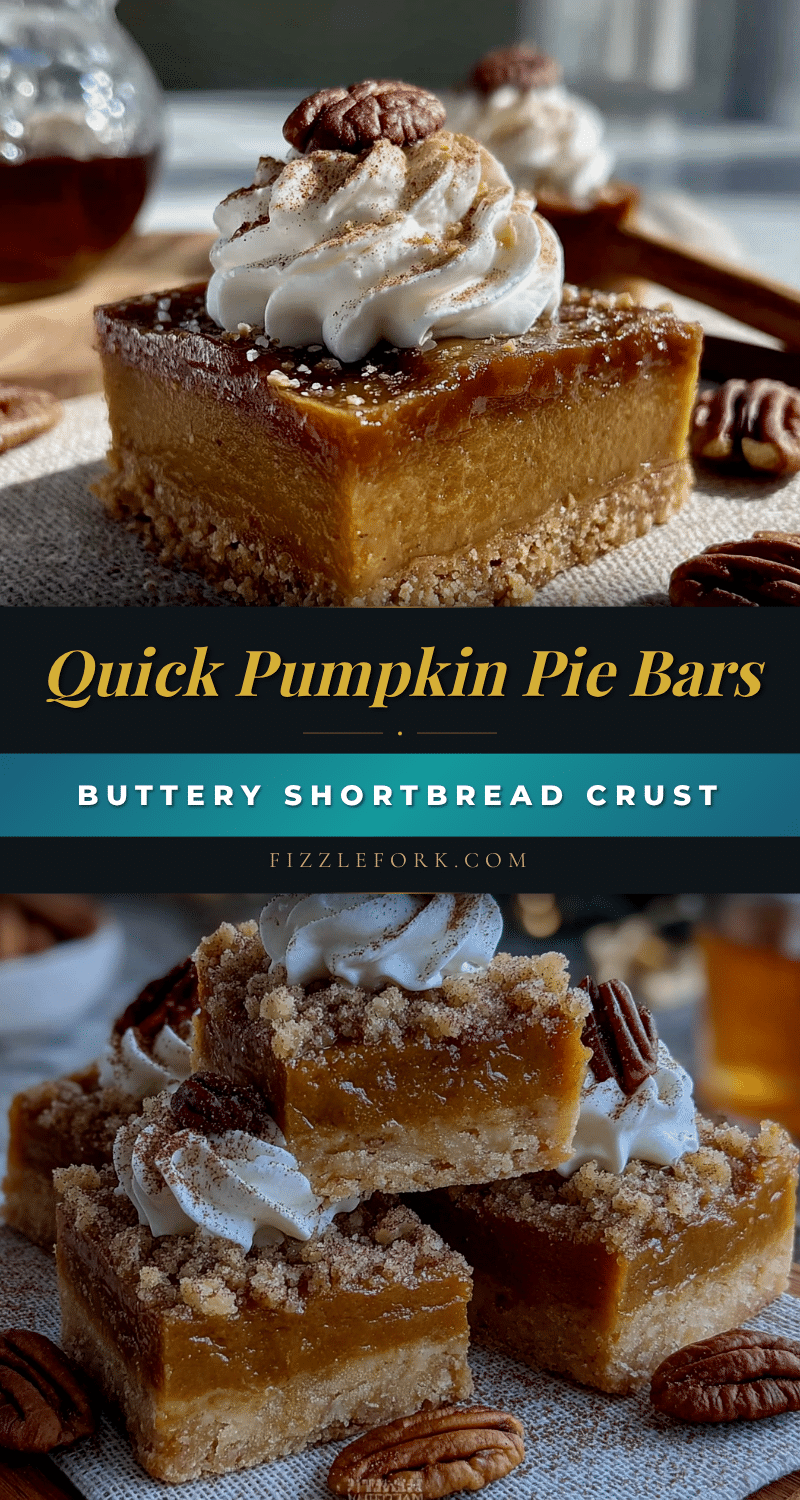
Quick Pumpkin Pie Bars with Easy Shortbread Crust
These quick pumpkin pie bars deliver all the flavor of traditional pumpkin pie without the fuss of rolling out dough. A buttery shortbread crust supports a silky, spiced pumpkin filling for an easy weeknight dessert that tastes like fall.
- Prep Time: 15 minutes
- Cook Time: 55 minutes
- Total Time: 1 hour 10 minutes
- Yield: 12 servings 1x
- Category: Dessert
- Cuisine: American
Ingredients
- 1 ½ cups all-purpose flour
- ½ cup powdered sugar
- ¾ cup cold unsalted butter, cut into small cubes
- ¼ teaspoon fine sea salt
- 1 can (15 oz) pumpkin puree (not pumpkin pie filling)
- ¾ cup granulated sugar
- ¼ cup packed light brown sugar
- 2 large eggs, room temperature
- 1 cup heavy cream
- 1 teaspoon vanilla extract
- 1 ½ teaspoons ground cinnamon
- ½ teaspoon ground ginger
- ½ teaspoon ground nutmeg
- ¼ teaspoon ground cloves
- ¼ teaspoon salt
Instructions
- Preheat your oven to 350°F (175°C). Line a 9×13-inch baking pan with parchment paper, leaving overhang on the long sides. Lightly spray the parchment with non-stick spray.
- Make the shortbread crust: In a food processor, combine flour, powdered sugar, and salt. Pulse to mix. Add cold butter cubes and pulse until mixture looks like coarse meal with some pea-sized butter pieces. Do not over-process.
- Press the crust mixture firmly and evenly into the prepared pan. Use the bottom of a measuring cup to flatten. Prick the crust all over with a fork.
- Bake the crust for 15-18 minutes, until edges are just starting to turn golden. Let cool on a wire rack for 10 minutes. Keep oven on.
- Make the pumpkin filling: In a large bowl, whisk together pumpkin puree, granulated sugar, and brown sugar until smooth. Add eggs one at a time, whisking well after each. Pour in heavy cream and vanilla extract, whisk until combined and silky.
- Sprinkle cinnamon, ginger, nutmeg, cloves, and salt over the filling. Whisk until fully incorporated.
- Pour the pumpkin filling over the pre-baked crust. Gently tilt the pan to spread evenly.
- Bake for 40-45 minutes, until filling is set around the edges but still slightly jiggly in the center. A knife inserted an inch from the center should come out mostly clean.
- Cool completely on a wire rack for at least 1 hour at room temperature, then refrigerate for at least 2 hours before cutting.
- Use parchment handles to lift bars out of the pan. Place on a cutting board and slice into squares. Wipe knife clean between cuts for neat edges.
Notes
Don’t skip pre-baking the crust to avoid sogginess. Use room temperature eggs for a smooth filling. Let bars cool completely before cutting to ensure clean slices. For best results, refrigerate overnight.
Nutrition
- Serving Size: 1 bar
- Calories: 320
- Sugar: 24
- Sodium: 180
- Fat: 18
- Saturated Fat: 11
- Carbohydrates: 38
- Fiber: 2
- Protein: 4
Keywords: pumpkin pie bars, shortbread crust, easy pumpkin dessert, fall dessert, weeknight dessert, Thanksgiving dessert