The neighborhood Halloween party was in six hours and I’d completely forgotten. Everyone else would be bringing elaborate themed treats — I saw a neighbor hauling in a three-tiered cake shaped like a haunted mansion, for crying out loud. I had a carton of eggs, some sugar I’d meant to turn into caramel, and absolutely no plan. Honestly, I stood in my kitchen staring at the pantry like it owed me an answer. Then I remembered these ghost meringue cookies I’d seen on a baking blog years ago. The idea felt almost too simple — egg whites, sugar, and a little patience. No flour, no butter, no complicated frosting. I figured I’d give it a shot and at least show up with something semi-respectable. Let me tell you, the panic was real. I mean, my kitchen looked like a tiny tornado had hit it by the time I was done, and I may or may not have gotten a little powdered sugar on my ceiling fan. But those little ghosts? They turned out impossibly cute. And the best part? They disappeared before the haunted mansion cake even got sliced. That’s the thing about these spooky ghost meringue cookies with chocolate eyes — they look like you fussed, but they’re secretly the easiest thing you’ll make all season. Maybe you’ve been there, scrambling for a last-minute Halloween treat. Trust me, this is your recipe.
Why You’ll Love This Recipe
Let me be real with you — I’ve tested this recipe about seven times to get the texture just right. Not because it’s hard, but because I wanted to make sure the meringue was crisp on the outside, slightly chewy in the middle, and stable enough to hold those adorable chocolate eyes without cracking. After all those batches (and a few sad, flat ghosts), I can confidently say this version works every single time.
- Quick & Easy : From start to finish, these come together in about 90 minutes — most of that is hands-off baking time. The active prep is maybe 15 minutes.
- Simple Ingredients : You need four things. That’s it. Eggs, sugar, vanilla, and chocolate chips for the eyes. No weird specialty items.
- Perfect for Halloween : These are the star of any spooky spread — classroom parties, office potlucks, or just a fun weekend project with the kids.
- Crowd-Pleaser : They’re gluten-free, dairy-free, and low-fat, so pretty much everyone can enjoy them. I’ve seen kids and adults alike grab three at a time.
- Unbelievably Delicious : Light as air with a sweet vanilla flavor and that satisfying crunch-crumbly texture. The chocolate eyes add just enough richness to balance the sweetness.
What makes these different from every other meringue cookie recipe out there? It’s the technique. I whip the egg whites to a specific stiff-peak stage that ensures your ghosts hold their shape and don’t deflate in the oven. Plus, I’ve figured out the perfect piping motion to get that wobbly, ghost-like silhouette — not too perfect, not too blobby. This isn’t just another version; it’s the one that actually works on the first try.
These cookies are the kind that make you smile after the first bite. They’re playful, nostalgic, and somehow both elegant and silly at the same time. Perfect for impressing at a party without any stress, or turning a regular October afternoon into something magical.
What Ingredients You Will Need
This recipe uses the most basic baking staples to create something that feels special. The magic is all in the technique, not the grocery list. Here’s what you’ll need:
For the Meringue Ghosts
- 3 large egg whites, at room temperature (this is crucial — cold eggs won’t whip up as high)
- 3/4 cup (150g) granulated sugar (use superfine if you can find it, but regular works fine)
- 1/4 teaspoon cream of tartar (stabilizes the meringue — don’t skip it)
- 1/2 teaspoon vanilla extract (pure, not imitation, for the best flavor)
For the Chocolate Eyes
- 1/4 cup (45g) semi-sweet chocolate chips (I prefer Ghirardelli or Guittard for smooth melting)
- 1/2 teaspoon coconut oil or vegetable shortening (optional, but helps the chocolate set shiny)
Ingredient Selection Tips : Make sure your bowl and whisk are completely clean and free of any grease. Even a tiny bit of oil or yolk will prevent your egg whites from whipping properly. I learned this the hard way — I once used a bowl that had a smear of butter residue, and my meringue never got past the frothy stage. Such a waste of good eggs!
Substitution Guidance : For a dairy-free option, use dairy-free chocolate chips for the eyes. If you don’t have cream of tartar, you can substitute with 1/2 teaspoon of lemon juice or white vinegar — it serves the same stabilizing purpose. For a different flavor, swap the vanilla for almond extract or peppermint extract. Just be careful with peppermint — a little goes a long way.
Sourcing Notes : Look for eggs that are at least a week old. Fresh eggs actually have tighter proteins that don’t whip as well. Older eggs whip up higher and more stable. I know that sounds counterintuitive, but it’s true!
Equipment Needed
You don’t need a fancy kitchen for these ghosts, but a few specific tools make the process much smoother.
- Electric mixer (stand mixer or hand mixer — I’ve used both. A stand mixer is easier since you can walk away, but a hand mixer works perfectly fine. Just hold the bowl steady with a damp towel underneath.)
- Large glass or metal mixing bowl (plastic bowls can retain grease, even after washing. Stick with glass or metal for the best results.)
- Piping bag with a round tip (I use a Wilton 1A tip. If you don’t have a piping bag, a sturdy zip-top bag with the corner snipped off works in a pinch — just be careful not to squeeze too hard.)
- Baking sheet lined with parchment paper (don’t use wax paper — the meringue will stick. Parchment is non-negotiable here.)
- Small microwave-safe bowl for melting the chocolate
- Toothpick or small offset spatula for placing the chocolate eyes
Budget-Friendly Options : If you don’t have a piping bag, seriously, the zip-top bag trick works. I’ve done it dozens of times. Just make sure the bag is sturdy — the cheap ones can split open at the seam when you squeeze. Double-bag if you’re nervous.
Preparation Method
Follow these steps carefully, and you’ll have the cutest little ghosts on the block.
- Preheat your oven to 200°F (93°C). Yes, that’s very low. We’re drying the meringues, not baking them. Line a large baking sheet with parchment paper.
- Separate your eggs carefully. Crack each egg and separate the white from the yolk, making sure absolutely no yolk gets into the whites. If even a speck of yolk falls in, start over with that egg. I keep three small bowls — one for each white as I separate it — so if I mess up, I only lose one egg white, not the whole batch.
- Let the egg whites come to room temperature. This takes about 30 minutes on the counter. Room temperature whites whip up to a much greater volume than cold ones. If you’re in a hurry, place the bowl of whites in a larger bowl of warm water for 5-10 minutes, stirring occasionally.
- Add the cream of tartar. Once your whites are at room temperature, add the cream of tartar. Start whipping on medium speed until the mixture becomes foamy and opaque, about 1-2 minutes.
- Gradually add the sugar. With the mixer running on medium-high, add the sugar one tablespoon at a time. I know it’s tedious, but adding it slowly allows each addition to dissolve before the next one goes in. This is the secret to a smooth, not-grainy meringue. Keep whipping for about 5-7 minutes total.
- Check for stiff peaks. The meringue is ready when it holds a stiff peak — when you lift the whisk, the meringue stands straight up without drooping. It should also look glossy and smooth, not dull or curdled. Rub a tiny bit between your fingers — if it feels gritty, keep whipping until the sugar dissolves completely.
- Add the vanilla. Gently fold in the vanilla extract with a rubber spatula. Don’t overmix — just a few folds until it’s incorporated.
- Fill your piping bag. Spoon the meringue into your piping bag fitted with the round tip. Twist the top of the bag closed and squeeze a small test dab onto the baking sheet to make sure the flow is even.
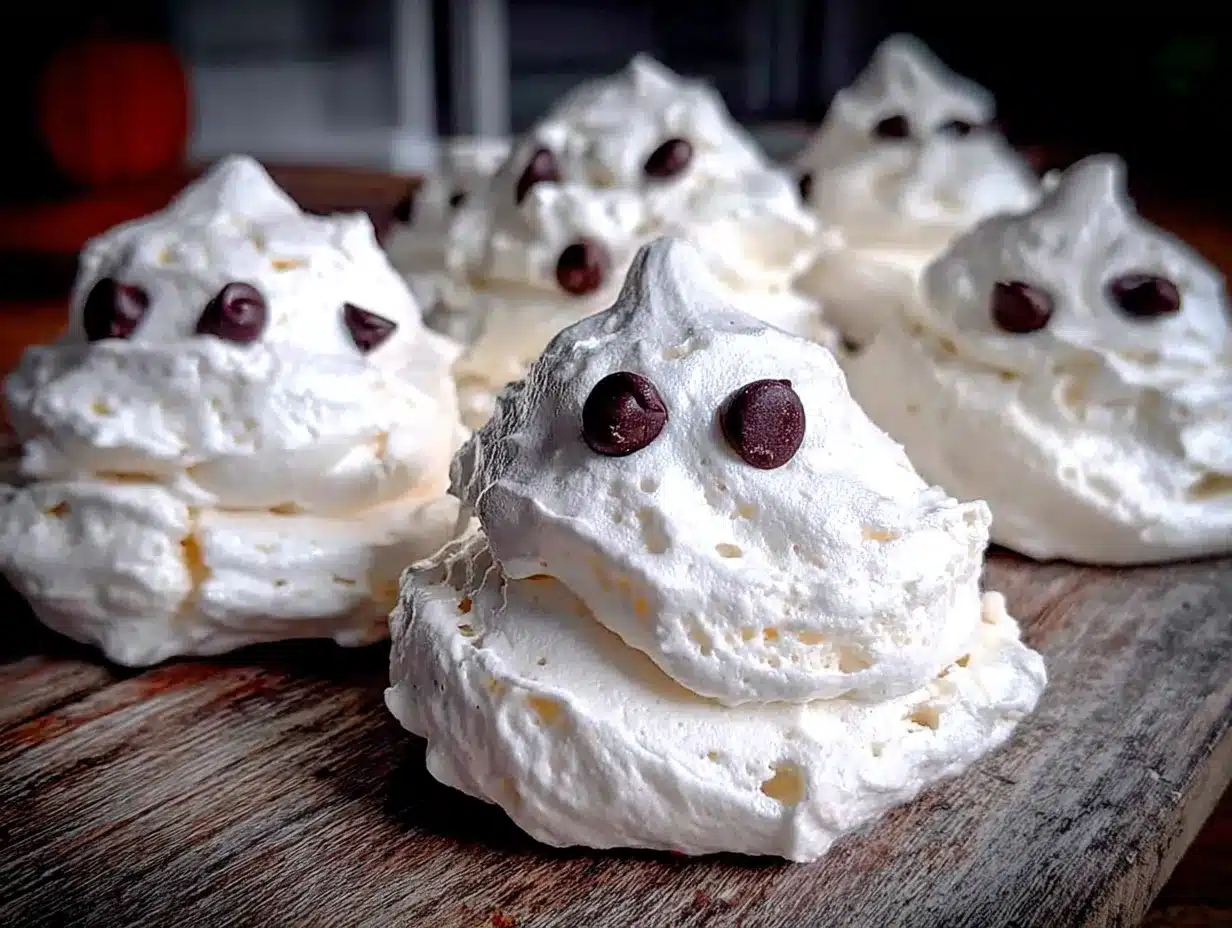
- Pipe the ghosts. Hold the piping bag perpendicular to the baking sheet, about 1/2 inch above the surface. Squeeze a generous base, then slowly lift the bag while continuing to squeeze, creating a tall, wobbly shape. Release pressure and pull the bag away quickly to create a little peak on top. Don’t worry if they look a little wonky — ghosts are supposed to be irregular! Aim for ghosts that are about 2 inches tall and 1.5 inches wide at the base. You should get about 18-20 ghosts.
- Bake for 60 minutes. Place the baking sheet in the preheated oven and bake for 60 minutes. Do not open the oven door during this time — the rush of cool air can cause the meringues to crack or collapse.
- Turn off the oven and let them cool inside. After 60 minutes, turn off the oven but leave the meringues inside with the door closed for another 30-60 minutes. This drying step ensures they’re crisp all the way through.
- Make the chocolate eyes. While the meringues are cooling, melt the chocolate chips and coconut oil in a microwave-safe bowl. Microwave in 20-second intervals, stirring between each, until smooth. Let it cool slightly — you want it thick enough to hold a dot shape, not runny.
- Attach the eyes. Once the meringues are completely cool, use a toothpick to dab a tiny amount of melted chocolate onto the back of a chocolate chip (or just use the melted chocolate itself to pipe small dots). Place two dots on each ghost for eyes. Let the chocolate set for about 15 minutes at room temperature, or 5 minutes in the fridge.
Sensory Cues : The meringue should look glossy and smooth, like marshmallow fluff, when it’s properly whipped. When you pipe it, you should see clean, defined ridges that hold their shape. After baking, the ghosts should feel light and hollow when you pick one up, and they should lift easily off the parchment paper.
Cooking Tips & Techniques
I’ve made more batches of these than I care to count, and I’ve learned a few things the hard way. Let me save you some trouble.
The Humidity Trap : Meringues are sensitive to humidity. If it’s a rainy or humid day, your meringues might turn out sticky or chewy instead of crisp. Try to make these on a dry day if you can. If you can’t wait, add an extra 15-20 minutes of drying time in the oven.
Don’t Overwhip : I once got distracted by a phone call and overwhipped my meringue until it looked curdled and separated. The sugar started weeping out, and the ghosts turned out flat and sad. Stop as soon as you hit stiff peaks — that glossy, smooth stage is your sweet spot.
Piping Consistency : If your meringue feels too stiff to pipe smoothly, it might be slightly overwhipped. Try adding a few drops of water and folding gently to loosen it up. If it’s too runny, your egg whites were underwhipped or you had a bit of yolk contamination.
Baking Sheet Rotation : Halfway through the baking time, rotate the baking sheet front to back. Ovens have hot spots, and this ensures even drying. Just do it quickly and close the door gently — no slamming!
Storage Timing : These are best eaten within 2-3 days. After that, they start absorbing moisture from the air and lose their crunch. Store them in an airtight container at room temperature — never in the fridge, which is too humid.
Variations & Adaptations
One of the best things about this recipe is how easy it is to customize. Here are some ways I’ve played around with it.
Flavor Variations : Swap the vanilla for 1/2 teaspoon of peppermint extract for a candy-cane vibe, or use almond extract for a subtle nutty flavor. For a pumpkin spice version, add 1/2 teaspoon of pumpkin pie spice along with the vanilla. I tried a lavender version once with 1/4 teaspoon of culinary lavender extract — it was surprisingly lovely and very elegant.
Colorful Ghosts : Add a few drops of gel food coloring to the meringue before piping. For Halloween, I’ve made orange ghosts with black eyes and purple ghosts with green eyes. Just fold the color in gently — you want streaks, not fully mixed color, for a marbled effect.
Dietary Adaptations : These are already gluten-free and dairy-free if you use dairy-free chocolate. For a sugar-free version, you can try using a granulated monk fruit sweetener, but I’ll warn you — the texture won’t be exactly the same. The meringue might be a bit less crisp and more fragile.
Different Shapes : Don’t limit yourself to ghosts! Pipe little pumpkins by making a round base and adding a tiny green meringue stem. Or make kisses by piping a tall, pointed shape. I’ve even made little bats by piping two small wings on either side of a round body.
Size Adjustments : For mini ghosts (perfect for party favors), pipe smaller shapes and reduce baking time to 40-45 minutes. For giant ghosts, pipe larger bases and bake for 75-80 minutes. Just keep an eye on them — the edges should not brown at all.
Serving & Storage Suggestions
These little ghosts are incredibly versatile when it comes to serving. Here’s how to make the most of them.
Serving Temperature : Serve at room temperature. They’re perfect just as they are — no heating or chilling needed. Arrange them on a platter with some fake spiderwebs or dry ice for a spooky effect. I once served them on a black cake stand with orange sprinkles scattered around — it looked amazing.
Complementary Dishes : These pair beautifully with a cup of hot cocoa or a pumpkin spice latte. For a Halloween dessert spread, serve them alongside brownies, caramel apples, or pumpkin cheesecake bars. They also make a great topping for a bowl of vanilla ice cream — just crumble a few over the top.
Storage Instructions : Store in an airtight container at room temperature for up to 5 days. Do not refrigerate — the moisture will make them sticky. If you need to store them longer, you can freeze them for up to 2 months. Place them in a single layer in a freezer-safe container with parchment paper between layers. Thaw at room temperature for about 15 minutes before serving.
Reheating : These don’t need reheating, but if they’ve lost their crunch after a few days, you can crisp them up in a 200°F (93°C) oven for 10-15 minutes. Let them cool completely before serving again.
Flavor Development : Interestingly, the vanilla flavor actually becomes more pronounced after a day or two. The flavors meld and mellow, making them taste even better on day two — if they last that long!
Nutritional Information & Benefits
Per serving (1 ghost meringue cookie): Approximately 35 calories, 0g fat, 8g carbohydrates, 8g sugar, 1g protein. These are a relatively guilt-free treat!
Health Benefits : Meringues are naturally low in fat and cholesterol-free since they’re made only from egg whites. Egg whites are a good source of high-quality protein and contain no saturated fat. They’re also naturally gluten-free and dairy-free, making them accessible to many dietary restrictions.
Dietary Considerations : This recipe is vegetarian, gluten-free, and dairy-free (with dairy-free chocolate chips). It’s also nut-free and soy-free, depending on your chocolate brand. The only potential allergen is eggs. For a vegan version, you can try using aquafaba (the liquid from a can of chickpeas) instead of egg whites — it works surprisingly well, though the texture is slightly different.
Personal Wellness Perspective : I love that these cookies allow for a little indulgence without the heavy feeling you get from butter-laden treats. They’re perfect for a Halloween party where you want to offer something sweet but not overly rich. Plus, the portion control is built in — one or two is usually enough to satisfy a sweet craving.
Conclusion
These spooky ghost meringue cookies with chocolate eyes are proof that the simplest recipes often steal the show. They’re quick to make, use ingredients you probably already have, and they’re endlessly customizable. Whether you’re scrambling for a last-minute Halloween party contribution (like I was) or just want a fun weekend project with the kids, these little ghosts deliver every single time.
I’d love to hear how yours turn out! Did you try a fun flavor variation? Did your kids get creative with the piping? Drop a comment below and let me know. And if you’re looking for more Halloween treats, you might enjoy these spooky Halloween popcorn bark or these pumpkin spice blondies. Happy haunting, and happy baking!
Frequently Asked Questions
Can I make these ghost meringue cookies ahead of time?
Absolutely! You can make them up to 5 days in advance and store them in an airtight container at room temperature. Just wait to add the chocolate eyes until right before serving, as the chocolate can sometimes bloom or get sticky over time.
Why did my meringue turn out flat and runny?
This usually happens for one of three reasons: your bowl or whisk had a trace of grease, a tiny bit of egg yolk got into the whites, or the egg whites were underwhipped. Make sure everything is squeaky clean, separate your eggs carefully, and whip until you see stiff, glossy peaks that hold their shape.
Can I use liquid egg whites from a carton?
I don’t recommend it. Carton egg whites are pasteurized at a higher temperature, which denatures the proteins and makes them less stable for whipping. They’ll still whip up, but they won’t reach the same volume or hold their shape as well. Fresh egg whites are your best bet here.
How do I know when the meringues are fully baked?
Properly baked meringues should lift easily off the parchment paper without sticking. They should feel light and hollow, almost like Styrofoam. If they feel heavy or sticky on the bottom, they need more time in the oven. The color should be pure white — any browning means your oven was too hot.
Can I pipe these into different shapes for other holidays?
Definitely! This meringue recipe is incredibly versatile. For Christmas, pipe little snowmen or trees. For Valentine’s Day, pipe hearts. For Easter, pipe bunnies or eggs. Just adjust the piping technique and add appropriate decorations. The baking time and temperature stay the same regardless of shape.
Pin This Recipe!
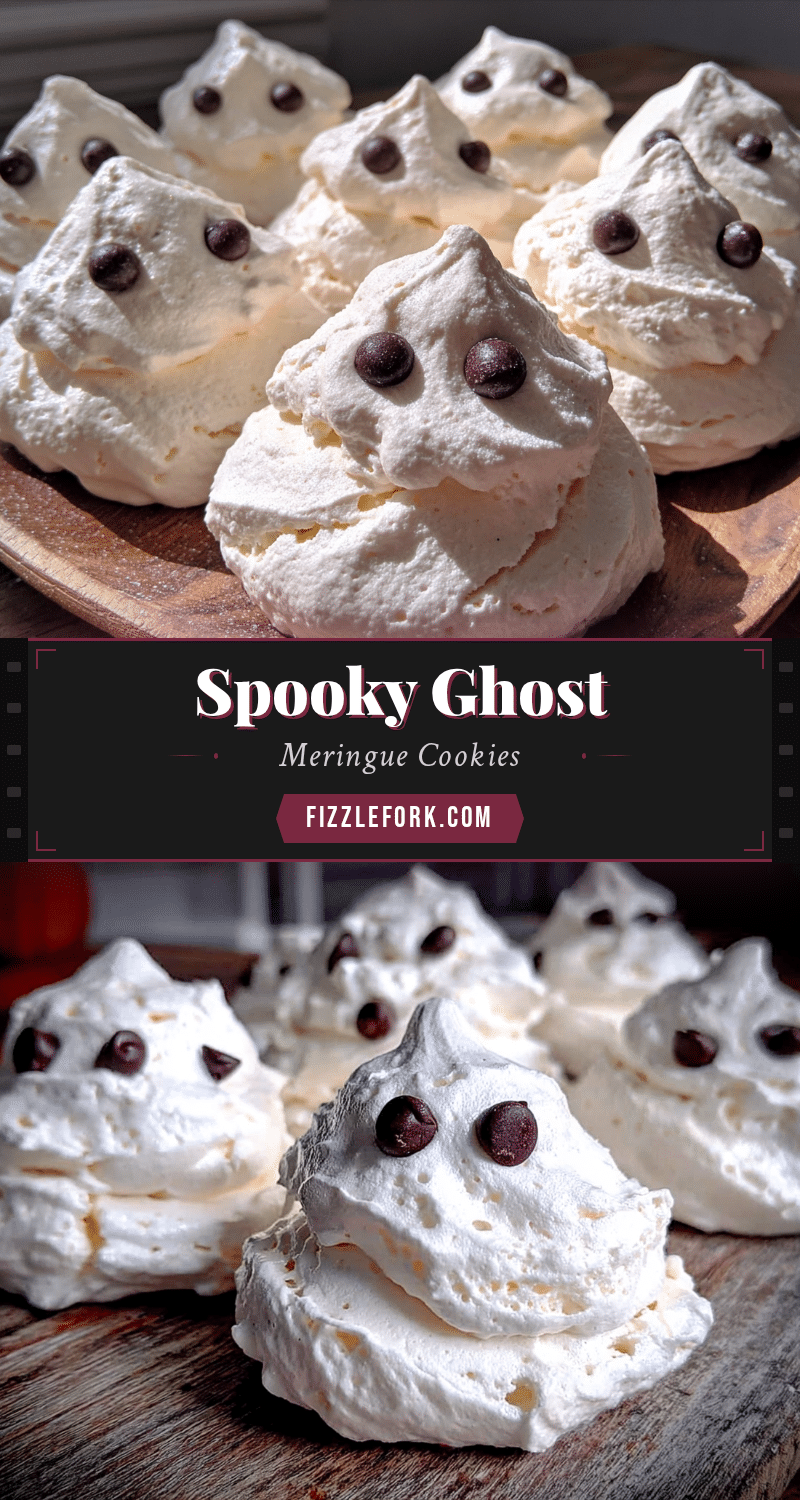
Spooky Ghost Meringue Cookies with Chocolate Eyes
These spooky ghost meringue cookies with chocolate eyes are light, airy, and surprisingly easy to make. Perfect for Halloween parties, they require just four simple ingredients and come together in about 90 minutes.
- Prep Time: 15 minutes
- Cook Time: 60 minutes
- Total Time: 1 hour 30 minutes
- Yield: 18-20 cookies 1x
- Category: Dessert
- Cuisine: American
Ingredients
- 3 large egg whites, at room temperature
- 3/4 cup (150g) granulated sugar
- 1/4 teaspoon cream of tartar
- 1/2 teaspoon vanilla extract
- 1/4 cup (45g) semi-sweet chocolate chips
- 1/2 teaspoon coconut oil or vegetable shortening (optional)
Instructions
- Preheat your oven to 200°F (93°C). Line a large baking sheet with parchment paper.
- Separate your eggs carefully, ensuring no yolk gets into the whites.
- Let the egg whites come to room temperature (about 30 minutes).
- Add the cream of tartar to the egg whites. Start whipping on medium speed until foamy and opaque, about 1-2 minutes.
- Gradually add the sugar one tablespoon at a time while mixing on medium-high. Continue whipping for 5-7 minutes until stiff, glossy peaks form.
- Gently fold in the vanilla extract with a rubber spatula.
- Spoon the meringue into a piping bag fitted with a round tip.
- Pipe ghosts onto the prepared baking sheet: squeeze a generous base, then slowly lift the bag while squeezing to create a tall, wobbly shape. Release pressure and pull away to create a peak.
- Bake for 60 minutes. Do not open the oven door during baking.
- Turn off the oven and let the meringues cool inside with the door closed for 30-60 minutes.
- While the meringues cool, melt the chocolate chips and coconut oil in a microwave-safe bowl in 20-second intervals, stirring between each, until smooth.
- Once the meringues are completely cool, use a toothpick to dab a tiny amount of melted chocolate onto the back of a chocolate chip (or pipe small dots) and place two dots on each ghost for eyes. Let the chocolate set for about 15 minutes at room temperature.
Notes
Make sure your bowl and whisk are completely clean and free of any grease. Even a tiny bit of oil or yolk will prevent your egg whites from whipping properly. For best results, use eggs that are at least a week old. Meringues are sensitive to humidity; try to make these on a dry day. Store in an airtight container at room temperature for up to 5 days. Do not refrigerate.
Nutrition
- Serving Size: 1 ghost meringue coo
- Calories: 35
- Sugar: 8
- Sodium: 10
- Carbohydrates: 8
- Protein: 1
Keywords: Halloween cookies, ghost meringue, meringue cookies, easy Halloween treat, gluten-free cookies, dairy-free cookies, low-fat cookies


