My sister swore she hated themed party food. For years. She’d roll her eyes at themed cupcakes and make gagging noises at anything shaped like a pumpkin or a ghost. Then, last Halloween, I made this cheese ball ‘just for the kids’ and found her standing in front of the fridge at 11 PM, eating it with a spoon. Caught red-handed—or, well, orange-fingered from the cheddar.
Honestly, I wasn’t even trying to convert her. I just needed something fast for the neighborhood potluck that looked spooky but didn’t taste like a science experiment. You know that feeling when you want to bring something impressive but you also have to help three kids into costume and carve a pumpkin? That was me. I grabbed cream cheese, some shredded cheddar, and a bag of pretzel sticks, and just started shaping. The mummy cheese ball was born out of pure desperation, and let me tell you, it worked better than any Pinterest-worthy project I’ve ever attempted.
The best part? It’s not just cute—it’s actually good. Like, really good. The creamy, savory cheese center paired with the salty crunch of pretzel sticks is one of those combos that makes you close your eyes after the first bite. I mean, I’ve brought this to three different Halloween parties now, and every single time, someone asks for the recipe before the dip bowl is empty. Maybe you’ve been there too—looking for something that feels festive without making you spend all day in the kitchen. This is that recipe. It’s the one that made my anti-theme sister a believer, and honestly, it might just do the same for you.
Why You’ll Love This Recipe
I’ve tested this mummy cheese ball more times than I care to admit. The first version was too soft, the second fell apart when I wrapped the ‘bandages,’ and the third? Well, the third was the one my sister caught her sneaking at midnight. Here’s why this version works every time:
- Quick & Easy: Comes together in under 20 minutes of active prep time. No baking, no complicated steps, just mix, shape, and decorate.
- Simple Ingredients: Everything comes from your regular grocery store. No speciality items, no hunting down obscure cheeses.
- Perfect for Halloween Parties: Kids love the mummy look, adults love the savory flavor. It disappears at every gathering.
- Crowd-Pleaser: Even picky eaters go for this. The pretzel sticks add that satisfying crunch that makes it addictive.
- Unbelievably Delicious: The cream cheese base is perfectly seasoned, and the cheddar gives it that sharp, tangy kick that keeps you coming back for more.
What makes this recipe different from all the other cheese balls out there? It’s the texture, honestly. Most cheese balls are either too dense or too soft. I figured out the exact ratio of cream cheese to cheddar that gives you a firm, sliceable ball that still spreads like a dream. Plus, the pretzel sticks aren’t just for decoration—they double as edible dippers, so you don’t need extra crackers or chips. It’s a two-in-one appetizer that looks way more complicated than it actually is.
This isn’t just a recipe for Halloween. It’s the kind of thing you’ll find yourself making for football parties, game nights, and random Tuesday cravings. It’s comfort food reimagined as something playful and spooky, but with the same soul-soothing satisfaction as your favorite dip. Perfect for impressing guests without stress, or turning a simple snack into something memorable.
What Ingredients You Will Need
This recipe uses simple, everyday ingredients to deliver big flavor and that perfect mummy look. Most of these are probably already in your fridge or pantry.
- Cream Cheese: 16 ounces (two 8-ounce blocks), softened to room temperature. This is the base of your cheese ball, so don’t skip the softening step—cold cream cheese leads to lumps. I personally prefer Philadelphia brand for the smoothest texture.
- Shredded Cheddar Cheese: 2 cups (about 8 ounces), sharp or medium. Sharp cheddar gives more flavor, but medium works fine too. Pre-shredded is okay in a pinch, but freshly shredded melts better and has a creamier texture. (Pro tip: shred your own if you have the time.)
- Ranch Seasoning Mix: 1 packet (1 ounce). This is the flavor powerhouse. It adds that tangy, herby kick that makes the cheese ball so addictive. Hidden Valley is my go-to, but any brand works.
- Garlic Powder: ½ teaspoon. Adds a subtle savory depth without being overpowering.
- Onion Powder: ½ teaspoon. Complements the garlic and ranch seasoning perfectly.
- Salt: ¼ teaspoon, or to taste. The cheese and ranch mix are already salty, so go easy here.
- Black Pepper: ¼ teaspoon, freshly ground. A little goes a long way.
- Pretzel Sticks: 1 bag (about 10-12 ounces). These serve double duty as the mummy’s ‘legs’ and as edible dippers. I like the thicker, crunchy pretzel sticks—they hold up better when you spread the cheese on them.
- Black Olives: 2 whole olives, sliced into rounds. These become the mummy’s eyes. You can also use candy eyes if you prefer a sweeter look, but olives keep it savory.
- Fresh Parsley or Chives: A small handful, finely chopped (optional). For garnish, adds a pop of green and freshness.
Substitution Guidance: For a lower-fat version, use reduced-fat cream cheese and cheddar. The texture will be slightly less creamy but still delicious. If you’re dairy-free, try a plant-based cream cheese and vegan cheddar shreds—the flavor will be different but still tasty. For a gluten-free option, use gluten-free pretzel sticks (most major brands now offer them). And if you don’t have ranch seasoning, you can mix 1 teaspoon dried dill, 1 teaspoon dried parsley, ½ teaspoon garlic powder, ½ teaspoon onion powder, and ¼ teaspoon salt as a substitute.
Equipment Needed
You don’t need anything fancy for this recipe, which is honestly my favorite part about it.
- Large Mixing Bowl: For combining all the cheese ingredients. A glass or stainless steel bowl works best.
- Hand Mixer or Stand Mixer: Makes blending the cream cheese and cheddar much easier. A sturdy spatula and some elbow grease will also work if you’re mixing by hand—just make sure the cream cheese is really soft.
- Plastic Wrap: Essential for shaping the cheese ball and keeping it together while it chills. I use the generic store brand without issues.
- Baking Sheet or Large Plate: For holding the cheese ball in the fridge. A small cutting board works too.
- Sharp Knife: For slicing the olives into eye rounds. A paring knife is perfect for this.
- Serving Platter: Something large enough to fit the mummy cheese ball with room for pretzel sticks around it. A wooden board or white platter makes the mummy pop visually.
Budget-Friendly Tip: If you don’t have a hand mixer, you can absolutely mix this by hand. Just let your cream cheese sit out for an extra 30 minutes until it’s very soft, and use a strong fork or spatula to mash everything together. It takes a few more minutes, but the result is the same.
Preparation Method
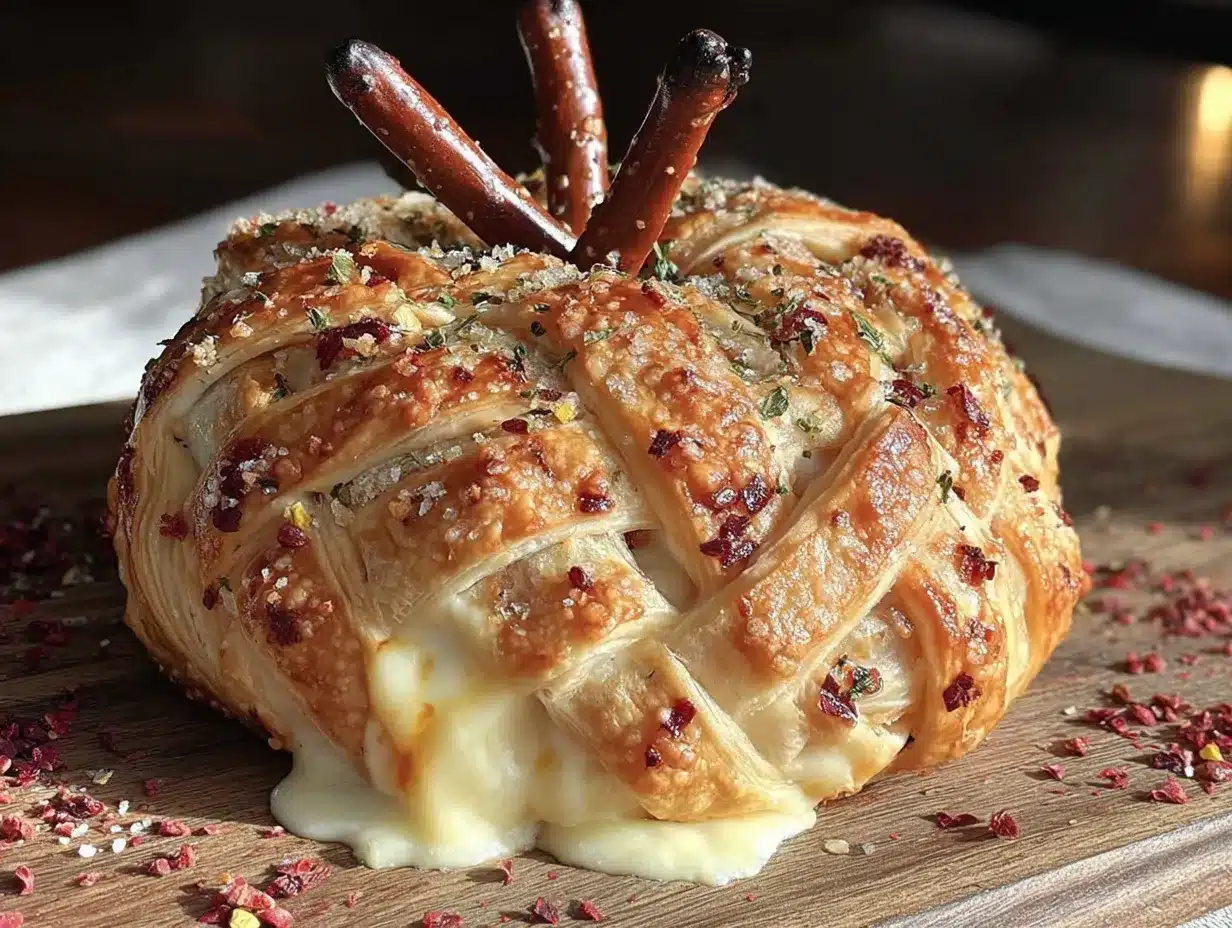
Follow these steps, and you’ll have a spooky mummy cheese ball that looks like it took hours—but really took about 20 minutes of hands-on time.
- Soften the cream cheese. Take both blocks of cream cheese out of the fridge about 1-2 hours before you start. You want it at room temperature—soft enough that you can easily press a finger into it. If you’re short on time, microwave it in 10-second bursts, flipping the block over each time, until softened but not melted. (I learned this the hard way after melting a block into a puddle. Trust me, low and slow is the way.)
- Mix the cheese base. In your large mixing bowl, add the softened cream cheese, shredded cheddar, ranch seasoning mix, garlic powder, onion powder, salt, and black pepper. Use your hand mixer on medium speed (or a sturdy spatula) to combine everything until smooth and well-blended. Scrape down the sides of the bowl halfway through. The mixture should be thick, creamy, and evenly colored—no white streaks of plain cream cheese remaining. This takes about 2-3 minutes with a mixer, or 5-6 minutes by hand.
- Taste and adjust. This is the fun part. Grab a clean spoon and taste your cheese mixture. Does it need more salt? More garlic? A little extra black pepper? Adjust to your preference. Remember, the pretzel sticks are salty, so you might want to keep the cheese ball on the milder side. I usually add a pinch more garlic powder because I’m obsessed with it.
- Shape into a ball. Lay out a large piece of plastic wrap on your counter. Scoop the cheese mixture into the center of the plastic wrap. Gather the edges of the wrap and twist them together at the top, forming the cheese into a rough ball shape. Then, using your hands through the plastic wrap, gently squeeze and mold it into a smooth, round ball. Don’t worry about perfection—you’ll smooth it out more later. Aim for a ball about 4-5 inches in diameter.
- Chill the cheese ball. Place the wrapped cheese ball on your baking sheet or plate and refrigerate for at least 2 hours, or up to overnight. Chilling is crucial—it firms up the cheese so you can wrap the ‘bandages’ without the ball falling apart. If you’re in a rush, 1 hour in the freezer works too, but check it after 30 minutes to make sure it doesn’t freeze solid.
- Prepare the ‘bandages’ and legs. While the cheese ball chills, get your pretzel sticks ready. You’ll need about 20-25 pretzel sticks for the mummy’s legs and bandages. For the legs, select 6-8 straight, unbroken pretzel sticks. For the bandages, you’ll use the remaining sticks whole. Set them aside.
- Unwrap and smooth. After chilling, remove the cheese ball from the fridge and unwrap it. Place it on your serving platter. If the surface looks a little lumpy or uneven, use a clean, dry spatula or your hands (lightly wet them with water to prevent sticking) to smooth it out into a nice round shape.
- Create the mummy face. Take two of the black olive slices and press them gently into the top half of the cheese ball to form the mummy’s eyes. Space them about an inch apart. They should stick easily to the chilled cheese. If they don’t, press a little harder—the cheese will hold them.
- Wrap the bandages. Now for the fun part. Take a pretzel stick and gently press it into the cheese ball, starting from the top and wrapping it around the ‘head’ area, leaving the eyes exposed. The pretzel should be partially embedded in the cheese. Continue adding more pretzel sticks, overlapping them slightly, working your way down the cheese ball. You want the pretzels to look like wrapped bandages, so leave small gaps of cheese showing through. Don’t cover the entire ball—leave some cheese visible for texture. Use about 12-15 pretzel sticks for the bandages.
- Add the legs. Insert the remaining 6-8 pretzel sticks into the bottom of the cheese ball, spacing them evenly to look like little mummy legs sticking out. They should be inserted about ½ inch deep to stay secure.
- Garnish and serve. If using, sprinkle the fresh parsley or chives around the base of the cheese ball for a ‘spooky graveyard’ effect. Serve immediately with extra pretzel sticks, crackers, or vegetable sticks for dipping. The mummy cheese ball should be at room temperature for the best spreading consistency—so let it sit out for 15-20 minutes if it’s been refrigerated for a while.
Cooking Tips & Techniques
I’ve made this mummy cheese ball at least a dozen times now, and I’ve learned a few things the hard way. Here are my best tips for getting it right every time.
Don’t skip the chilling step. I know, I know—you’re impatient, and the kids are hyped up on candy. But if you try to wrap the pretzel bandages on a warm, soft cheese ball, the whole thing will collapse into a cheesy mess. I learned this lesson when I tried to rush it for a last-minute party. The mummy looked more like a cheese blob with legs. Chilling firms up the cream cheese fat, giving you a stable base to work with. Two hours minimum, no shortcuts.
Use room temperature cream cheese for the smoothest mix. Cold cream cheese creates lumps that no amount of mixing can fully fix. Set it out on the counter at least an hour before you start. If you forget, unwrap the blocks and microwave them on a plate in 10-second bursts, flipping them over each time. You want them soft but not warm. Warm cream cheese will make the mixture too loose to hold its shape.
Press the pretzels gently but firmly. You want them to stay embedded in the cheese without breaking. If you press too hard, the pretzel will snap (and you’ll have to fish the broken piece out of the cheese). If you press too gently, they’ll fall off when you move the platter. Aim for about halfway into the cheese—enough to hold, but not so deep that the pretzel disappears.
Arrange the bandages in a spiral pattern. Start at the top and work your way down, slightly overlapping each pretzel stick. This gives the mummy a wrapped, layered look that’s more realistic. If you just stick them on randomly, it looks like a pretzel porcupine instead of a mummy. I usually do a practice run with dry pretzels on the counter to figure out my pattern before committing.
Make it ahead of time. This is a lifesaver for party prep. You can make the cheese ball (steps 1-5) a day in advance and keep it wrapped in the fridge. On party day, just unwrap, add the pretzel bandages and eyes, and serve. The flavors actually meld together better overnight, making it even more delicious.
Variations & Adaptations
One of the best things about this recipe is how flexible it is. Here are some ways to make it your own.
Spicy Mummy: Add 1-2 teaspoons of hot sauce (like Tabasco or Sriracha) and ½ teaspoon of cayenne pepper to the cheese mixture. The heat pairs beautifully with the cool cream cheese and salty pretzels. I tried this for a game day party, and it was gone in 15 minutes.
Bacon Cheddar Mummy: Cook 4-5 strips of bacon until crispy, crumble them, and fold into the cheese mixture before shaping. The smoky, salty bacon adds incredible depth. Just be aware that the bacon bits can make the cheese ball a little harder to shape—chill it for an extra 30 minutes.
Herb & Garden Mummy: Skip the ranch seasoning and instead mix in 2 tablespoons of fresh chopped herbs (parsley, chives, dill, and a little basil work great) plus 1 teaspoon of lemon zest. This gives a lighter, fresher flavor that’s perfect for fall gatherings that aren’t specifically Halloween-themed.
Sweet Mummy (Dessert Version): Replace the cheddar and ranch seasoning with ¼ cup of powdered sugar and ½ teaspoon of vanilla extract. Use chocolate wafer cookies or pretzel sticks for the bandages, and candy eyes instead of olives. This is a fun twist for kids’ parties—though honestly, I prefer the savory version.
Nut-Free and Gluten-Free: This recipe is naturally nut-free as written. For gluten-free, just swap in gluten-free pretzel sticks. Most major brands now offer them, and they work exactly the same way. The cheese mixture itself is completely gluten-free.
Serving & Storage Suggestions
This mummy cheese ball is best served at room temperature, when the cheese is soft and spreadable. If you’ve refrigerated it, take it out about 20-30 minutes before serving. The pretzel sticks will stay crunchy, and the cheese will be perfectly dippable.
Presentation Ideas: Place the mummy on a large wooden cutting board or a dark-colored platter to make the cheese ball pop. Surround it with extra pretzel sticks, celery sticks, carrot sticks, and bell pepper strips for dipping. You can also add some ‘spooky’ decorations around the platter—fake spider webs, plastic spiders, or candy corn. For a graveyard effect, sprinkle crushed pretzels or dark chocolate cookie crumbs around the base.
What to Serve With It: Besides more pretzel sticks, this cheese ball is amazing with sturdy crackers (like Wheat Thins or Triscuits), sliced baguette, pita chips, or vegetable sticks. It also works as a spread on sandwiches or wraps the next day—if you have any left.
Storage: Leftover cheese ball (without the pretzel bandages) can be wrapped tightly in plastic wrap and stored in the refrigerator for up to 5 days. The pretzel sticks will get soft if left on the cheese ball overnight, so remove them before storing. To reuse, just reshape the cheese ball, add fresh pretzel bandages, and serve. You can also freeze the cheese ball (without pretzels) for up to 1 month. Wrap it in plastic wrap and then foil, and thaw overnight in the fridge before serving.
Reheating: You don’t really ‘reheat’ a cheese ball, but if it’s been in the fridge, let it sit at room temperature for 20-30 minutes before serving. The flavors actually deepen after a day or two in the fridge, so leftovers might taste even better than the original.
Nutritional Information & Benefits
While this is definitely a treat rather than a health food, it does have some redeeming qualities. A serving (about 2 tablespoons of cheese mixture plus 3-4 pretzel sticks) contains approximately:
- Calories: 180-200
- Protein: 7g
- Fat: 14g (mostly from cream cheese and cheddar)
- Carbohydrates: 10g (from pretzels and cheese)
- Calcium: 15% of daily value (from the cheese)
- Vitamin A: 10% of daily value (from cream cheese)
Health Benefits: Cream cheese and cheddar are good sources of calcium and protein, which support bone health and muscle function. The black olives provide healthy monounsaturated fats and antioxidants. And the pretzel sticks? Well, they’re a source of quick energy. This isn’t a diet food, but it’s a satisfying snack that can be part of a balanced diet—especially when you pair it with vegetable sticks for dipping.
Dietary Considerations: This recipe is vegetarian, nut-free, and can be made gluten-free with simple substitutions. It is not dairy-free or vegan as written, but plant-based alternatives work well. It’s also relatively low in sugar, making it a good option for those watching their sugar intake.
Allergen Note: Contains dairy (cream cheese, cheddar) and gluten (pretzel sticks). The pretzels may also be processed in facilities that handle other allergens, so check labels if needed.
Conclusion
Honestly, I never thought I’d be the person who gets excited about themed party food. But this mummy cheese ball changed something in me. It’s proof that you don’t need fancy equipment, hours of time, or a culinary degree to make something that looks impressive and tastes incredible. It’s the recipe that converted my sister, the one that’s become my go-to for every Halloween party, and the one that always, always gets asked for.
What I love most about it is how customizable it is. You can make it spicy, herby, or even sweet. You can use different crackers or vegetables for dipping. You can make it a day ahead and just assemble it before the party. It’s forgiving, flexible, and genuinely delicious—the kind of recipe that makes you look like a kitchen hero without breaking a sweat.
So go ahead—give it a try. Make it for your Halloween party, your game day gathering, or just for a fun Tuesday night snack. And when someone asks for the recipe (because they will), send them my way. I’d love to hear how yours turns out—tag me in your photos, leave a comment below, or tell me about your own variations. Happy Halloween, and happy snacking!
Frequently Asked Questions
Can I make this cheese ball ahead of time?
Absolutely! You can prepare the cheese mixture, shape it into a ball, and refrigerate it (wrapped in plastic) up to 2 days in advance. Just add the pretzel bandages and olive eyes right before serving for the best presentation.
My cheese ball is too soft to hold its shape. What did I do wrong?
This usually happens if the cream cheese was too warm when you mixed it, or if you didn’t chill it long enough. Pop it in the freezer for 30 minutes to firm it up quickly. Next time, make sure your cream cheese is softened but not warm, and chill for the full 2 hours.
Can I use a different type of cheese?
Yes! While sharp cheddar is classic, you can swap in pepper jack for a spicy kick, gouda for a smoky flavor, or even a blend of mozzarella and parmesan for a different texture. Just keep the total amount of shredded cheese the same (2 cups).
How do I keep the pretzel sticks from getting soggy?
Pretzel sticks will soften over time when pressed into the cheese. For the best crunch, add the pretzel bandages no more than 1-2 hours before serving. If you’re making it ahead, store the cheese ball and pretzels separately and assemble just before serving.
Can I freeze the mummy cheese ball?
Yes, but without the pretzel bandages. Wrap the plain cheese ball tightly in plastic wrap and then foil, and freeze for up to 1 month. Thaw overnight in the refrigerator, then add fresh pretzel bandages and olives before serving. The texture will be slightly softer but still delicious.
Pin This Recipe!
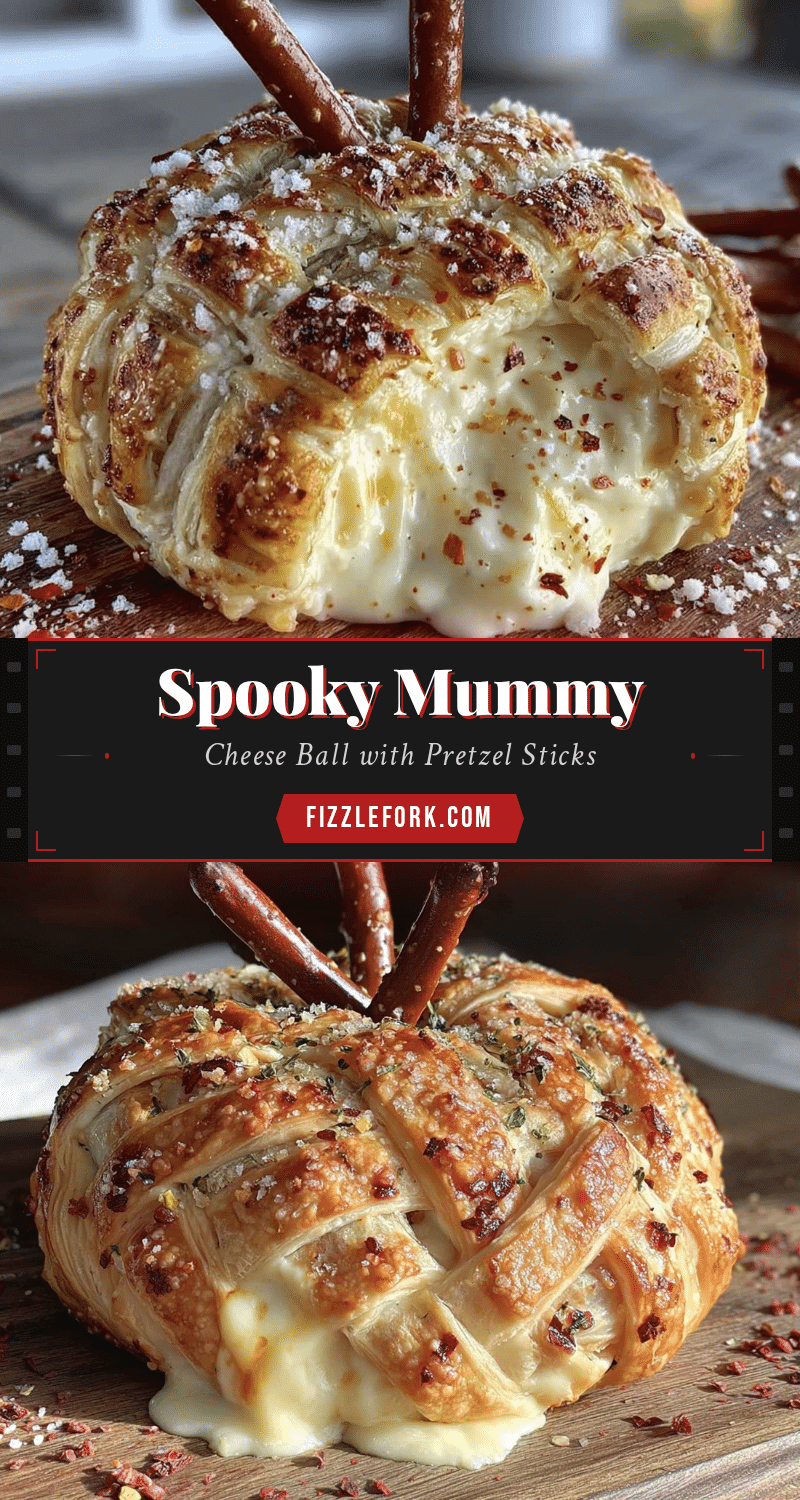
Spooky Mummy Cheese Ball with Easy Pretzel Sticks
A creamy, savory cheese ball shaped like a mummy with pretzel stick bandages and legs, perfect for Halloween parties. Quick to make with simple ingredients, it’s a crowd-pleasing appetizer that looks impressive but requires minimal effort.
- Prep Time: 20 minutes
- Cook Time: 0 minutes
- Total Time: 2 hours 20 minutes (includes chilling)
- Yield: 8 servings 1x
- Category: Appetizer
- Cuisine: American
Ingredients
- 16 ounces cream cheese (two 8-ounce blocks), softened to room temperature
- 2 cups (about 8 ounces) shredded sharp or medium cheddar cheese
- 1 packet (1 ounce) ranch seasoning mix
- ½ teaspoon garlic powder
- ½ teaspoon onion powder
- ¼ teaspoon salt, or to taste
- ¼ teaspoon freshly ground black pepper
- 1 bag (10-12 ounces) pretzel sticks
- 2 whole black olives, sliced into rounds
- Fresh parsley or chives, finely chopped (optional, for garnish)
Instructions
- Soften the cream cheese: Take both blocks of cream cheese out of the fridge about 1-2 hours before starting. You want it at room temperature—soft enough to easily press a finger into it. If short on time, microwave in 10-second bursts, flipping the block over each time, until softened but not melted.
- Mix the cheese base: In a large mixing bowl, add the softened cream cheese, shredded cheddar, ranch seasoning mix, garlic powder, onion powder, salt, and black pepper. Use a hand mixer on medium speed (or a sturdy spatula) to combine until smooth and well-blended, about 2-3 minutes with a mixer or 5-6 minutes by hand. Scrape down the sides of the bowl halfway through.
- Taste and adjust: Taste the cheese mixture and adjust seasoning as needed. Remember that pretzel sticks are salty, so keep the cheese ball on the milder side if desired.
- Shape into a ball: Lay out a large piece of plastic wrap on the counter. Scoop the cheese mixture into the center of the plastic wrap. Gather the edges of the wrap and twist them together at the top, forming the cheese into a rough ball shape. Using your hands through the plastic wrap, gently squeeze and mold it into a smooth, round ball about 4-5 inches in diameter.
- Chill the cheese ball: Place the wrapped cheese ball on a baking sheet or plate and refrigerate for at least 2 hours, or up to overnight. For a quicker option, freeze for 1 hour, checking after 30 minutes to ensure it doesn’t freeze solid.
- Prepare the ‘bandages’ and legs: While the cheese ball chills, select 6-8 straight, unbroken pretzel sticks for the legs. Set aside the remaining pretzel sticks (about 12-15) for the bandages.
- Unwrap and smooth: After chilling, remove the cheese ball from the fridge and unwrap it. Place it on a serving platter. If the surface is lumpy, use a clean, dry spatula or lightly wet hands to smooth it into a nice round shape.
- Create the mummy face: Press two black olive slices gently into the top half of the cheese ball to form the mummy’s eyes, spacing them about an inch apart.
- Wrap the bandages: Starting from the top, gently press a pretzel stick into the cheese ball, partially embedding it. Continue adding more pretzel sticks, overlapping them slightly, working your way down the cheese ball. Leave small gaps of cheese showing through for texture. Use about 12-15 pretzel sticks for the bandages.
- Add the legs: Insert the remaining 6-8 pretzel sticks into the bottom of the cheese ball, spacing them evenly to look like mummy legs. Insert them about ½ inch deep to stay secure.
- Garnish and serve: If using, sprinkle fresh parsley or chives around the base of the cheese ball. Serve immediately with extra pretzel sticks, crackers, or vegetable sticks for dipping. Let the cheese ball sit at room temperature for 15-20 minutes if refrigerated for best spreading consistency.
Notes
Chilling is crucial for the cheese ball to hold its shape when adding pretzel bandages. For best results, make the cheese ball a day ahead and add pretzels just before serving. Pretzel sticks will soften over time, so add them no more than 1-2 hours before serving. Leftover cheese ball (without pretzels) can be stored in the refrigerator for up to 5 days or frozen for up to 1 month.
Nutrition
- Serving Size: 2 tablespoons cheese
- Calories: 190
- Sugar: 2
- Sodium: 450
- Fat: 14
- Saturated Fat: 8
- Carbohydrates: 10
- Protein: 7
Keywords: Halloween appetizer, mummy cheese ball, pretzel sticks, cream cheese, cheddar, party food, spooky snack


