That first hit of browned butter—the one that smells like toasted nuts and caramel and something almost impossible—still stops me in my tracks. It’s the kind of scent that wraps around you before you even see the pan, and it takes me straight back to my tiny apartment kitchen, the one with the flickering overhead light and the counter that was never quite clean enough. I was trying to salvage a batch of regular chocolate chip cookies that had turned out flat and sad, again. I’d read somewhere that browning the butter could add depth, so I figured, why not? I had nothing to lose.
I stood there, swirling the butter in the pan, watching it go from yellow to amber to a deep, fragrant brown. The smell filled the whole apartment, and honestly, I knew right then that something special was happening. Those cookies came out of the oven looking like little golden pillows, thick and soft, with edges that crinkled just so. The first bite was a revelation. The nutty, almost toffee-like flavor from the butter had transformed a simple cookie into something that felt, well, intentional. It wasn’t just a cookie anymore. It was a *moment*.
This recipe for Perfect Thick and Chewy Brown Butter Chocolate Chip Cookies is the result of that happy accident and years of tweaking. It’s the one I make when I need to impress someone, or when I just need to feel a little bit more put together. It’s the cookie that taught me that the best things often come from a little bit of patience and a whole lot of butter. I think you’re really going to love it.
Why You’ll Love This Recipe
Let’s be real for a second—the internet is absolutely flooded with chocolate chip cookie recipes. So why should you trust this one? Because I’ve made the mistakes so you don’t have to. I’ve pulled out trays of cookies that spread into one giant, greasy disc. I’ve cried over cookies that were hard as rocks the next day. This recipe is the final boss of all those failures. It’s been tested, tweaked, and tasted by more friends and family than I can count, and it’s never let me down.
– Perfectly Thick and Chewy: Forget thin, crispy discs. These cookies have a substantial, bakery-style thickness with a soft, chewy center and slightly crisp edges that hold up for days.
– That Brown Butter Magic: This isn’t just a gimmick. The nutty, caramelized flavor of brown butter adds a layer of complexity you simply can’t get from regular melted butter. It makes the cookie taste like it came from a fancy bakery.
– Simple, Everyday Ingredients: You won’t need to hunt down obscure flours or special extracts. Everything on the list is a pantry staple, which means you’re never more than an hour away from a warm cookie.
– Make-Ahead Friendly: This dough loves a good rest in the fridge. You can make it a day or two ahead, or even scoop and freeze the balls for fresh cookies whenever a craving hits. It’s the ultimate stress-free dessert.
– Unbelievably Satisfying: This is the kind of cookie that makes you close your eyes after the first bite. It’s comfort in its purest form—rich, buttery, and studded with just the right amount of melty chocolate chips.
What really sets this recipe apart is the technique. It’s not just about browning the butter; it’s about how you handle the dough afterward. The combination of chilled brown butter and an extra egg yolk creates a structure that’s sturdy enough to hold its shape but tender enough to melt in your mouth. It’s comfort food reimagined—familiar and nostalgic, but with a depth of flavor that feels completely new.
What Ingredients You Will Need
This recipe uses simple, wholesome ingredients to deliver that signature thick and chewy texture and deep, nutty flavor. Every component plays a specific role, and I’ll walk you through exactly what to look for.
– 1 cup (2 sticks / 226g) Unsalted Butter: This is the star of the show. I always use unsalted so I can control the salt level. For the best flavor, use a quality brand like Kerrygold or Plugrà—their higher butterfat content creates a richer brown butter and a more tender cookie. You’ll be browning this, so don’t skip that step!
– 2 ¼ cups (280g) All-Purpose Flour: Standard all-purpose flour is perfect here. Don’t use bread flour or cake flour, as they’ll alter the texture. I like to weigh my flour for the most accurate results, but if you’re using measuring cups, spoon the flour into the cup and level it off with a knife—don’t scoop directly from the bag.
– 1 teaspoon Baking Soda: This is our leavening agent. It helps the cookies spread just the right amount and gives them a nice lift. Make sure it’s fresh (not expired) for the best results.
– ½ teaspoon Salt: A crucial ingredient for balancing the sweetness and enhancing the brown butter flavor. I use fine sea salt for the dough.
– 1 cup (200g) Packed Light Brown Sugar: This is where the chewiness comes from. Brown sugar is more acidic and moist than white sugar, which creates a softer, more tender cookie. Make sure it’s packed firmly into the measuring cup.
– ½ cup (100g) Granulated Sugar: The white sugar helps with spreading and gives the cookies those slightly crisp edges. The combination of both sugars is key.
– 1 Large Egg + 1 Large Egg Yolk: The whole egg provides structure, while the extra yolk adds richness, tenderness, and that signature chewy texture. It’s a little trick I learned from a pastry chef friend.
– 2 teaspoons Vanilla Extract: Use pure vanilla extract, not imitation. It adds a warm, aromatic flavor that complements the brown butter beautifully.
– 2 cups (340g) Semi-Sweet Chocolate Chips: I prefer semi-sweet for a balanced flavor that isn’t too sweet. You can use dark chocolate, milk chocolate, or even a mix. I personally love using a combination of chips and chopped chocolate bars for pools of melted chocolate. Guittard or Ghirardelli are my go-to brands for consistent quality.
Equipment Needed
You don’t need a professional kitchen to make these cookies. A few basic tools will do the trick.
– Medium Heavy-Bottomed Saucepan: This is essential for browning the butter. A light-colored pan (like stainless steel) is best so you can see the butter solids turn amber. Avoid non-stick for this step.
– Large Mixing Bowls: You’ll need one for the dry ingredients and one for the wet ingredients.
– Whisk and Wooden Spoon or Rubber Spatula: A whisk for the dry ingredients and a sturdy spatula for folding everything together.
– Measuring Cups and Spoons: For accurate measurements. A kitchen scale is a game-changer for baking, but measuring cups work fine.
– Baking Sheets: Standard half-sheet pans are perfect. Line them with parchment paper or a silicone baking mat for easy cleanup.
– Cookie Scoop (about 3 tablespoons): This ensures evenly sized cookies that bake uniformly. A 1.5-ounce scoop is my favorite for that perfect bakery-style size.
– Cooling Rack: Essential for letting the cookies cool properly without getting soggy on the bottom.
If you don’t have a cookie scoop, you can use two spoons to portion the dough. It’s a little messier, but it works just fine. And if you don’t have a cooling rack, a clean cutting board or even a piece of foil will do in a pinch.
Preparation Method
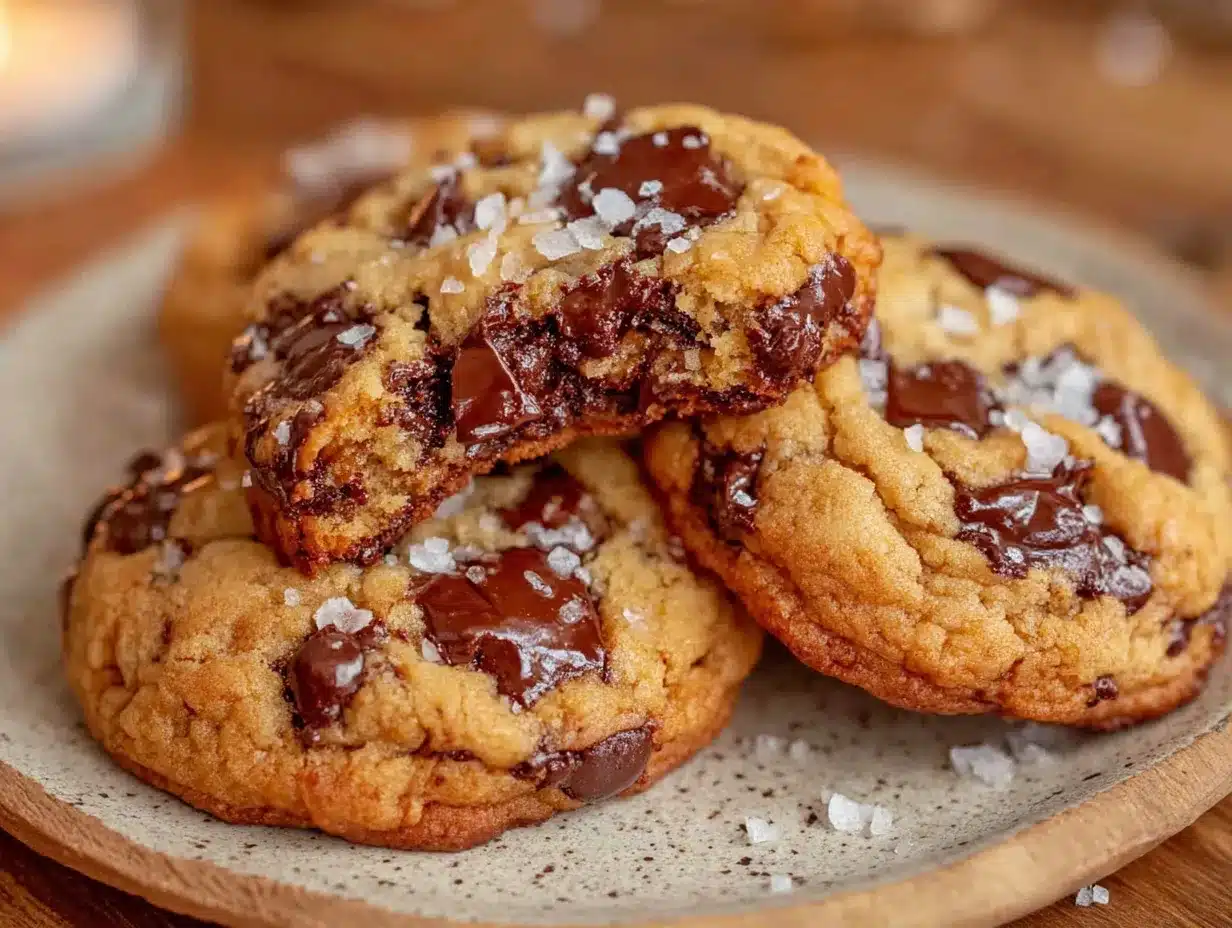
Alright, let’s get to the good part. This process is straightforward, but a few key steps make all the difference. Follow along, and you’ll have a batch of perfect cookies in no time.
- Brown the Butter: Place the 1 cup of unsalted butter in your medium saucepan over medium heat. Let it melt completely, then continue cooking, swirling the pan occasionally. The butter will begin to foam and crackle. After a few minutes, the foam will subside, and you’ll see tiny brown specks forming at the bottom of the pan. The butter will smell nutty and toasty. This whole process takes about 5-7 minutes. Once it’s a deep amber color, immediately remove the pan from the heat and pour the browned butter into a large heatproof bowl (including all those brown bits!). Let it cool for about 10-15 minutes. You want it warm, not hot, so it doesn’t cook the eggs later.
- Mix the Dry Ingredients: In a separate medium bowl, whisk together the 2 ¼ cups all-purpose flour, 1 teaspoon baking soda, and ½ teaspoon salt. Set this aside.
- Combine the Wet Ingredients: Once the browned butter has cooled, add the 1 cup packed light brown sugar and ½ cup granulated sugar to the bowl. Whisk vigorously until the mixture is smooth and well combined. It might look a little grainy at first, but keep going until it comes together.
- Add the Eggs and Vanilla: Crack in the 1 large egg and the 1 extra egg yolk. Add the 2 teaspoons of vanilla extract. Whisk again until the mixture is thick, glossy, and pale in color, about 1-2 minutes. This step is important for creating a good structure.
- Combine Wet and Dry: Pour the dry ingredients into the bowl with the wet ingredients. Using a rubber spatula or wooden spoon, fold everything together gently. Stop mixing as soon as you no longer see streaks of flour. Overmixing will make the cookies tough.
- Add the Chocolate Chips: Gently fold in the 2 cups of semi-sweet chocolate chips until they are evenly distributed throughout the dough. The dough will be thick and slightly sticky.
- Chill the Dough (Crucial Step!): Cover the bowl with plastic wrap and refrigerate the dough for at least 30 minutes, but preferably 1-2 hours. This step is non-negotiable for thick cookies. Chilling solidifies the butter, which prevents the cookies from spreading too much in the oven. It also allows the flavors to meld together beautifully.
- Preheat and Prep: When you’re ready to bake, preheat your oven to 375°F (190°C). Line two baking sheets with parchment paper or silicone mats.
- Scoop and Bake: Use your cookie scoop to portion the dough into balls, about 3 tablespoons each. Place them on the prepared baking sheets, leaving about 3 inches of space between each ball to allow for spreading. Bake for 10-12 minutes, or until the edges are golden brown and the centers still look slightly soft and puffy. They will continue to set on the baking sheet.
- Cool and Enjoy: Let the cookies cool on the baking sheet for 5-10 minutes. This is important—it allows them to firm up. Then, transfer them to a wire rack to cool completely. Or, you know, eat one (or three) while they’re still warm.
Cooking Tips & Techniques
I’ve made this recipe more times than I can count, and I’ve learned a few things the hard way. Here are my best tips to ensure your cookies turn out perfect every single time.
– Don’t Walk Away from the Butter: Browning butter goes from perfect to burnt in seconds. Keep a close eye on it, and as soon as you see those brown specks and smell that nutty aroma, pull it off the heat immediately. I’ve ruined a few pans of butter by getting distracted.
– Use a Cookie Scoop for Evenness: I cannot stress this enough. Using a scoop ensures every cookie is the same size, so they all bake at the same rate. No more burnt edges on tiny cookies while the big ones are still raw in the middle.
– The Parchment Paper Trick: If you’re baking multiple batches, let the baking sheet cool completely between batches. If you plop dough onto a hot sheet, the butter will start melting immediately, and your cookies will spread into flat pancakes.
– Underbake Them Slightly: This is the secret to a chewy cookie. When they come out of the oven, the centers should look puffy and slightly underdone. They will continue to cook from the residual heat of the pan. If you wait until they look fully set, they’ll be overbaked and crunchy.
– Chill the Dough Overnight: If you have the time, chilling the dough for 12-24 hours is a game-changer. The flavors deepen, and the texture becomes even more complex. It’s like the cookie version of a good stew.
Variations & Adaptations
This recipe is a fantastic base for all sorts of delicious experiments. Don’t be afraid to make it your own.
– Chocolate Lover’s Dream: Swap out ½ cup of the semi-sweet chips for dark chocolate chunks or even white chocolate chips. You can also add a tablespoon of cocoa powder to the dry ingredients for a double chocolate version.
– Nutty Crunch: Toast ½ cup of chopped pecans or walnuts and fold them in with the chocolate chips. The crunch is a wonderful contrast to the chewy cookie.
– Sea Salt Finish: Just before baking, sprinkle a few flakes of flaky sea salt (like Maldon) on top of each dough ball. The salty-sweet combination is absolutely addictive.
– Gluten-Free Adaptation: You can substitute the all-purpose flour with a 1:1 gluten-free baking flour blend (like Bob’s Red Mill). The texture will be slightly different—a bit more cakey—but still delicious. Just make sure your blend contains xanthan gum.
– Vegan Option: Use a high-quality vegan butter stick (like Miyoko’s) and a flax egg (1 tablespoon ground flaxseed mixed with 3 tablespoons water, let sit for 5 minutes). The texture won’t be exactly the same, but it’s a surprisingly good alternative.
I once made a batch with chopped dark chocolate and a swirl of peanut butter. It was a glorious, messy success. Don’t be shy about experimenting.
Serving & Storage Suggestions
These cookies are best enjoyed warm, when the chocolate is still melty and the texture is at its peak. But they’re pretty fantastic at room temperature, too.
– Serving: Serve them on a beautiful plate with a tall glass of cold milk or a cup of strong coffee. For an extra-special treat, sandwich a scoop of vanilla ice cream between two cookies for an epic ice cream sandwich.
– Storage: Store any leftover cookies in an airtight container at room temperature for up to 5 days. To keep them extra soft, add a slice of fresh bread to the container—the cookies will absorb the moisture from the bread.
– Freezing: You can freeze the baked cookies for up to 3 months. Just place them in a freezer-safe bag or container. To enjoy, let them thaw at room temperature or pop them in a 300°F oven for a few minutes to warm up.
– Freezing the Dough: This is my favorite trick. Scoop the dough into balls, place them on a baking sheet, and freeze until solid. Then transfer the frozen dough balls to a freezer bag. You can bake them straight from frozen—just add 2-3 minutes to the baking time. Fresh cookies in 15 minutes, anytime you want them.
Nutritional Information & Benefits
Let’s be honest, these are a treat, not a health food. But knowing what’s in them can help you enjoy them mindfully.
– Estimated Per Cookie (based on 24 cookies): Approximately 250 calories, 14g fat, 32g carbohydrates, 3g protein, 1g fiber, 20g sugar.
– Key Ingredients: The brown butter adds a small amount of healthy fats, and the dark chocolate contains antioxidants. The eggs provide protein. The real benefit? The pure, unadulterated joy of a perfectly made cookie.
– Dietary Considerations: This recipe is not gluten-free, dairy-free, or vegan in its standard form, but see the variations section for adaptations. It contains gluten, dairy, and eggs.
I believe in balance. Enjoying a delicious, homemade cookie is part of a happy life. It’s about the experience, the smell, and the shared moment, not just the numbers.
Conclusion
This recipe for Perfect Thick and Chewy Brown Butter Chocolate Chip Cookies is more than just a list of ingredients and steps. It’s a little piece of kitchen magic. It’s the smell that fills your home, the warmth of a fresh-baked treat, and the smile on the face of anyone who takes a bite. It’s the cookie I turn to time and time again, and I have a feeling it will become one of your favorites, too.
I’d love to hear how yours turn out! Did you make any fun variations? Did you manage to resist eating the whole batch in one sitting? Drop a comment below and let me know. And if you loved this recipe, please share it with a friend or save it to your Pinterest board. Happy baking!
Frequently Asked Questions
Can I use salted butter instead of unsalted?
Yes, you can. Just reduce the added salt in the recipe to ¼ teaspoon to avoid making the cookies too salty. The flavor will still be delicious.
Why do I have to chill the dough? Can I skip this step?
Chilling the dough is crucial for achieving that thick, chewy texture. It solidifies the butter, which prevents the cookies from spreading too much in the oven. If you skip this step, your cookies will be thin and flat. I really don’t recommend skipping it.
My cookies spread too much. What did I do wrong?
This usually happens for a few reasons: the dough wasn’t chilled long enough, the butter was too warm when you mixed it, or you used too much sugar. Make sure to chill the dough for at least 30 minutes, and let the browned butter cool before mixing.
Can I make these cookies gluten-free?
Absolutely! Use a 1:1 gluten-free all-purpose baking flour blend that contains xanthan gum. The texture will be slightly more cakey, but they will still be delicious and chewy.
How do I get that perfect bakery-style look?
Right when the cookies come out of the oven, use a round cookie cutter or a large glass to gently “scoot” the edges of the cookies into a perfect circle. This gives them that uniform, professional appearance.
Pin This Recipe!
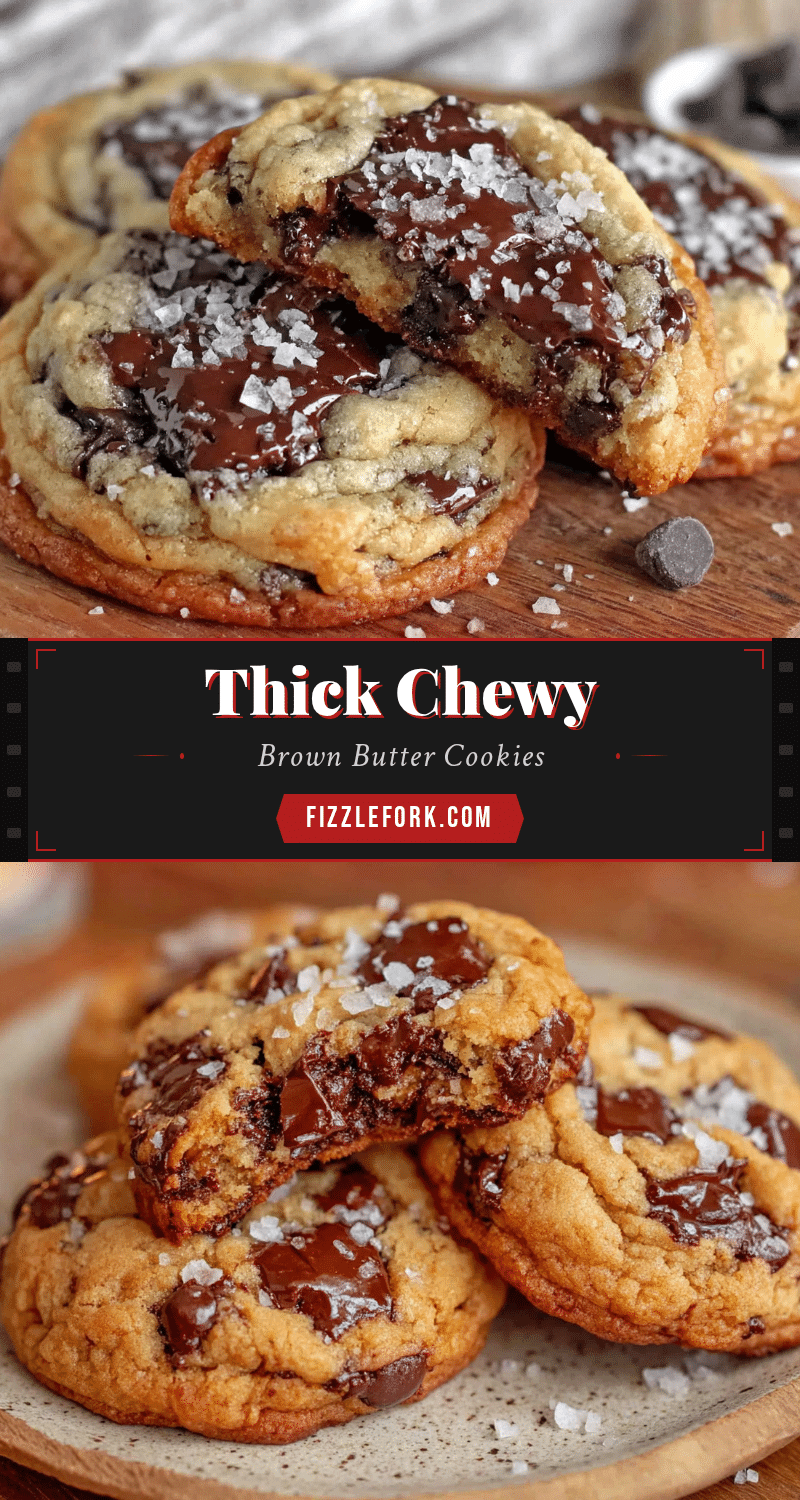
The Best Brown Butter Chocolate Chip Cookies Recipe (Easy)
Perfectly thick and chewy brown butter chocolate chip cookies with a nutty, caramelized flavor. This easy recipe uses simple ingredients and a few key techniques for bakery-style results every time.
- Prep Time: 15 minutes
- Cook Time: 12 minutes
- Total Time: 1 hour 27 minutes (including chilling)
- Yield: 24 cookies 1x
- Category: Dessert
- Cuisine: American
Ingredients
- 1 cup (2 sticks / 226g) unsalted butter
- 2 ¼ cups (280g) all-purpose flour
- 1 teaspoon baking soda
- ½ teaspoon salt
- 1 cup (200g) packed light brown sugar
- ½ cup (100g) granulated sugar
- 1 large egg + 1 large egg yolk
- 2 teaspoons vanilla extract
- 2 cups (340g) semi-sweet chocolate chips
Instructions
- Brown the butter: Place the 1 cup of unsalted butter in a medium saucepan over medium heat. Let it melt completely, then continue cooking, swirling the pan occasionally. The butter will foam and crackle. After a few minutes, the foam will subside, and tiny brown specks will form at the bottom. The butter will smell nutty and toasty. This takes about 5-7 minutes. Once it’s a deep amber color, immediately remove from heat and pour into a large heatproof bowl (including all brown bits). Let cool fo…
- Mix the dry ingredients: In a separate medium bowl, whisk together the 2 ¼ cups all-purpose flour, 1 teaspoon baking soda, and ½ teaspoon salt. Set aside.
- Combine the wet ingredients: Once the browned butter has cooled, add the 1 cup packed light brown sugar and ½ cup granulated sugar. Whisk vigorously until smooth and well combined.
- Add the eggs and vanilla: Crack in the 1 large egg and 1 extra egg yolk. Add the 2 teaspoons vanilla extract. Whisk again until the mixture is thick, glossy, and pale in color, about 1-2 minutes.
- Combine wet and dry: Pour the dry ingredients into the wet ingredients. Using a rubber spatula or wooden spoon, fold together gently until no streaks of flour remain. Do not overmix.
- Add the chocolate chips: Gently fold in the 2 cups of semi-sweet chocolate chips until evenly distributed. The dough will be thick and slightly sticky.
- Chill the dough: Cover the bowl with plastic wrap and refrigerate for at least 30 minutes, preferably 1-2 hours.
- Preheat and prep: When ready to bake, preheat oven to 375°F (190°C). Line two baking sheets with parchment paper or silicone mats.
- Scoop and bake: Use a cookie scoop (about 3 tablespoons) to portion the dough into balls. Place on prepared baking sheets, leaving about 3 inches of space between each. Bake for 10-12 minutes, until edges are golden brown and centers still look slightly soft and puffy.
- Cool and enjoy: Let cookies cool on the baking sheet for 5-10 minutes, then transfer to a wire rack to cool completely.
Notes
Chilling the dough is crucial for thick cookies. Do not skip. For best flavor, chill dough overnight. Underbake slightly for chewy texture. Let baking sheets cool between batches.
Nutrition
- Serving Size: 1 cookie
- Calories: 250
- Sugar: 20
- Sodium: 150
- Fat: 14
- Saturated Fat: 8
- Carbohydrates: 32
- Fiber: 1
- Protein: 3
Keywords: brown butter chocolate chip cookies, thick and chewy cookies, easy cookie recipe, bakery-style cookies, chocolate chip cookies