Mrs. Kowalski watched me fumbling with a bag of frozen green beans at the farmers market, my toddler strapped into the stroller and starting to fuss. She didn’t say anything at first. Then she reached past me, picked up a bunch of fresh ones, and said, “For the casserole, you want these. The frozen ones get sad.” I laughed and told her I was just trying to get dinner on the table without a meltdown—from me or my kid. She smiled, tucked the fresh beans into my basket, and told me her secret: blanch them first, even if the recipe says not to. That was three years ago, and I haven’t made green bean casserole any other way since.
Honestly, I used to dread green bean casserole season. You know the one—mushy beans swimming in canned soup, topped with those sad, soggy onions that taste more like cardboard than crunch. It’s the kind of dish everyone tolerates but nobody raves about. But this version? It’s different. It’s the one that got my picky nephew to ask for seconds, the one my mother-in-law now requests for Thanksgiving instead of her own recipe. Let me tell you, that’s a win.
This kid-approved green bean casserole with crispy onions came together through trial and error—and a lot of help from that chance encounter at the market. I wanted something that felt special enough for a holiday table but simple enough for a Tuesday night. Something that didn’t require a chemistry degree to pull off. And most importantly, something that would actually get eaten by the small humans at the table. Maybe you’ve been there—spending hours on a dish only to watch your kids push it around their plates. This recipe changed that for us.
The first time I made it, I forgot to save some crispy onions for the topping. I mean, I ate them straight out of the bag while the casserole baked. It was a moment of weakness, and honestly, no regrets. But now I buy two bags—one for the recipe, one for the cook. That’s just smart planning. This recipe stayed with me because it solved a real problem: how to make a classic dish that everyone actually loves, without breaking the bank or losing my mind in the kitchen.
Why You’ll Love This Recipe
Let me tell you why this kid-approved green bean casserole with crispy onions has become my go-to for family dinners and holiday gatherings alike. I’ve tested this recipe more times than I can count, tweaking it based on feedback from real families—including my own crew of picky eaters and veggie skeptics.
- Quick & Easy: From start to table in about 45 minutes. The active prep time is only 15 minutes, which means you can actually enjoy the meal instead of being stuck in the kitchen.
- Simple Ingredients: No fancy grocery trips needed. You likely have most of these items in your pantry already—canned soup, milk, soy sauce, black pepper, and of course, green beans and crispy onions.
- Perfect for Family Dinners: This dish works for weeknight meals, Thanksgiving, Christmas, Easter, potlucks, and literally any occasion where you need a vegetable side that people will actually eat.
- Crowd-Pleaser: I’ve served this to kids as young as three and adults in their eighties. The feedback is always the same—they ask for the recipe.
- Unbelievably Delicious: The texture is what sets this apart. The beans stay crisp-tender, the sauce is creamy without being gluey, and the crispy onion topping stays crunchy even after baking.
What makes this recipe different from the rest? It’s the blanch-first technique that Mrs. Kowalski taught me. Most recipes tell you to use canned or frozen beans straight from the package, which leads to that mushy texture nobody loves. Taking five extra minutes to blanch the beans transforms the entire dish. The beans retain their bright green color and a slight snap, which makes them infinitely more appealing to kids who usually avoid anything green.
This isn’t just another version of green bean casserole—it’s the version that makes you close your eyes after the first bite. It’s comfort food reimagined: faster than the from-scratch versions, but with way more soul than the shortcut kind. Perfect for impressing the in-laws without stressing yourself out, or turning a simple Tuesday dinner into something the kids actually look forward to.
What Ingredients You Will Need
This recipe uses simple, wholesome ingredients that work together to create something genuinely delicious. The beauty of this kid-approved green bean casserole with crispy onions is that everything is easy to find and budget-friendly.
For the Casserole Base
- Fresh green beans – 1 ½ pounds, trimmed and cut into 2-inch pieces (fresh makes a huge difference here; frozen will work in a pinch but won’t have the same texture)
- Condensed cream of mushroom soup – 1 can (10.5 ounces) – I prefer Campbell’s for consistency, but any brand works
- Whole milk – ¾ cup (adds richness; 2% works too, but don’t go lower)
- Soy sauce – 1 tablespoon (this is the secret ingredient that adds depth without making it taste Asian)
- Black pepper – ¼ teaspoon, freshly ground
- Garlic powder – ½ teaspoon (optional but recommended for extra flavor)
For the Topping
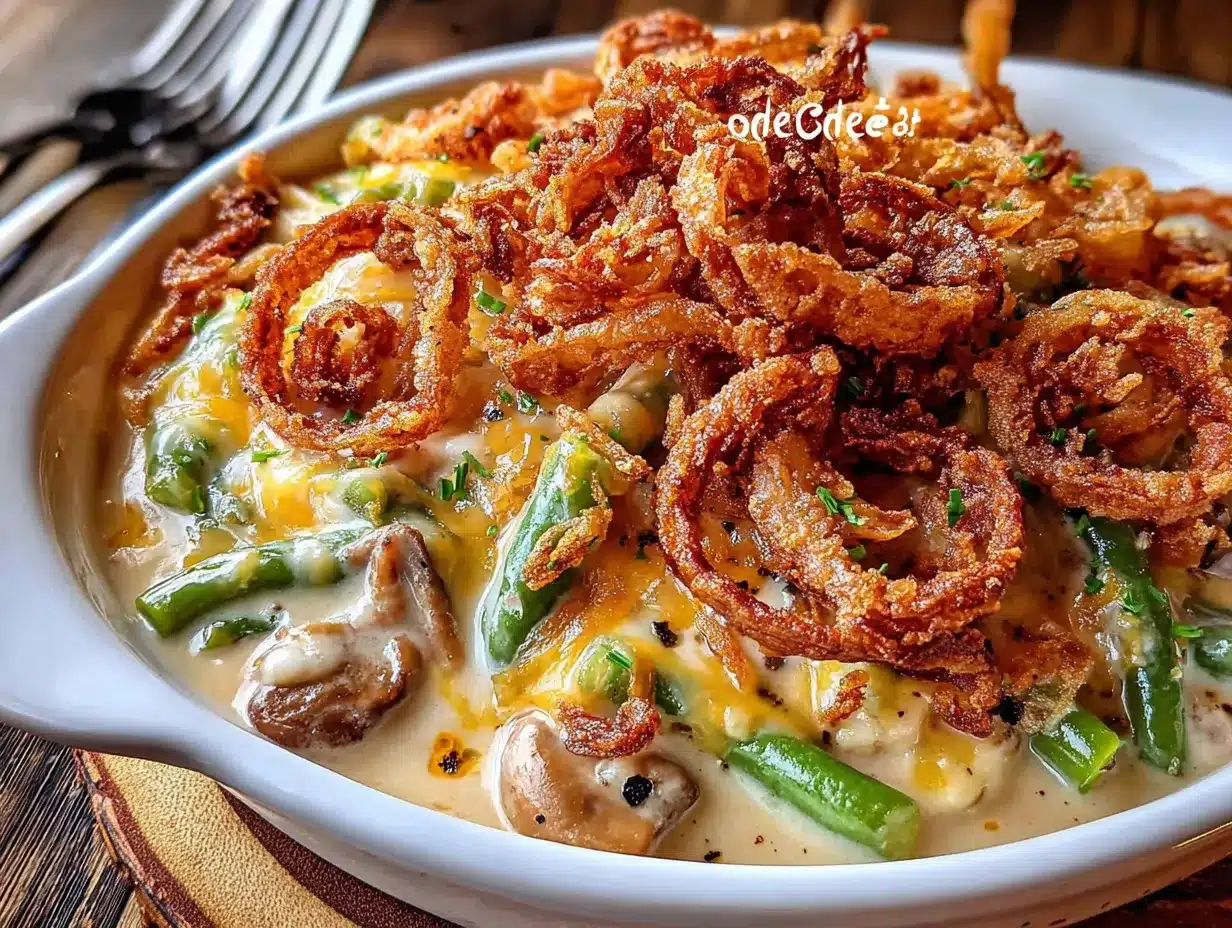
- Crispy fried onions – 1 ½ cups (the classic French’s brand works perfectly, but store brands are fine too)
- Shredded cheddar cheese – ½ cup (optional but highly recommended; sharp cheddar adds the most flavor)
Let me talk about ingredient selection for a moment because it matters more than you might think. For the green beans, look for ones that are bright green and snap when you bend them. Avoid any that are limp, brown-spotted, or feel slimy. If you’re using frozen green beans, thaw them completely and pat them dry with paper towels before using—this prevents the casserole from becoming watery.
For the cream of mushroom soup, I know some people are tempted to make their own from scratch. And hey, if you have the time and energy, go for it. But honestly? The canned version works perfectly here and keeps this recipe accessible for busy weeknights. Just make sure you’re using the condensed version, not the ready-to-eat kind.
If you need substitutions, here are some that work well: use cream of chicken soup instead of mushroom if you prefer; swap the whole milk for unsweetened almond milk or oat milk (though the sauce will be slightly thinner); use tamari instead of soy sauce for a gluten-free option. For a dairy-free version, use a plant-based milk and skip the cheddar cheese—the crispy onions add plenty of flavor on their own.
Equipment Needed
You don’t need a professional kitchen to make this kid-approved green bean casserole with crispy onions. Here’s what you’ll need:
- Large pot – For blanching the green beans (any 5-6 quart pot works)
- Colander – For draining the beans after blanching
- Large bowl – For mixing the casserole filling
- 9×13-inch baking dish – This is the standard size; an 8×8 dish works if you want a thicker casserole
- Mixing spoon – A sturdy wooden spoon or silicone spatula works great
- Measuring cups and spoons – For accuracy
- Sharp knife and cutting board – For trimming the green beans
If you don’t have a 9×13 dish, you can use a 10-inch cast iron skillet or a 2-quart casserole dish instead. Just adjust the baking time slightly—a wider dish will cook faster, a deeper one will need a few extra minutes. I’ve used both and they work fine. Also, if you’re short on time, you can skip the colander and just use a slotted spoon to remove the beans from the hot water. I’ve done that plenty of times when my dishwasher was full and I didn’t want to dirty another dish.
One tip: invest in a good colander if you don’t have one. The cheap plastic ones tend to warp in hot water. I learned that the hard way when mine collapsed mid-drain and I spent fifteen minutes picking beans out of the sink. Not my finest moment.
Preparation Method
Here’s how to make this kid-approved green bean casserole with crispy onions. The steps are straightforward, but I’ve included all the little details that make a difference.
- Preheat your oven to 350°F (175°C). This gives it time to come to temperature while you prep everything else. Lightly grease your 9×13 baking dish with butter or cooking spray.
- Bring a large pot of salted water to a boil. Add about 1 tablespoon of salt per 4 cups of water. While you’re waiting, fill a large bowl with ice water and set it nearby. This is your ice bath—it stops the cooking process instantly.
- Blanch the green beans. Drop the trimmed beans into the boiling water and cook for exactly 3 minutes. Set a timer—no guessing! The beans should turn bright green and become slightly tender but still have a snap. Overcooking them at this stage leads to mushy beans later.
- Shock the beans. Using a slotted spoon or colander, immediately transfer the beans to the ice bath. Let them sit for 3-4 minutes until completely cool. This stops the cooking and locks in that bright green color. Drain the beans well and pat them dry with a clean kitchen towel or paper towels. Moisture is the enemy of a good casserole texture.
- Make the sauce mixture. In a large bowl, whisk together the cream of mushroom soup, milk, soy sauce, black pepper, and garlic powder until smooth. The mixture should be creamy and slightly thick. If it looks too thick, add another tablespoon of milk.
- Combine everything. Add the drained green beans to the sauce mixture and stir until every bean is coated. This is important—uncoated beans will dry out in the oven. Fold in ½ cup of the crispy fried onions and the shredded cheddar cheese if you’re using it.
- Transfer to the baking dish. Pour the mixture into your prepared dish and spread it into an even layer. Use a spatula to smooth the top so it bakes evenly.
- Bake the casserole. Place the dish in the preheated oven and bake for 25 minutes, uncovered. The casserole should be bubbly around the edges and the sauce should be thickened.
- Add the topping. Remove the casserole from the oven and sprinkle the remaining 1 cup of crispy fried onions evenly over the top. Return to the oven and bake for another 5-7 minutes, until the onions are golden and fragrant. Watch closely—they can burn quickly!
- Rest before serving. Let the casserole sit for 5 minutes after removing it from the oven. This allows the sauce to set slightly so it doesn’t run all over the plate when you serve it. I know it’s hard to wait, but trust me on this one.
A few sensory cues to watch for: when you’re blanching, the beans should turn a vibrant emerald green. The sauce should smell savory and slightly earthy from the mushroom soup. When the casserole comes out of the oven, the edges should be bubbling and the top should be golden brown. If you tap the dish gently, the casserole should jiggle slightly but not be liquidy.
Cooking Tips & Techniques
After making this kid-approved green bean casserole with crispy onions more times than I can count, I’ve learned a few things the hard way. Here are the tips that make a real difference.
Don’t skip the blanching step. I know it adds an extra pot to wash, but it’s non-negotiable. The first time I made this, I thought I could save time by using frozen beans straight from the bag. The result was a watery, sad casserole that nobody touched. Blanching gives you control over the texture—crisp-tender beans that hold up to the sauce and baking process.
Dry your beans thoroughly. After shocking them in the ice bath, really take the time to pat them dry. Excess water dilutes the sauce and makes the casserole soupy. I usually spread the beans on a clean kitchen towel and roll them up gently to absorb the moisture. It takes an extra minute but pays off big time.
Add the crispy onions in two stages. This is the trick that makes the topping actually stay crunchy. If you add all the onions at the beginning, they get soft and soggy from the moisture in the sauce. By reserving some for the last few minutes of baking, you get that satisfying crunch that makes this dish so addictive.
Let the casserole rest. I cannot stress this enough. The first few times I made this, I served it straight from the oven and ended up with a soupy mess on everyone’s plates. Giving it those 5 minutes allows the sauce to thicken and set. Your patience will be rewarded.
Make it ahead. This casserole actually tastes better if you assemble it a day ahead and let the flavors meld in the fridge. Just prepare everything through step 6, cover the dish, and refrigerate. When you’re ready to bake, add about 10 minutes to the cooking time since you’re starting from cold. This is a lifesaver for holiday meals.
One mistake I made early on: I used low-fat milk to save calories. Don’t do it. The sauce needs the fat from whole milk to achieve that creamy texture. If you’re worried about calories, use less cheese or skip it entirely—the sauce will still be delicious.
Variations & Adaptations
This kid-approved green bean casserole with crispy onions is incredibly versatile. Here are some variations I’ve tried and loved:
Mushroom Lover’s Version: Sauté 8 ounces of sliced fresh mushrooms in butter until golden brown, then fold them into the sauce along with the green beans. This adds an earthy depth that mushroom fans will adore. I made this for a friend who claims to hate green bean casserole, and she asked for the recipe.
Bacon & Cheese Version: Cook 4 slices of bacon until crispy, crumble them, and stir into the casserole along with an extra ½ cup of shredded cheddar. Top with the crispy onions as usual. The smoky bacon flavor pairs beautifully with the creamy sauce. My kids go absolutely crazy for this version—they call it “the special one.”
Gluten-Free Version: Use a gluten-free cream of mushroom soup (Pacific Foods makes a good one) and gluten-free crispy fried onions. Most brands of fried onions contain wheat flour, so check the label carefully. The texture will be slightly different—the gluten-free onions don’t stay as crunchy—but the flavor is still excellent.
Dairy-Free Version: Swap the whole milk for unsweetened oat milk or full-fat coconut milk. Omit the cheddar cheese or use a dairy-free shred. The sauce will be a bit thinner, so you might want to add an extra tablespoon of cornstarch dissolved in milk to help it thicken.
Southern-Style Version: Add ½ teaspoon of smoked paprika and a pinch of cayenne pepper to the sauce mixture. Use sharp cheddar cheese and top with extra black pepper before serving. This gives the casserole a subtle smoky heat that adults love.
Fresh Herb Version: Stir in 2 tablespoons of fresh thyme leaves or 1 tablespoon of fresh rosemary, finely chopped, along with the sauce. The herbs brighten up the dish and make it feel more elegant. I serve this version when I’m trying to impress dinner guests.
Serving & Storage Suggestions
This kid-approved green bean casserole with crispy onions is best served warm, straight from the oven. The contrast between the hot, creamy filling and the crunchy topping is what makes it so special. Let it rest for that crucial 5 minutes, then scoop it onto plates with a wide spatula to keep the topping intact.
For presentation, I like to serve it in the baking dish right on the table—it’s rustic and homey. If you want to get fancy, you can transfer it to a warmed serving bowl and garnish with a few extra crispy onions and a sprinkle of fresh parsley. But honestly, the casserole looks beautiful as-is with that golden brown top.
This dish pairs beautifully with roasted turkey, baked ham, meatloaf, or even a simple rotisserie chicken. For a complete meal, serve it alongside mashed potatoes and dinner rolls. The creamy sauce is perfect for sopping up with bread—my kids fight over the last bits.
Storage Instructions: Leftovers can be stored in an airtight container in the refrigerator for up to 4 days. The crispy onions will soften over time, but the flavor will still be delicious. To reheat, place individual portions in the microwave for 1-2 minutes, or reheat the entire dish in a 350°F oven for 15-20 minutes until warmed through.
Freezer Instructions: You can freeze this casserole before or after baking. To freeze unbaked, assemble the casserole through step 6, cover tightly with foil, and freeze for up to 3 months. Thaw overnight in the refrigerator before baking, adding 10-15 minutes to the cooking time. To freeze baked casserole, let it cool completely, then wrap tightly and freeze. Thaw and reheat in a 350°F oven until hot.
One thing I love about this recipe: the flavors actually develop and deepen after a day in the fridge. Leftovers often taste even better than the fresh version. So don’t be shy about making extra—you’ll be happy to have it for lunch the next day.
Nutritional Information & Benefits
Here’s the estimated nutritional breakdown for one serving of this kid-approved green bean casserole with crispy onions (based on 8 servings):
| Nutrient | Amount Per Serving |
|---|---|
| Calories | 185 |
| Total Fat | 10g |
| Saturated Fat | 4g |
| Cholesterol | 15mg |
| Sodium | 580mg |
| Total Carbohydrates | 18g |
| Dietary Fiber | 3g |
| Sugars | 5g |
| Protein | 5g |
| Vitamin A | 15% DV |
| Vitamin C | 20% DV |
| Calcium | 8% DV |
| Iron | 6% DV |
Green beans are a fantastic source of vitamins A, C, and K, as well as fiber and folate. They’re low in calories but high in nutrients, making them a smart addition to any meal. The crispy onions add a bit of indulgence, but that’s what makes this dish so satisfying—it’s a vegetable side that actually feels like a treat.
This recipe is vegetarian as written and can be made gluten-free or dairy-free with simple substitutions. It’s not low-sodium due to the canned soup and fried onions, but you can reduce the sodium by using low-sodium soup and cutting back on added salt. From a wellness perspective, I love that this dish gets my kids to eat a full serving of green vegetables without any complaining. That’s a win in my book.
Conclusion
This kid-approved green bean casserole with crispy onions has earned a permanent spot in my recipe rotation. It’s the dish that turned a tired holiday cliché into something my family genuinely looks forward to. The blanched beans stay crisp, the sauce is creamy without being heavy, and that crunchy onion topping is pure magic.
I love that this recipe is flexible enough to adapt to whatever you have on hand—swap in different cheeses, add bacon, go dairy-free—it all works. But the core technique of blanching the beans and adding the onions in two stages is what makes it special. Those small steps transform a humble casserole into something worth celebrating.
I’d love to hear how this recipe turns out for you. Did your kids go back for seconds? Did you try one of the variations? Drop a comment below and let me know—your feedback helps other readers decide if this recipe is right for them. And if you took photos, tag me on social media so I can see your beautiful creation. Happy cooking, friends!
Frequently Asked Questions
Can I use frozen green beans instead of fresh?
Yes, you can use frozen green beans in a pinch. Thaw them completely and pat them dry with paper towels before using. Skip the blanching step since frozen beans are already blanched during processing. Keep in mind that frozen beans will be softer than fresh ones, so the texture won’t be as crisp.
How do I keep the crispy onions from getting soggy?
The key is adding them in two stages. Mix some into the casserole before baking, then reserve the rest for the last 5-7 minutes of baking. This way, the onions on top stay crunchy while the ones inside add flavor. Also, make sure your green beans are thoroughly dried after blanching—excess moisture is the enemy of crunch.
Can I make this casserole ahead of time?
Absolutely! Assemble the casserole through step 6, cover it, and refrigerate for up to 24 hours. When you’re ready to bake, add about 10 minutes to the cooking time since you’re starting from cold. You can also freeze it unbaked for up to 3 months—just thaw overnight in the fridge before baking.
What can I use instead of cream of mushroom soup?
You can use cream of chicken soup, cream of celery soup, or even a homemade béchamel sauce as a substitute. If you’re making your own sauce, melt 2 tablespoons of butter, whisk in 2 tablespoons of flour, then slowly add 1 cup of milk and cook until thickened. Season with salt, pepper, and a pinch of nutmeg.
Is this recipe gluten-free?
As written, this recipe is not gluten-free because traditional cream of mushroom soup and crispy fried onions contain wheat flour. However, you can easily make it gluten-free by using a certified gluten-free cream of mushroom soup and gluten-free fried onions. Check labels carefully—not all brands are gluten-free.
Pin This Recipe!
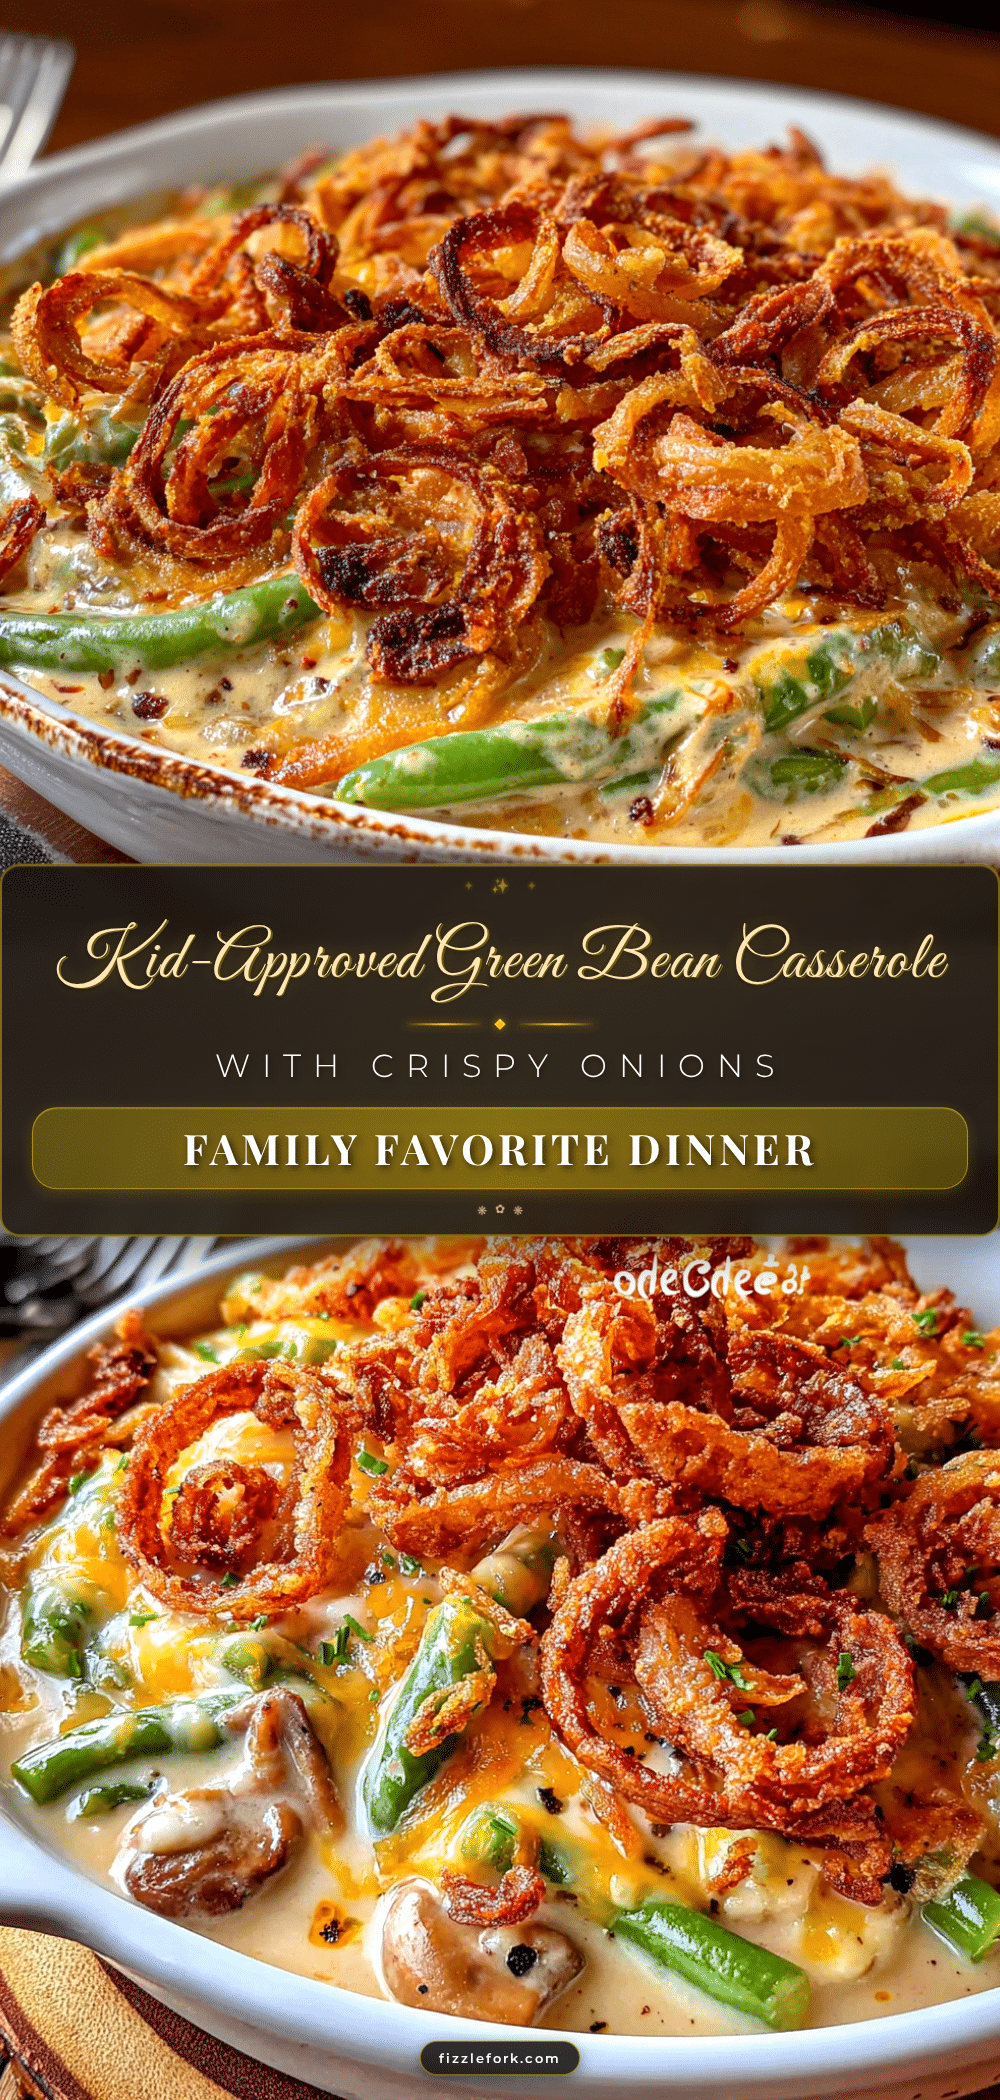
The Best Kid-Approved Green Bean Casserole with Crispy Onions

This kid-approved green bean casserole with crispy onions features crisp-tender beans, a creamy sauce, and a crunchy onion topping. It’s a family-friendly twist on the classic holiday side dish that even picky eaters love.
- Prep Time: 15 minutes
- Cook Time: 30 minutes
- Total Time: 45 minutes
- Yield: 8 servings 1x
- Category: Side Dish
- Cuisine: American
Ingredients
- 1 ½ pounds fresh green beans, trimmed and cut into 2-inch pieces
- 1 can (10.5 ounces) condensed cream of mushroom soup
- ¾ cup whole milk
- 1 tablespoon soy sauce
- ¼ teaspoon freshly ground black pepper
- ½ teaspoon garlic powder (optional)
- 1 ½ cups crispy fried onions
- ½ cup shredded cheddar cheese (optional)
Instructions
- Preheat your oven to 350°F (175°C). Lightly grease a 9×13-inch baking dish with butter or cooking spray.
- Bring a large pot of salted water to a boil (about 1 tablespoon salt per 4 cups water). Fill a large bowl with ice water and set aside.
- Blanch the green beans: Drop the trimmed beans into the boiling water and cook for exactly 3 minutes. They should turn bright green and be slightly tender but still have a snap.
- Shock the beans: Immediately transfer the beans to the ice bath using a slotted spoon or colander. Let sit for 3-4 minutes until completely cool. Drain well and pat dry with a clean kitchen towel or paper towels.
- Make the sauce mixture: In a large bowl, whisk together the cream of mushroom soup, milk, soy sauce, black pepper, and garlic powder (if using) until smooth.
- Combine everything: Add the drained green beans to the sauce mixture and stir until every bean is coated. Fold in ½ cup of the crispy fried onions and the shredded cheddar cheese (if using).
- Transfer to the baking dish: Pour the mixture into the prepared dish and spread into an even layer.
- Bake the casserole: Place in the preheated oven and bake for 25 minutes, uncovered, until bubbly around the edges and the sauce has thickened.
- Add the topping: Remove from the oven and sprinkle the remaining 1 cup of crispy fried onions evenly over the top. Return to the oven and bake for another 5-7 minutes, until the onions are golden and fragrant.
- Rest before serving: Let the casserole sit for 5 minutes before serving to allow the sauce to set.
Notes
Don’t skip the blanching step—it ensures crisp-tender beans. Dry the beans thoroughly after shocking to avoid a watery casserole. Add the crispy onions in two stages for maximum crunch. Let the casserole rest for 5 minutes before serving to allow the sauce to set. For make-ahead, assemble through step 6, cover, and refrigerate for up to 24 hours; add about 10 minutes to the baking time. For freezing, assemble unbaked, cover tightly, and freeze for up to 3 months; thaw overnight in the fridge before baking.
Nutrition
- Serving Size: 1 serving (about 1 c
- Calories: 185
- Sugar: 5
- Sodium: 580
- Fat: 10
- Saturated Fat: 4
- Carbohydrates: 18
- Fiber: 3
- Protein: 5
Keywords: green bean casserole, kid-approved, crispy onions, Thanksgiving side dish, easy vegetable side dish, holiday recipe, family dinner


