I’m not supposed to play favorites with recipes, but this peppermint cheesecake has me completely hooked. It all started last December when my neighbor, an older woman named Clara whose kitchen window always glowed warm, watched me struggle with a grocery bag that had split open in the parking lot. She didn’t say anything at first. Then she just smiled, helped me gather my scattered cans, and handed me a crumpled napkin with handwriting so tiny I had to squint. “Try this,” she said. “It’s the only dessert you’ll need all season.”
That napkin sat on my counter for three days before I actually looked at it. Honestly, I was skeptical. A peppermint cheesecake? I’d had my share of dry, crumbly cheesecakes that promised holiday magic but delivered nothing but disappointment. But Clara’s version was different. The first time I made it, I accidentally over-whipped the cream and thought I’d ruined the whole thing. Turns out, that little mistake gave the filling this incredible light, airy texture that melts on your tongue. Maybe you’ve been there—when a kitchen mishap turns into your favorite happy accident.
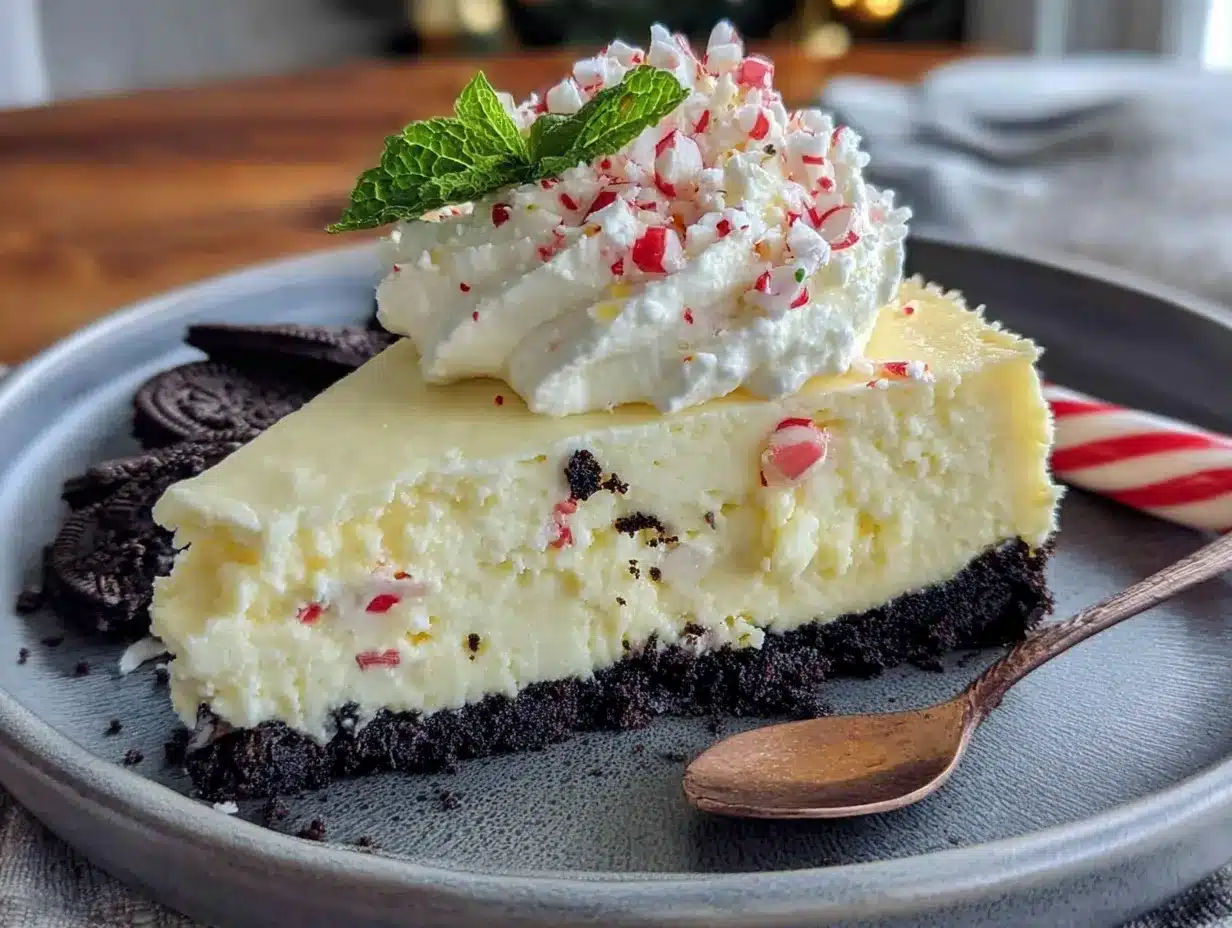
What makes this the perfect holiday peppermint cheesecake isn’t just the festive red and white swirls. It’s the way the cool peppermint cuts through the rich, creamy cheesecake filling. It’s the crunchy chocolate cookie crust that gives way to that silky center. It’s the fact that you can make it ahead of time and actually enjoy your own holiday party. Clara moved away last spring, but every December when I pull out that worn napkin, I think of her kindness. And honestly, that’s what the holidays are really about—sharing something good with someone else.
Why You’ll Love This Recipe
This isn’t just another cheesecake recipe you’ll bookmark and forget. After testing this peppermint cheesecake six times (yes, six—my family was thrilled, my waistline less so), I can tell you exactly why this version works when others fall flat. The secret is in the balance. Too many peppermint cheesecakes taste like toothpaste or get that weird, grainy texture from crushed candy canes. Not this one.
- Quick & Easy : Comes together in about 30 minutes of active prep time. The oven does the rest of the work while you wrap presents or sip hot cocoa.
- Simple Ingredients : No fancy grocery trips needed. Cream cheese, sour cream, eggs, heavy cream—all the usual suspects. The peppermint extract and candy canes are the only special additions.
- Perfect for Holiday Gatherings : This dessert steals the show at Christmas dinner, cookie exchanges, and New Year’s Eve parties. It’s festive without being fussy.
- Crowd-Pleaser : Even people who claim they don’t like cheesecake ask for seconds. The peppermint flavor is refreshing, not overwhelming.
- Unbelievably Delicious : The texture is what gets everyone. It’s dense but not heavy, creamy but not gloppy. That first bite with the chocolate crust and cool peppermint filling? Pure magic.
What makes this recipe different from the rest is the technique. Instead of crushing candy canes into the batter (which melts into a sticky mess), I use peppermint extract for clean, consistent flavor. The crushed candy canes go on top, where they stay crunchy and beautiful. I also add a splash of sour cream that keeps the cheesecake from cracking—a trick I learned after my first three attempts looked like earthquake zones.
This peppermint cheesecake is the kind of dessert that makes you close your eyes after the first bite. It’s comfort food reimagined for the holidays—familiar enough to feel nostalgic, but special enough to feel like an occasion. Perfect for impressing your mother-in-law without spending all day in the kitchen.
What Ingredients You Will Need
This recipe uses simple, wholesome ingredients that work together to deliver that perfect holiday flavor. Most of these are pantry staples, and the few special items are easy to find at any grocery store during the holiday season. I’ve tested this with different brands and substitutions, so I’ll share what works best.
For the Crust
- 2 cups chocolate cookie crumbs (about 24 Oreos, cream removed, or use chocolate graham crackers). I prefer Oreos for that deep chocolate flavor that complements the peppermint.
- 5 tablespoons unsalted butter, melted. Salted butter works too, just skip the added salt in the crust.
- 2 tablespoons granulated sugar. Optional, but adds a little sweetness to balance the dark chocolate.
- Pinch of salt. Just a tiny one—it makes the chocolate taste more chocolatey.
For the Cheesecake Filling
- 32 ounces cream cheese, softened to room temperature. This is non-negotiable. Cold cream cheese gives you lumpy cheesecake. I recommend Philadelphia brand for the smoothest texture.
- 1 cup granulated sugar. Regular white sugar works perfectly here. No need for anything fancy.
- 1 cup sour cream, room temperature. This is my secret weapon for crack-free cheesecake. Full-fat gives the best texture.
- 1 teaspoon vanilla extract. Pure vanilla, not imitation. It rounds out the peppermint flavor beautifully.
- 1 ½ teaspoons peppermint extract. Start with 1 teaspoon, taste the batter, then add more. Different brands have different strengths. I use Nielsen-Massey for the cleanest flavor.
- 4 large eggs, room temperature. Cold eggs will seize the batter. Leave them on the counter for an hour before starting.
- 2 tablespoons all-purpose flour. This helps stabilize the cheesecake and prevents cracking. You can substitute cornstarch if needed.
- Red food coloring (optional). Just a few drops for that festive pink swirl. Gel coloring works best and won’t thin the batter.
For the Topping
- 1 cup heavy whipping cream, cold. Look for heavy cream with at least 36% milk fat for the best whipped cream.
- 2 tablespoons powdered sugar. Adds sweetness and helps stabilize the cream.
- ½ teaspoon vanilla extract. For flavor.
- ½ cup crushed candy canes or peppermint candies. Crush them in a zip-top bag with a rolling pin. Don’t pulverize them—you want some texture.
- Whole candy canes for decoration (optional). Makes it look extra festive.
Equipment Needed
You don’t need a professional bakery setup for this peppermint cheesecake. Here’s what you’ll actually use:
- 9-inch springform pan. This is essential for removing the cheesecake cleanly. I’ve had my Nordic Ware pan for eight years, and it still works perfectly. If you don’t have one, you can use a deep-dish pie plate, but getting slices out will be trickier.
- Electric mixer. A stand mixer makes life easier, but a hand mixer works just fine. I actually prefer my hand mixer because I have more control over the speed.
- Large mixing bowls. You’ll need at least two—one for the crust mixture and one for the filling.
- Food processor or zip-top bag and rolling pin. For crushing the cookies and candy canes. The food processor is faster, but the bag method is oddly satisfying.
- Rubber spatula. For scraping every last bit of that creamy filling into the pan. Trust me, you won’t want to waste any.
- Roasting pan or large baking dish. For the water bath. This helps the cheesecake bake evenly and prevents cracking.
- Aluminum foil. To wrap the springform pan so water doesn’t leak in. Use heavy-duty foil and double wrap it.
- Wire cooling rack. For cooling the cheesecake gradually.
Budget-friendly tip: If you don’t own a springform pan, check your local thrift store. I found my backup pan for three dollars, and it works great.
Preparation Method
Let me walk you through this step by step. I’ve made this peppermint cheesecake more times than I can count, so I know exactly where things can go wrong—and how to fix them.
Step 1: Prepare the Crust
Preheat your oven to 325°F (163°C). If you’re using Oreos, scrape out the cream filling and discard it (or save it for another recipe—no judgment). Pulse the chocolate cookies in a food processor until you have fine crumbs. You need 2 cups of crumbs. In a bowl, mix the crumbs with the melted butter, sugar, and salt until it looks like wet sand. Press this mixture firmly into the bottom of your springform pan. Use the bottom of a measuring cup to really pack it down. Bake for 10 minutes, then set aside to cool. Don’t skip this step—a pre-baked crust stays crunchy.
Step 2: Wrap the Pan
While the crust cools, take two large sheets of heavy-duty aluminum foil and wrap them tightly around the outside of your springform pan. Go all the way up the sides. This is your waterproof armor against the water bath. I learned this the hard way after my first cheesecake came out soggy. Place the wrapped pan in a large roasting pan.
Step 3: Make the Filling
In a large bowl, beat the softened cream cheese with an electric mixer on medium speed until it’s completely smooth—about 2 minutes. Scrape down the bowl and the beaters. Add the sugar and beat for another 2 minutes until light and fluffy. Add the sour cream and vanilla, mixing until combined. Now add the peppermint extract. Start with 1 teaspoon, taste a tiny bit (it’s safe with raw eggs from the store, but use your judgment), and add more if you want a stronger peppermint kick.
Add the eggs one at a time, mixing on low speed after each addition just until incorporated. Overmixing at this stage adds too much air, which causes cracks. Fold in the flour gently with a spatula.
Step 4: Create the Swirl
Spoon about 1 cup of the batter into a separate bowl and stir in a few drops of red food coloring until you reach your desired pink shade. Pour the plain batter over the crust. Drop spoonfuls of the pink batter on top, then use a knife or skewer to gently swirl them together. Don’t over-swirl, or you’ll lose the distinct pattern. A few figure-eight motions are plenty.
Step 5: Water Bath and Bake
Pour hot water into the roasting pan until it reaches about halfway up the sides of the springform pan. Be careful not to splash water onto the cheesecake. Bake at 325°F (163°C) for 55-65 minutes. The edges should be set, but the center should still jiggle slightly when you gently shake the pan. It will continue cooking as it cools. Turn off the oven, crack the door open, and let the cheesecake sit inside for 1 hour. This gradual cooling prevents cracking.
Step 6: Chill
Remove the cheesecake from the water bath and take off the foil. Let it cool completely on a wire rack, then refrigerate for at least 6 hours, but overnight is better. I know it’s hard to wait, but this is where the magic happens. The flavors meld together, and the texture sets perfectly.
Step 7: Make the Topping
When you’re ready to serve, whip the cold heavy cream with the powdered sugar and vanilla until stiff peaks form. Spread or pipe the whipped cream over the chilled cheesecake. Sprinkle the crushed candy canes generously on top. Add whole candy canes around the edge if you’re feeling fancy.
Cooking Tips & Techniques
After making this peppermint cheesecake more times than I care to count, here’s what I’ve learned the hard way so you don’t have to.
Room temperature ingredients are not optional. I know, I know—you’re in a hurry. But cold cream cheese creates lumps that no amount of mixing can fix. Cold eggs seize the batter. Take everything out of the fridge at least an hour before you start. Set a timer if you need to.
Don’t overmix the eggs. This was my biggest struggle. When you beat the eggs too vigorously, you incorporate too much air. That air expands in the oven, then contracts as it cools, leaving you with cracks. Mix on low speed, and stop as soon as the yolk disappears into the batter.
The water bath is your friend. I tried skipping the water bath once because I was feeling lazy. Big mistake. The edges baked way faster than the center, and I ended up with a cheesecake that looked like the Grand Canyon. The steam from the water bath creates gentle, even heat that cradles the cheesecake.
Patience with cooling. Letting the cheesecake cool gradually in the oven with the door cracked is the most important step. Sudden temperature changes cause cracks. After that, let it come to room temperature before refrigerating. No shortcuts here.
Timing tip: Make this peppermint cheesecake two days before you need it. It actually tastes better on day two, and you’ll be so grateful to have one less thing to do on party day.
Variations & Adaptations
One of the best things about this peppermint cheesecake is how adaptable it is. Here are some variations I’ve tried and loved.
Gluten-Free Version
Use gluten-free chocolate sandwich cookies for the crust. Most brands work well—just check the label. The filling is naturally gluten-free as long as you use gluten-free flour or cornstarch. I’ve made this for gluten-free friends, and they couldn’t tell the difference.
White Chocolate Peppermint Cheesecake
Melt 6 ounces of white chocolate and fold it into the batter after adding the sour cream. The white chocolate adds a creamy sweetness that pairs beautifully with the peppermint. I tried this last Christmas, and it was a huge hit.
Chocolate Peppermint Cheesecake
Add 4 ounces of melted dark chocolate to the batter for a double-chocolate experience. Drizzle more melted chocolate over the top before adding the whipped cream. This version is dangerously good.
No-Bake Version
If you’re short on oven space (hello, Thanksgiving weekend), you can make a no-bake version. Use the same crust, but for the filling, beat 16 ounces of cream cheese with ½ cup sugar, then fold in 2 cups of whipped cream and the peppermint extract. Chill for 6 hours. It’s lighter and less dense, but still delicious.
Dairy-Free Adaptation
Use dairy-free cream cheese and coconut cream instead of heavy cream. The texture will be slightly different, but the flavor is still fantastic. I’ve tested this with my lactose-intolerant cousin, and she gave it two thumbs up.
Serving & Storage Suggestions
This peppermint cheesecake is best served cold, straight from the refrigerator. Let it sit at room temperature for about 10-15 minutes before slicing—this takes the chill off and makes cutting cleaner. Use a long, sharp knife dipped in hot water and wiped dry between slices for those picture-perfect pieces.
For presentation, I like to arrange whole candy canes around the base of the cheesecake and sprinkle extra crushed candy canes on the serving plate. It looks like a winter wonderland. A few fresh mint leaves add a pop of green that contrasts beautifully with the red and white.
This cheesecake pairs wonderfully with a cup of hot coffee, a mug of rich hot chocolate, or even a glass of cold milk. For adult gatherings, a peppermint martini or a glass of dessert wine like Moscato complements the flavors perfectly.
Storage: Cover the cheesecake loosely with plastic wrap or store it in an airtight cake carrier. It will keep in the refrigerator for up to 5 days. The flavor actually improves after a day or two as the peppermint mellows and melds with the cream cheese.
Freezing: This peppermint cheesecake freezes beautifully. Freeze it without the whipped cream topping for up to 3 months. Wrap it tightly in plastic wrap, then a layer of aluminum foil. Thaw overnight in the refrigerator, then add the whipped cream and crushed candy canes before serving.
Reheating: Honestly, I prefer this cheesecake cold. But if you want a warm dessert, microwave individual slices for 10-15 seconds. The crust stays crunchy, and the filling gets slightly soft.
Nutritional Information & Benefits
Let’s be real—this is a holiday dessert, not a health food. But it does have some redeeming qualities. Here’s the approximate nutritional breakdown per slice (based on 12 servings):
- Calories: 485
- Fat: 34g
- Saturated Fat: 20g
- Carbohydrates: 38g
- Sugar: 28g
- Protein: 8g
- Calcium: 10% of daily value
The cream cheese provides a good amount of calcium and protein. The peppermint extract isn’t just for flavor—peppermint has been shown to aid digestion, which is helpful after a heavy holiday meal. Plus, there’s something to be said for the mental health benefits of treating yourself to something special during the busy holiday season.
For dietary considerations: This recipe contains dairy, gluten, and eggs. With the adaptations I shared above, you can make it gluten-free or dairy-free. It’s not low-carb by any stretch, but a small slice is a perfectly reasonable indulgence.
Conclusion
This peppermint cheesecake has become my signature holiday dessert, and I think it deserves a spot in your holiday rotation too. It’s the kind of recipe that looks impressive but is surprisingly forgiving. The creamy filling, the crunchy chocolate crust, the cool burst of peppermint—every bite is a little celebration.
What I love most about this recipe is how it brings people together. Every time I serve it, someone asks for the recipe. Every time I make it, I think of Clara and her crumpled napkin. That’s the thing about good food—it carries memories with it.
I’d love to hear how your peppermint cheesecake turns out! Did you try any of the variations? Did your family love it as much as mine does? Drop a comment below and share your experience. And if you have your own twist on this recipe, please share it—I’m always looking for new ideas.
Happy baking, and may your holidays be filled with good food, warm company, and at least one dessert that makes everyone close their eyes and smile.
Frequently Asked Questions
Can I use store-bought graham cracker crust instead of making my own?
You can, but I don’t recommend it for this peppermint cheesecake. Store-bought crusts are usually too thin and not sturdy enough to hold the filling. Plus, the chocolate cookie crust is a big part of what makes this recipe special. The homemade crust takes only 10 minutes and makes a huge difference.
Why did my cheesecake crack?
Cracks happen for a few reasons: overmixing the batter, skipping the water bath, cooling too quickly, or overbaking. The most common culprit is overbaking. Remember, the center should still jiggle when you take it out. Don’t worry if you get a small crack—the whipped cream topping covers it beautifully.
Can I reduce the sugar in this recipe?
You can reduce the sugar in the filling by about ¼ cup without affecting the texture too much. I wouldn’t reduce it further because sugar helps stabilize the cheesecake structure. The peppermint flavor is strong enough that you might not miss the extra sweetness.
How far in advance can I make this peppermint cheesecake?
You can make the entire cheesecake (without the whipped cream topping) up to 3 days ahead. Store it covered in the refrigerator. Add the whipped cream and crushed candy canes on the day you plan to serve it. The candy canes will start to soften and bleed color if they sit on the cheesecake for too long.
Can I use peppermint extract instead of crushed candy canes for the topping?
The crushed candy canes on top are mostly for texture and visual appeal. You could skip them and just have plain whipped cream, but you’d lose that satisfying crunch and the festive look. If you want peppermint flavor in the whipped cream, add a drop or two of extract to the cream before whipping.
Pin This Recipe!
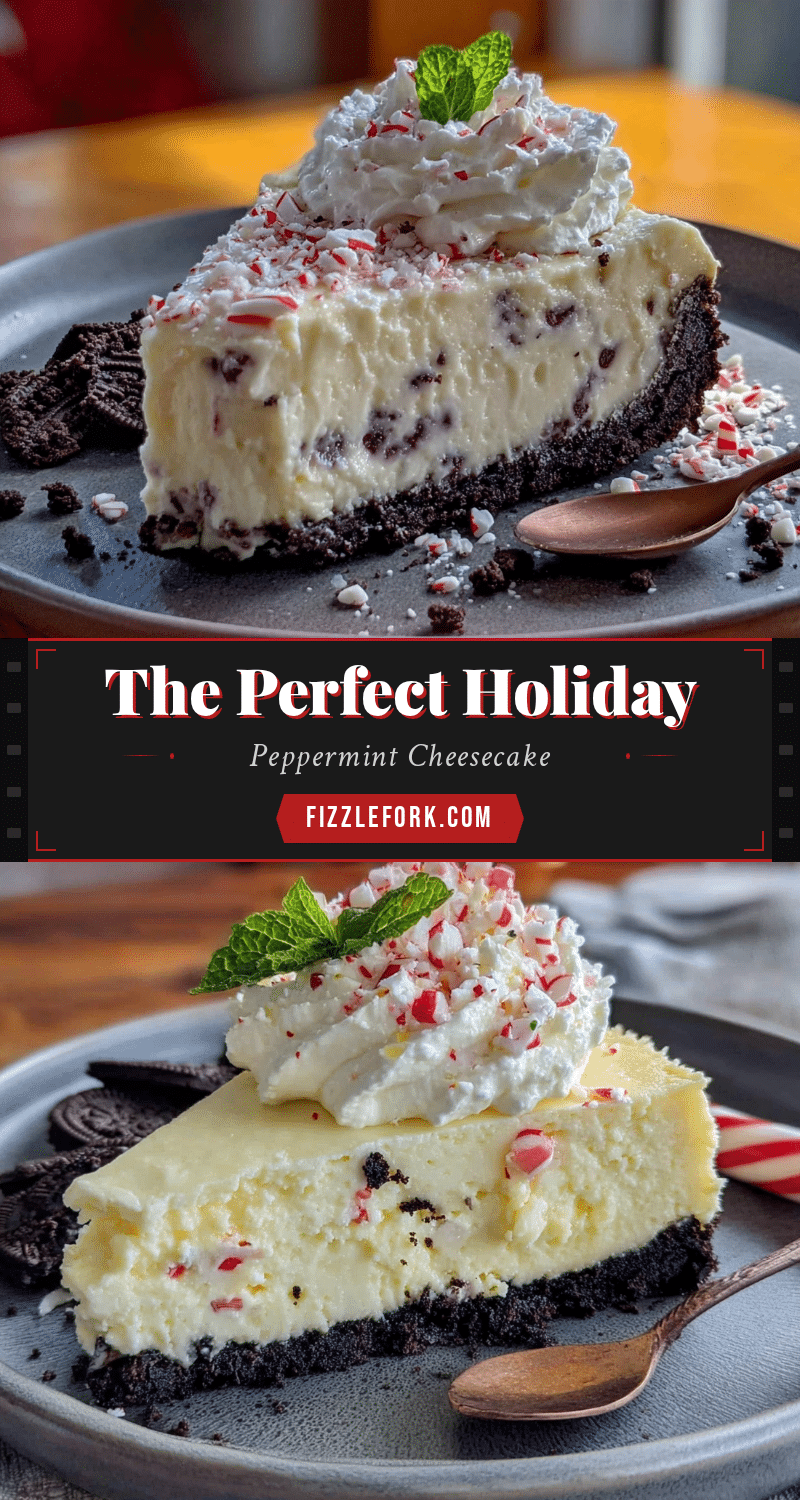
The Perfect Holiday Peppermint Cheesecake (Easy Recipe)
This peppermint cheesecake features a creamy, light filling with cool peppermint flavor, a crunchy chocolate cookie crust, and festive red swirls. It’s an easy, make-ahead dessert perfect for holiday gatherings.
- Prep Time: 30 minutes
- Cook Time: 55-65 minutes
- Total Time: 8 hours (including chilling)
- Yield: 12 servings 1x
- Category: Dessert
- Cuisine: American
Ingredients
- 2 cups chocolate cookie crumbs (about 24 Oreos, cream removed, or use chocolate graham crackers)
- 5 tablespoons unsalted butter, melted
- 2 tablespoons granulated sugar
- Pinch of salt
- 32 ounces cream cheese, softened to room temperature
- 1 cup granulated sugar
- 1 cup sour cream, room temperature
- 1 teaspoon vanilla extract
- 1 ½ teaspoons peppermint extract
- 4 large eggs, room temperature
- 2 tablespoons all-purpose flour
- Red food coloring (optional)
- 1 cup heavy whipping cream, cold
- 2 tablespoons powdered sugar
- ½ teaspoon vanilla extract
- ½ cup crushed candy canes or peppermint candies
- Whole candy canes for decoration (optional)
Instructions
- Preheat oven to 325°F (163°C). Pulse chocolate cookies in a food processor to fine crumbs. Mix crumbs with melted butter, sugar, and salt until like wet sand. Press firmly into bottom of a 9-inch springform pan. Bake for 10 minutes, then set aside to cool.
- Wrap the outside of the springform pan tightly with two layers of heavy-duty aluminum foil. Place wrapped pan in a large roasting pan.
- In a large bowl, beat softened cream cheese with an electric mixer on medium speed until smooth, about 2 minutes. Add sugar and beat for another 2 minutes until light and fluffy. Add sour cream and vanilla, mixing until combined. Add peppermint extract (start with 1 teaspoon, taste, and add more if desired).
- Add eggs one at a time, mixing on low speed after each addition just until incorporated. Fold in flour gently with a spatula.
- Spoon about 1 cup of batter into a separate bowl and stir in a few drops of red food coloring until desired pink shade. Pour plain batter over crust. Drop spoonfuls of pink batter on top, then gently swirl with a knife or skewer.
- Pour hot water into the roasting pan until it reaches halfway up the sides of the springform pan. Bake at 325°F (163°C) for 55-65 minutes. Edges should be set, center should jiggle slightly. Turn off oven, crack door open, and let cheesecake sit inside for 1 hour.
- Remove cheesecake from water bath and take off foil. Cool completely on a wire rack, then refrigerate for at least 6 hours or overnight.
- When ready to serve, whip cold heavy cream with powdered sugar and vanilla until stiff peaks form. Spread or pipe whipped cream over chilled cheesecake. Sprinkle crushed candy canes on top. Add whole candy canes around edge if desired.
Notes
Room temperature ingredients are essential for a smooth texture. Don’t overmix the eggs to prevent cracks. The water bath ensures even baking. Cool gradually in the oven to avoid cracking. Make this cheesecake up to 2 days ahead for best flavor. Freeze without topping for up to 3 months.
Nutrition
- Serving Size: 1 slice
- Calories: 485
- Sugar: 28
- Fat: 34
- Saturated Fat: 20
- Carbohydrates: 38
- Protein: 8
Keywords: peppermint cheesecake, holiday dessert, Christmas cheesecake, easy cheesecake recipe, peppermint dessert


