My niece Clara asked why I couldn’t just melt the white chocolate in the microwave, save myself the fuss of a double boiler. I started to explain why that wouldn’t work—something about even heat and seized chocolate and the importance of doing things the “right” way. Then I stopped. Honestly, I was tired. It was a rainy Tuesday in late September, and I just wanted to make this candy corn bark without a production. I handed her the bowl of white chips and told her to go for it, fully expecting a grainy, burnt mess.
She hit the button for thirty seconds, stirred, hit it again. The chocolate turned smooth as silk. No scorching, no clumps. I stood there with my wooden spoon and my double boiler, feeling like a complete fool. Let me tell you, that moment changed the way I approach fall baking. I mean, I’d spent years believing certain kitchen rules were carved in stone. Turns out, some of them are just suggestions.
This easy 3-ingredient candy corn bark is the result of that humbling afternoon. It’s the kind of recipe that makes you wonder why you ever overcomplicated things. You’ve got your candy corn, your white chocolate, and a handful of peanuts for crunch. That’s it. No candy thermometers, no tempering, no stress. Maybe you’ve been there—standing in the kitchen with a recipe that felt like more work than it was worth. This one is the opposite. It’s the fall treat that actually delivers on its promise of being easy.
The bark turned out so good that I made three more batches that week. Clara still brings it up every time she sees me reach for the double boiler. And honestly? I keep making it because it reminds me that sometimes the best recipes come from letting go of the rules. The crunch of the peanuts against the sweet, creamy chocolate, the little pops of candy corn color—it’s pure autumn joy in a pan. This is the recipe that stayed with me, and I think it’ll stay with you, too.
Why You’ll Love This Recipe
This candy corn bark is the fall dessert you didn’t know you needed. It’s ridiculously simple, but it delivers on every level. Here’s why it works:
- Quick & Easy: Comes together in under 15 minutes, with only 5 minutes of active prep. Perfect for those afternoons when a sweet craving hits out of nowhere.
- Simple Ingredients: Three ingredients, all of which you can find at any grocery store. No specialty baking aisles required.
- Perfect for Fall Gatherings: Great for Halloween parties, Thanksgiving dessert tables, or just a cozy night in with a movie. It’s the kind of treat that disappears fast.
- Crowd-Pleaser: Kids love the candy corn, adults love the chocolate-and-peanut combo. I’ve brought this to potlucks and watched it vanish within minutes.
- Unbelievably Delicious: The creamy white chocolate, the salty crunch of peanuts, and the chewy sweetness of candy corn create a texture and flavor combo that’s next-level comfort food.
What makes this recipe different from the rest? It’s the ratio. Most bark recipes pile on the candy corn until it’s overwhelming. I’ve found that a lighter hand with the toppings lets the chocolate shine. The peanuts add a savory balance that keeps you coming back for another piece. This isn’t just another version of candy bark—it’s the one you’ll actually want to make again and again.
This recipe is the kind that makes you close your eyes after the first bite. It’s comfort food reimagined—simpler, faster, but with the same soul-soothing satisfaction. Perfect for impressing guests without stress, or turning a simple Tuesday into something memorable.
What Ingredients You Will Need
This recipe uses simple, wholesome ingredients to deliver bold flavor and satisfying texture without the fuss. You likely have everything you need already, or can grab it on your next grocery run.
- 12 ounces white chocolate chips or melting wafers (I prefer Ghirardelli for the smoothest melt, but any good-quality brand works. Avoid white “morsels” with stabilizers—they don’t melt as evenly.)
- 1 cup candy corn (Classic Brach’s is my go-to. Look for fresh candy corn—if the bag feels hard or stale, it won’t have that soft, chewy texture.)
- 1/2 cup salted roasted peanuts (The salt is crucial here—it cuts through the sweetness. If you only have unsalted, add a pinch of flaky sea salt on top before the chocolate sets.)
Optional additions (not required, but fun):
- 1/4 cup dried cranberries or chopped dried cherries (adds a tart pop that brightens the whole bark)
- 1/4 cup pretzel pieces (for extra crunch and saltiness)
- A drizzle of dark chocolate (because more chocolate is never a bad thing)
Ingredient selection tips: For the smoothest bark, use white chocolate that lists cocoa butter as an ingredient, not just vegetable oils. I’ve tested this with both chips and chopped white chocolate bars—bars melt a bit more smoothly, but chips are perfectly fine for this recipe. If you’re making this for a party, spring for the good stuff. The texture really does matter.
Substitution guidance: Need a nut-free version? Swap the peanuts for sunflower seeds or pumpkin seeds. The crunch is still there, and the seeds add a lovely fall flavor. For a dairy-free option, use dairy-free white chocolate chips—just check the label, as some brands melt differently. And if you’re not a candy corn fan (I know, I know, it’s controversial), try this with candy pumpkins or autumn-colored M&Ms instead.
Equipment Needed
You don’t need much for this recipe, which is part of the beauty. Here’s what you’ll want on hand:
- Baking sheet (a standard half-sheet pan works perfectly)
- Parchment paper or silicone baking mat (don’t skip this—the bark will stick to bare metal)
- Microwave-safe bowl (medium size, wide enough to stir comfortably)
- Spatula (for spreading the chocolate evenly)
- Chef’s knife (for breaking the finished bark into pieces)
If you don’t have a microwave, you can melt the chocolate using a double boiler on the stovetop. Just bring an inch of water to a simmer in a small saucepan, place a heatproof bowl on top (make sure it doesn’t touch the water), and stir the chocolate until smooth. It takes a few extra minutes but works beautifully.
I’ve made this bark with both a silicone mat and parchment paper. The silicone mat gives a slightly smoother finish on the bottom, but parchment is easier to find and works just as well. For budget-friendly options, dollar-store parchment paper does the job—just make sure it’s actually non-stick.
Preparation Method
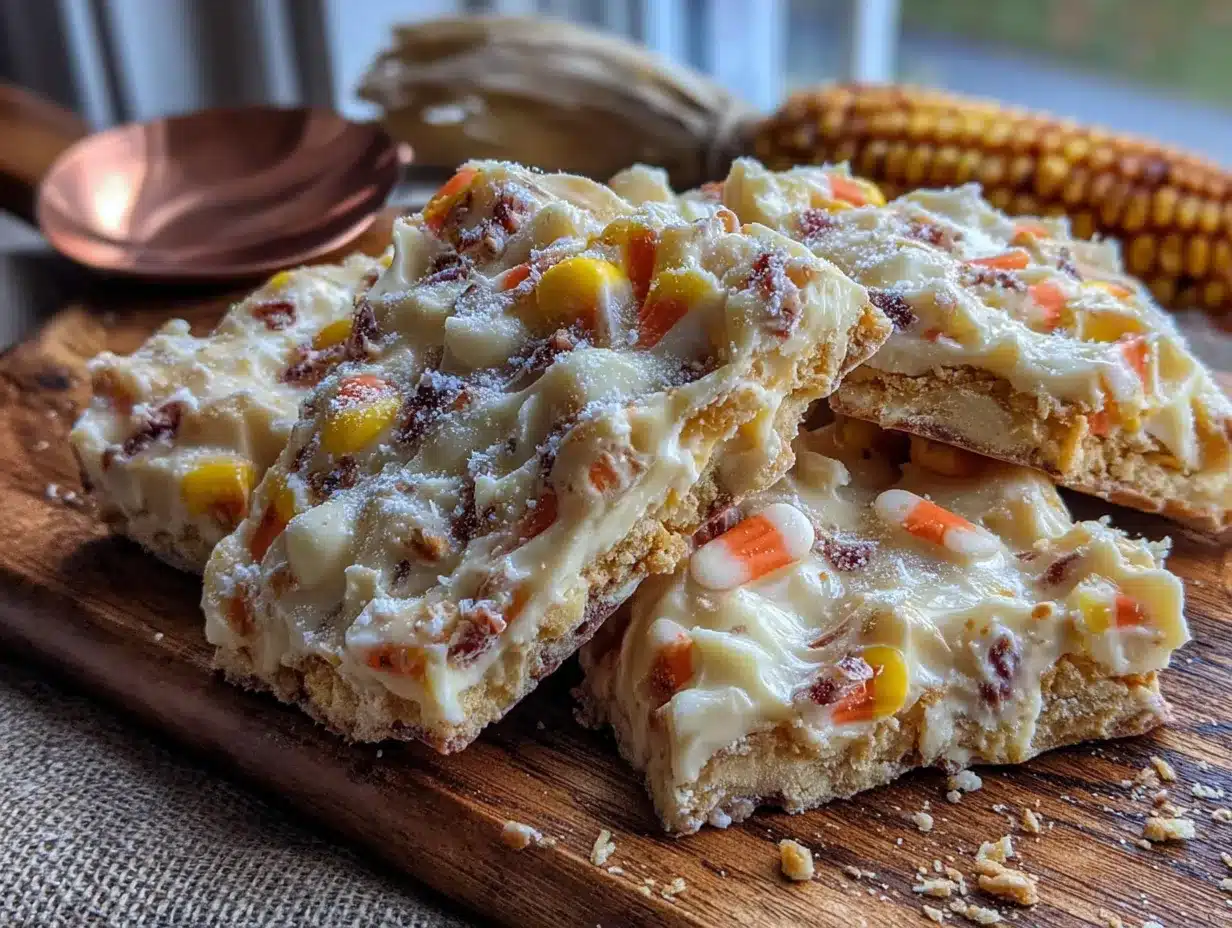
This comes together fast, so have your ingredients measured and ready before you start. Trust me on this.
- Line your baking sheet with parchment paper or a silicone mat. Make sure it lies flat—curled edges will give you uneven bark thickness. Set it aside.
- Pour the white chocolate chips into a microwave-safe bowl. Microwave on high for 30 seconds. Remove and stir vigorously, even if it doesn’t look melted yet. Return to the microwave for another 20-30 seconds. Stir again. Repeat in 15-second intervals until the chocolate is smooth and completely melted. Warning: White chocolate scorches easily. If you see any spots that look grainy or separated, stop immediately—you’ve overheated it. Next time, use shorter intervals.
- Pour the melted chocolate onto the center of your prepared baking sheet. Use a spatula to spread it into an even rectangle, about 1/4-inch thick. Don’t worry about making perfect edges—bark is supposed to look rustic. Aim for an even thickness so it breaks consistently later.
- While the chocolate is still wet, sprinkle the candy corn and peanuts evenly over the surface. Press them in gently with your fingers or the back of a spoon. Don’t just drop them on—give them a little nudge so they’re partially embedded in the chocolate. This keeps them from falling off when you break the bark.
- Let the bark set at room temperature for about 1-2 hours, or pop it in the refrigerator for 20-30 minutes if you’re impatient (I’m always impatient). It’s ready when the chocolate is firm to the touch and no longer glossy. If you refrigerate, let it sit at room temperature for 5 minutes before breaking—cold chocolate can shatter unpredictably.
- Once set, lift the parchment paper off the baking sheet. Place the bark on a cutting board and use a sharp chef’s knife to cut it into irregular pieces. Or just break it with your hands—that’s honestly more satisfying. Aim for 2-3 inch pieces for the best snacking size.
- Transfer the pieces to a serving platter or store in an airtight container. The bark will keep at room temperature for up to a week—if it lasts that long.
Sensory cue: The chocolate should look glossy and smooth when you spread it, like thick cream. When you press the candy corn in, you should feel it settle into the chocolate with a slight give. The finished bark should snap cleanly when you break it—if it bends, it needs more time to set.
Cooking Tips & Techniques
I learned these the hard way, so you don’t have to. The first time I made this bark, I used cheap white chocolate chips and ended up with a greasy, separated mess. It was heartbreaking. Here’s what I know now:
Don’t overheat the chocolate. This is the number one mistake. White chocolate is delicate—it burns at a lower temperature than dark or milk chocolate. Use short intervals and stir between each one. The residual heat will finish melting the chips, even if they look slightly solid when you pull them out of the microwave.
Spread the chocolate while it’s warm. If it starts to thicken before you’ve added the toppings, pop it back in the microwave for 10 seconds. Cold chocolate won’t hold the candy corn and peanuts in place, and you’ll end up with a sad pile of toppings at the bottom of the bag.
Press the toppings in firmly. Don’t just sprinkle and hope for the best. Give each piece a gentle press so it’s anchored in the chocolate. I use the tips of my fingers, but a spatula works too. This is the difference between bark that looks professional and bark that falls apart.
Let it set fully before cutting. I know it’s tempting to dig in while it’s still slightly soft, but patience pays off. Under-set bark will bend and crack instead of breaking cleanly. If you’re in a hurry, the fridge is your friend—just don’t leave it in there for more than 30 minutes, or condensation can form on the surface.
One more thing: if you’re making this for a party, double the batch. I promise you, one pan won’t be enough. I learned that the hard way at a Halloween gathering when I showed up with a single tray and watched it disappear in under ten minutes.
Variations & Adaptations
This recipe is endlessly adaptable. Here are a few ways I’ve tweaked it over the years:
Dark Chocolate Candy Corn Bark: Swap the white chocolate for dark chocolate (60-70% cocoa). The bitterness balances the sweetness of the candy corn beautifully. This is my personal favorite for adult gatherings—it feels a little more sophisticated, somehow.
Autumn Mix Bark: Instead of candy corn, use a bag of autumn mix (the one with the little pumpkins and corn kernels). The colors are gorgeous, and the variety of shapes adds visual interest. I made this for Thanksgiving last year and it was a hit.
Spiced White Chocolate Bark: Before spreading the chocolate, stir in 1/2 teaspoon of pumpkin pie spice or cinnamon. The warm spices complement the candy corn and make the whole kitchen smell like fall. I’ve also tried it with a pinch of cardamom—unexpected, but lovely.
Nut-Free Version: Replace peanuts with roasted pumpkin seeds or sunflower seeds. Both add that same satisfying crunch without the allergens. If you’re serving this at a school event, this is the version to make.
Salty-Sweet Version: Sprinkle flaky sea salt over the top right after adding the candy corn and peanuts. The salt crystals hit your tongue first, then the sweetness follows. It’s addictive. I keep a little dish of Maldon salt next to my stove just for this.
I once tried a version with white chocolate, candy corn, and crushed pretzels instead of peanuts. It was good, but the pretzels got soft after a day in storage. Stick with nuts or seeds if you’re planning to make this ahead.
Serving & Storage Suggestions
Serve this bark at room temperature. The chocolate should be firm but not cold, with a slight snap when you bite into it. Arrange the pieces on a wooden board or a festive fall platter for maximum visual appeal. I like to scatter a few extra candy corn pieces around the board for color.
This bark pairs beautifully with a hot cup of apple cider or a spiced chai latte. For a dessert table, set it alongside other fall treats like pumpkin cookies or caramel apples. It’s also fantastic crumbled over vanilla ice cream—trust me on this one.
Storage: Keep the bark in an airtight container at room temperature for up to one week. Layer pieces between sheets of parchment paper to prevent sticking. Do not refrigerate long-term—the chocolate can develop condensation, which affects the texture. If your kitchen is warm (above 75°F), store it in a cool, dark place.
Freezing: This bark freezes beautifully. Place pieces in a single layer on a baking sheet and freeze until solid, then transfer to a freezer-safe bag or container. It will keep for up to three months. Thaw at room temperature for about 15 minutes before serving. The texture stays perfect—I’ve tested this multiple times.
Flavor development: The bark is best within the first 2-3 days, when the white chocolate is at its creamiest and the candy corn is still soft and chewy. After that, the candy corn can start to harden slightly. Not a dealbreaker, but worth noting if you’re making it for a special occasion.
Nutritional Information & Benefits
Let’s be real—this is a treat, not a health food. But here’s what you’re working with per 2-ounce serving (about 3-4 pieces):
- Calories: Approximately 220-250
- Fat: 12-14g (mostly from the white chocolate and peanuts)
- Carbohydrates: 28-32g
- Sugar: 24-28g
- Protein: 4-5g (thanks to the peanuts)
- Sodium: 80-100mg
Health highlights: The peanuts provide a small amount of protein and healthy fats, which help slow down sugar absorption. If you use dark chocolate instead of white, you’ll get some antioxidants. The candy corn? Well, it’s pure sugar and happiness—no nutritional benefits, but plenty of seasonal joy.
Dietary considerations: This recipe is vegetarian. For a gluten-free version, just check your white chocolate label (most are gluten-free, but some brands add wheat-based ingredients). It’s not vegan, dairy-free, or low-sugar as written, but the substitutions mentioned earlier can address some of those needs.
My perspective: I believe in balance. This bark is a once-in-a-while treat, perfect for holidays and special moments. I don’t stress about the sugar content when I’m making it for a Halloween party or a cozy movie night. Enjoy it, share it, and don’t overthink it. That’s what fall is all about.
Conclusion
This easy 3-ingredient candy corn bark is proof that you don’t need a long ingredient list or complicated techniques to make something truly special. It’s quick, it’s forgiving, and it delivers that warm, nostalgic feeling that makes fall baking so wonderful. Whether you’re making it for a party, a gift, or just because it’s Tuesday and you deserve a treat, this recipe won’t let you down.
I encourage you to make it your own. Swap the peanuts for pecans, add a drizzle of caramel, throw in some dried cranberries—the possibilities are endless. The base is so simple that you can experiment without fear. And honestly, that’s the best kind of recipe to have in your back pocket.
This bark has become a fall tradition in my kitchen, and I hope it becomes one in yours, too. If you try it, I’d love to hear how it turned out. Drop a comment below, share your variations, or tag me in your photos. Let’s make this fall the sweetest one yet.
Happy baking, friends. And remember—sometimes the microwave really is the answer.
Frequently Asked Questions
Can I use milk chocolate instead of white chocolate?
Absolutely. Milk chocolate will give you a sweeter, creamier bark that pairs beautifully with the candy corn. Just be careful when melting—milk chocolate can also scorch if overheated. Use the same short-interval method in the microwave.
How do I keep the candy corn from sinking to the bottom?
Press the candy corn and peanuts into the chocolate while it’s still warm and fluid. Don’t just drop them on top—give each piece a gentle push so it’s partially embedded. The chocolate will hold them in place as it sets.
Can I make this bark ahead of time for a party?
Yes! This bark is perfect for making ahead. Store it in an airtight container at room temperature for up to a week, or freeze it for up to three months. Just make sure it’s fully set before you pack it away.
Why did my white chocolate seize up?
White chocolate seizes when it comes into contact with even a tiny amount of water. Make sure your bowl and spatula are completely dry before you start. It can also seize if overheated—always use short microwave intervals and stir between each one.
Can I use candy pumpkins instead of candy corn?
Definitely. Candy pumpkins work wonderfully in this recipe. They’re a little larger than candy corn, so you might want to cut them in half for better distribution. The flavor is similar, and the orange color keeps that fall vibe going strong.
Pin This Recipe!

Easy 3-Ingredient Candy Corn Bark: The Perfect Fall Treat

This easy 3-ingredient candy corn bark is the fall dessert you didn’t know you needed. It’s ridiculously simple, but it delivers on every level with creamy white chocolate, salty peanuts, and chewy candy corn.
- Prep Time: 5 minutes
- Cook Time: 5 minutes
- Total Time: 15 minutes
- Yield: 8 servings 1x
- Category: Dessert
- Cuisine: American
Ingredients
- 12 ounces white chocolate chips or melting wafers
- 1 cup candy corn
- 1/2 cup salted roasted peanuts
Instructions
- Line your baking sheet with parchment paper or a silicone mat. Make sure it lies flat.
- Pour the white chocolate chips into a microwave-safe bowl. Microwave on high for 30 seconds. Remove and stir vigorously. Return to the microwave for another 20-30 seconds. Stir again. Repeat in 15-second intervals until the chocolate is smooth and completely melted.
- Pour the melted chocolate onto the center of your prepared baking sheet. Use a spatula to spread it into an even rectangle, about 1/4-inch thick.
- While the chocolate is still wet, sprinkle the candy corn and peanuts evenly over the surface. Press them in gently with your fingers or the back of a spoon.
- Let the bark set at room temperature for about 1-2 hours, or pop it in the refrigerator for 20-30 minutes. It’s ready when the chocolate is firm to the touch and no longer glossy.
- Once set, lift the parchment paper off the baking sheet. Place the bark on a cutting board and use a sharp chef’s knife to cut it into irregular pieces, or break it with your hands.
- Transfer the pieces to a serving platter or store in an airtight container.
Notes
Don’t overheat the white chocolate; use short microwave intervals and stir between each one. Press the toppings in firmly so they are partially embedded in the chocolate. Let the bark set fully before cutting for clean breaks. For a nut-free version, swap peanuts for sunflower seeds or pumpkin seeds. For a dairy-free option, use dairy-free white chocolate chips.
Nutrition
- Serving Size: 2 ounces (about 3-4
- Calories: 235
- Sugar: 26
- Sodium: 90
- Fat: 13
- Saturated Fat: 7
- Carbohydrates: 30
- Fiber: 1
- Protein: 4.5
Keywords: candy corn bark, fall treat, easy dessert, white chocolate bark, Halloween dessert, 3-ingredient recipe