That crackling sound — the kind that hits you before you even take a bite — still takes me straight to my aunt’s tiny kitchen in Nashville. I was maybe twelve, standing on a step stool, watching her pull a tray of golden chicken tenders from the deep fryer. The oil was spitting, the kitchen was a humid cloud of heaven, and I was absolutely certain I’d never taste anything better. Fast forward twenty years, and I’m in my own kitchen on a Tuesday night, starving, staring at a package of chicken breasts, and absolutely dreading the thought of dragging out the flour, the eggs, the breadcrumbs, and that inevitable sticky mess all over my counter. I wanted that same crunch, that same juicy interior, but without the cleanup that makes you question your life choices.
That’s when the air fryer — that little countertop miracle I bought on a whim — became my new best friend. Honestly, I was skeptical at first. Could hot air really replicate that deep-fried magic? Would the coating actually stick without a traditional breading station? After a few experiments (and one sad, soggy attempt that I’ve chosen to forget), I landed on this method. It’s not just easy; it’s almost too easy. You get that satisfying, crispy exterior and tender, juicy meat with zero flour dust on your floor and no greasy oil to dispose of. These Easy Crispy Air Fryer Chicken Tenders have become my weeknight hero, my picky-eater solution, and honestly, my little secret weapon when I need dinner on the table in under twenty minutes.
This isn’t just another chicken tender recipe. It’s the one that finally made me believe I could have my crunch and eat it too, without the mess. And once you try it, you’ll understand exactly what I mean.
Why You’ll Love This Recipe
Let me tell you, I’ve tested a lot of chicken tender recipes over the years. I’ve baked them (dry), pan-fried them (splattery), and even attempted a few ridiculous “healthy” versions that tasted like cardboard. This air fryer method? It’s the Goldilocks of chicken tenders — everything is just right. Here’s why this recipe stands out from the pack:
- No Breading Mess: This is the big one. We’re using a simple coating of seasoned panko and a light spray of oil. No flour, no eggs, no sticky fingers. Just toss, shake, and air fry. The cleanup is almost non-existent.
- Incredibly Crispy: The air fryer circulates super-hot air around the chicken, creating a crunchy exterior that rivals any deep-fried version. You get that satisfying “snap” when you bite into it, without the greasy aftermath.
- Ready in Under 20 Minutes: From start to finish, this is a lightning-fast dinner. Perfect for those nights when you need something delicious on the table, stat.
- Simple, Pantry-Friendly Ingredients: You probably have everything you need right now. Chicken, panko breadcrumbs, a few spices, and some cooking spray. That’s it.
- Perfect for Meal Prep: These tenders reheat beautifully (yes, they stay crispy!). Make a big batch on Sunday and use them in salads, wraps, or just as a quick snack throughout the week.
- Kid-Approved & Crowd-Pleasing: Let’s face it, everyone loves chicken tenders. These are so good, even the adults will be sneaking extras from the serving platter before dinner is officially served.
What makes this recipe different is the technique. We’re not just tossing chicken in breadcrumbs and hoping for the best. A light spray of oil on the panko before cooking is the secret to that golden, crunchy crust. It’s a simple trick, but it makes all the difference between a good tender and a truly great one. This is the kind of recipe that makes you feel like a kitchen genius, even on your most tired nights.
What Ingredients You Will Need
This recipe uses simple, wholesome ingredients to deliver big, bold flavor and that signature crunchy texture without any fuss. You don’t need a specialty grocery store run — just your standard pantry staples.
- Chicken Breast Tenders (1 lb / 450g): You can buy pre-trimmed chicken tenders, or simply cut boneless, skinless chicken breasts into 1-inch wide strips. Try to get them all roughly the same size so they cook evenly. I personally prefer to buy whole breasts and cut them myself — it’s usually cheaper and I can control the size.
- Panko Breadcrumbs (1 cup / 100g): This is non-negotiable for maximum crunch. Panko is lighter and flakier than regular breadcrumbs, which means it creates a much crispier coating. Regular breadcrumbs will work in a pinch, but the texture won’t be the same.
- Grated Parmesan Cheese (1/4 cup / 25g): This adds incredible savory flavor and helps the browning process. The cheese gets beautifully golden in the air fryer, adding another layer of crispiness. I recommend the good stuff in a block that you grate yourself — it melts and crisps up better than the pre-shredded kind.
- Garlic Powder (1 teaspoon): For that essential savory depth. Don’t skip it!
- Paprika (1 teaspoon): I use sweet paprika for color and a mild, warm flavor. Smoked paprika would also be amazing for a different vibe.
- Salt (1/2 teaspoon): Seasoning the coating is key. Don’t undersalt!
- Black Pepper (1/4 teaspoon): Freshly ground is always best.
- Olive Oil Cooking Spray: This is the secret weapon. A light mist of oil on the breaded tenders is what makes them crisp up in the air fryer instead of just drying out. Avocado oil spray works great too.
Ingredient Selection Tip: For the juiciest chicken, look for “air-chilled” chicken breasts if you can find them. They haven’t been plumped up with water, so they brown better and have a more concentrated chicken flavor. I’ve found that brands like Bell & Evans or the organic options at my local market consistently give the best results.
Equipment Needed
One of the best things about this recipe is how little equipment it requires. You really just need your air fryer and a few basic kitchen tools.
- Air Fryer: Any model will work! I use a 5.8-quart basket-style air fryer, but an oven-style one works just as well. The key is not to overcrowd the basket, so you may need to cook in batches depending on the size of your machine.
- Mixing Bowls: You’ll need one large bowl for tossing the chicken with the coating.
- Measuring Spoons & Cups: For accurately measuring your ingredients.
- Tongs: For placing the coated tenders into the air fryer basket and flipping them halfway through.
- Cutting Board & Knife: If you’re cutting whole chicken breasts into tenders.
Budget-Friendly Tip: Don’t have an air fryer yet? You can absolutely make these in a convection oven! Place the coated tenders on a wire rack set over a baking sheet and bake at 400°F (200°C) for 12-15 minutes, flipping halfway. The wire rack is crucial for allowing air to circulate all around the chicken for that crispy result.
Preparation Method
Alright, let’s get cooking! This is so simple, you’ll practically have dinner on the table before you know it. Follow these steps, and you’ll be rewarded with perfectly crispy, juicy chicken tenders every single time.
- Prep the Chicken (5 minutes): If you’re using whole chicken breasts, place them on a cutting board and slice them against the grain into 1-inch thick strips. Pat the chicken tenders completely dry with paper towels. This is a crucial step — removing excess moisture helps the coating stick better and promotes browning. Season the chicken lightly with a pinch of salt and pepper.
- Make the Coating (2 minutes): In a large mixing bowl, combine the panko breadcrumbs, grated Parmesan cheese, garlic powder, paprika, salt, and black pepper. Give it a good stir with a fork to make sure everything is evenly distributed. The smell of the garlic and paprika at this point is already amazing!
- Coat the Chicken (3 minutes): Add the chicken tenders to the bowl with the panko mixture. Using your hands (yes, get in there!), toss and press the coating firmly onto each piece of chicken. Make sure every nook and cranny is covered. The Parmesan and breadcrumbs will stick beautifully to the slightly moist chicken. Don’t be shy — really press it in.
- Preheat the Air Fryer (3 minutes): Most air fryers preheat very quickly. Set yours to 400°F (200°C) and let it run empty for about 3 minutes. This ensures the cooking environment is hot from the get-go, which is essential for that initial crisp.
- Arrange & Spray (2 minutes): Lightly spray the air fryer basket with a little olive oil cooking spray. Place the coated chicken tenders in a single layer in the basket. Make sure they aren’t touching or overlapping — they need room for the hot air to circulate. You’ll probably need to cook them in 2 batches. Now, here’s the magic step: lightly spray the tops of the chicken tenders with the olive oil cooking spray. This is what gives them that golden, crunchy crust.
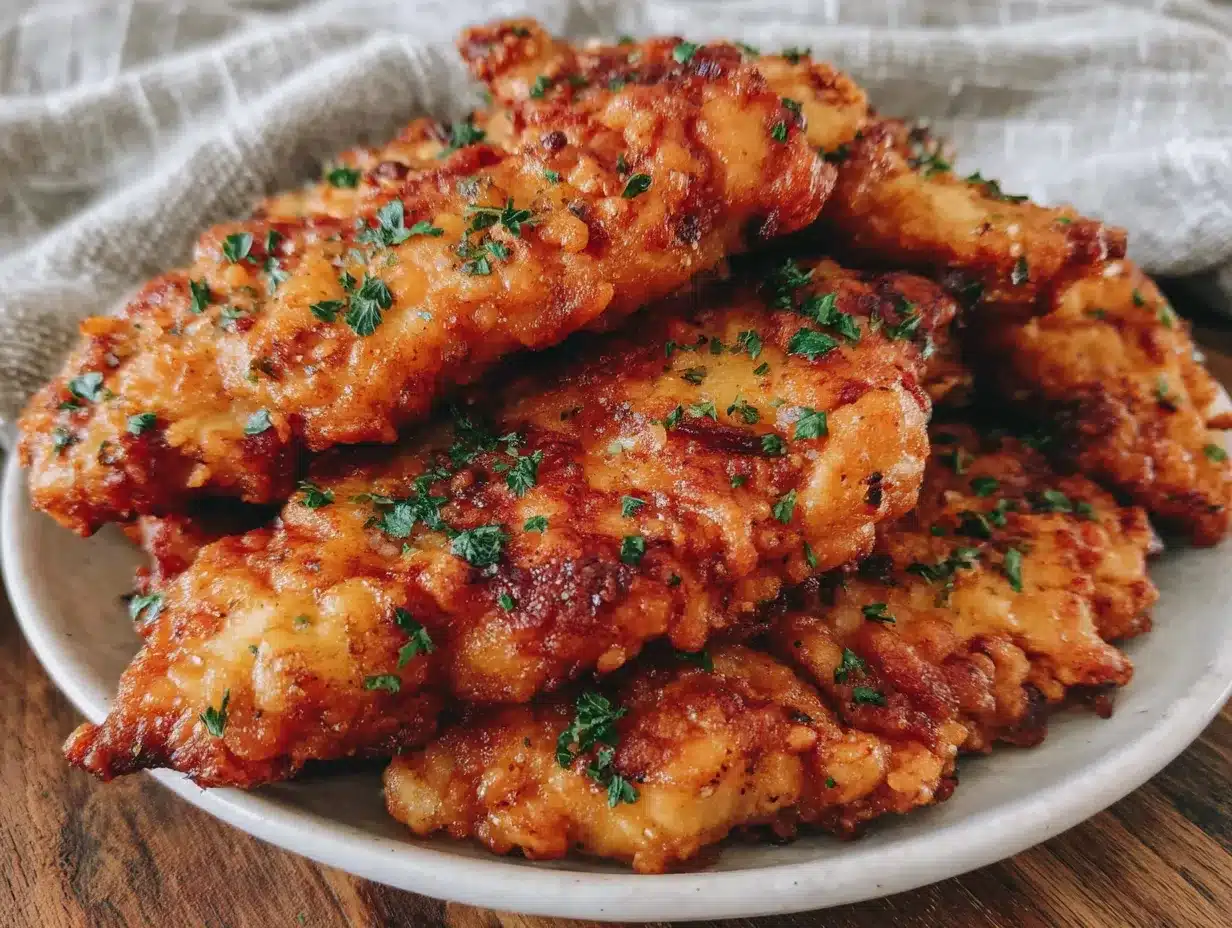
- Air Fry (8-10 minutes): Cook at 400°F (200°C) for 8-10 minutes, flipping the tenders halfway through with your tongs (at the 4-5 minute mark). When you flip them, give the other side a quick spray of oil too. The tenders are done when they are golden brown and crispy on the outside, and an instant-read thermometer inserted into the thickest part reads 165°F (74°C).
- Rest & Serve (2 minutes): Let the chicken tenders rest in the air fryer basket (turned off) for 1-2 minutes. This allows the juices to redistribute and the crust to set. Then, transfer them to a serving plate. Serve immediately with your favorite dipping sauces!
Sensory Cue: You’ll know the tenders are ready when the kitchen smells like a combination of toasted Parmesan, warm paprika, and fried chicken — without any of the greasy heaviness. The crust should be a deep golden brown and feel firm to the touch.
Cooking Tips & Techniques
I’ve learned a few things the hard way so you don’t have to. Here are my best tips for guaranteed success with these air fryer chicken tenders.
- Don’t Skip Drying the Chicken: This is probably the number one mistake people make. Wet chicken creates steam, and steam is the enemy of a crispy crust. Pat those tenders bone-dry with paper towels before you even think about adding the coating.
- Don’t Overcrowd the Basket: I know it’s tempting to try and cook everything at once, but overcrowding will lead to soggy, steamed chicken. The hot air needs to be able to circulate around each piece. Work in batches if you have to — it’s worth the extra few minutes.
- The Oil Spray is Key: I cannot stress this enough. A light mist of oil on the panko coating is what transforms it from dry and pale to golden and crunchy. Don’t drench them, but make sure every piece gets a light, even coating. I use a good quality Misto sprayer filled with olive oil for the best control.
- Flip Halfway Through: This ensures even browning on both sides. Set a timer so you don’t forget! Your air fryer might have a “shake” reminder, but I prefer to use tongs to flip each piece individually.
- Use a Meat Thermometer: Chicken is done at 165°F (74°C). Air fryers can vary in temperature, so relying on time alone can lead to overcooked (dry) or undercooked chicken. An instant-read thermometer is your best friend for perfect results every time.
- My Biggest Failure: I once tried to make a double batch and skipped the drying step to save time. The coating slid right off the chicken and created a sad, soggy mess at the bottom of the air fryer basket. It was a valuable lesson in patience! Trust the process.
Variations & Adaptations
This basic recipe is a fantastic canvas for all sorts of flavor adventures. Here are a few of my favorite ways to switch it up.
- Spicy Buffalo Tenders: Before coating, toss the chicken tenders in a tablespoon of your favorite hot sauce (Frank’s RedHot is my go-to). Then proceed with the panko coating as directed. After cooking, toss the hot tenders in a little more buffalo sauce for an extra kick. Serve with blue cheese or ranch dip.
- Honey Garlic Glazed Tenders: While the tenders are cooking, whisk together 1/4 cup of honey, 2 tablespoons of soy sauce, and 2 minced garlic cloves in a small saucepan. Simmer until slightly thickened. Once the tenders are cooked, brush the glaze over them and return to the air fryer for 1-2 minutes to caramelize.
- Gluten-Free Option: This is incredibly easy! Simply swap the panko breadcrumbs for gluten-free panko. They work exactly the same way. I’ve used the Ian’s brand with great success. Also, make sure your paprika and garlic powder are certified gluten-free if you are highly sensitive.
- Parmesan Herb Tenders: Add 1 tablespoon of dried Italian seasoning or a mix of dried oregano, basil, and thyme to the panko mixture. The herbs add a beautiful aroma and flavor that pairs perfectly with the Parmesan.
- Lemon Pepper Tenders: Replace the paprika and garlic powder with 2 teaspoons of lemon pepper seasoning. You can also add the zest of one lemon to the panko mixture for an extra bright, fresh flavor. This is my go-to for a lighter, summery meal.
Serving & Storage Suggestions
These tenders are incredibly versatile and can be served in so many ways. Here’s how to make the most of them, from the first serving to the last leftover.
- Serving Temperature: These are best served hot and fresh from the air fryer, when the crust is at its peak crispiness. They’re fantastic on their own, or as part of a bigger meal.
- Dipping Sauces: The options are endless! My personal favorites are classic honey mustard, a creamy ranch, a spicy sriracha mayo, or a simple barbecue sauce. For a fun twist, try them with the creamy jalapeno popper chicken dip — it’s an incredible combination.
- Meal Ideas: Slice them up and toss them on a fresh salad for a protein-packed lunch. Serve them with a side of roasted vegetables and some perfect rosemary garlic focaccia for a complete dinner. Or, stuff them into a warm tortilla with lettuce, tomato, and ranch for an easy chicken wrap.
- Storage: Store any leftover chicken tenders in an airtight container in the refrigerator for up to 3 days. They will lose some of their initial crunch, but they’ll still be delicious.
- Reheating: The air fryer is the best way to bring them back to life! Reheat at 375°F (190°C) for 3-4 minutes, or until heated through and crispy again. You can also reheat them in a conventional oven at 350°F (175°C) for about 10 minutes. Avoid the microwave at all costs — it will turn them into a sad, rubbery mess.
- Freezing: You can freeze the cooked and cooled chicken tenders in a single layer on a baking sheet, then transfer them to a freezer-safe bag for up to 2 months. Reheat directly from frozen in the air fryer at 375°F (190°C) for 6-8 minutes.
Nutritional Information & Benefits
While I’m a firm believer in food for joy first and fuel second, it’s always nice to know what you’re eating. These air fryer chicken tenders are a much lighter alternative to their deep-fried cousins, without sacrificing any of the satisfaction.
- Estimated Nutritional Values (per serving, approximately 4-5 tenders): Calories: 320-380, Fat: 12-15g, Protein: 35-40g, Carbohydrates: 15-20g, Fiber: 1g, Sugar: 1g. (Note: These are estimates and will vary based on exact ingredients and portion sizes).
- High in Protein: Chicken breast is an excellent source of lean protein, which is essential for muscle building and repair. This makes these tenders a great post-workout meal or a satisfying lunch that will keep you full for hours.
- Lower in Fat: By using an air fryer instead of a deep fryer, you drastically reduce the amount of oil absorbed by the chicken. This means you get all the crunch with significantly less fat and fewer calories.
- Dietary Considerations: This recipe is naturally low-carb and keto-friendly (just skip the panko and use crushed pork rinds or almond flour instead!). It’s also easily adaptable to be gluten-free.
- Potential Allergens: This recipe contains dairy (Parmesan cheese) and gluten (panko breadcrumbs). It may also contain traces of other allergens depending on your specific ingredients. Always check your labels.
Conclusion
So there you have it — the easiest, crispiest chicken tenders you’ll ever make without a deep fryer in sight. This recipe has honestly changed my weeknight dinner game. It’s the kind of meal that feels like a treat but comes together with almost no effort, leaving you with more time to actually enjoy your evening (and less time scrubbing a greasy stovetop).
I love this recipe because it’s proof that you don’t need complicated techniques or a pile of dirty dishes to get that perfect, satisfying crunch. It’s simple, it’s reliable, and it always, always delivers. Whether you’re feeding a family of picky eaters or just treating yourself to a solo dinner, these tenders are guaranteed to hit the spot.
Now I want to hear from you! Have you tried making these? What’s your favorite dipping sauce? Drop a comment below and let me know how they turned out. And if you loved them as much as I do, please share this recipe with a friend who needs a little less mess and a lot more crunch in their life. Happy cooking!
Frequently Asked Questions
Can I use chicken thighs instead of breasts?
Absolutely! Chicken thighs will be even more juicy and flavorful. Just make sure they are cut into even-sized strips. You may need to add 1-2 minutes to the cooking time, as thighs are a bit thicker and have a higher fat content. Always check the internal temperature reaches 165°F (74°C).
Why are my chicken tenders not crispy?
The most common culprits are overcrowding the air fryer basket and not using enough oil spray. Make sure the tenders are in a single layer with space between them. A light, even mist of oil on the panko coating is essential for that golden, crunchy crust. Also, make sure your chicken is patted very dry before coating.
Can I make these ahead of time for a party?
Yes! You can fully cook the chicken tenders, let them cool completely, and store them in the refrigerator. When you’re ready to serve, simply reheat them in the air fryer at 375°F (190°C) for 3-4 minutes until they are hot and crispy again. They’re perfect for game day spreads alongside other favorites like these crispy air fryer bacon ranch pretzel bites.
How do I keep the coating from falling off?
The key is to make sure the chicken is slightly moist but not wet. Patting it dry first removes excess water. Then, really press the panko mixture firmly onto the chicken. Let the coated tenders sit for 5 minutes before air frying — this gives the coating time to adhere. Finally, don’t move them around too much in the air fryer during the first half of cooking.
Can I use this method for chicken wings or thighs?
Absolutely! This coating and cooking method works wonderfully for chicken wings and boneless thighs. For wings, you’ll need to cook them a bit longer, about 20-25 minutes at 400°F (200°C), flipping halfway. For thighs, cook for 12-15 minutes, depending on their thickness. The same rules about drying the chicken and not overcrowding the basket apply.
Pin This Recipe!
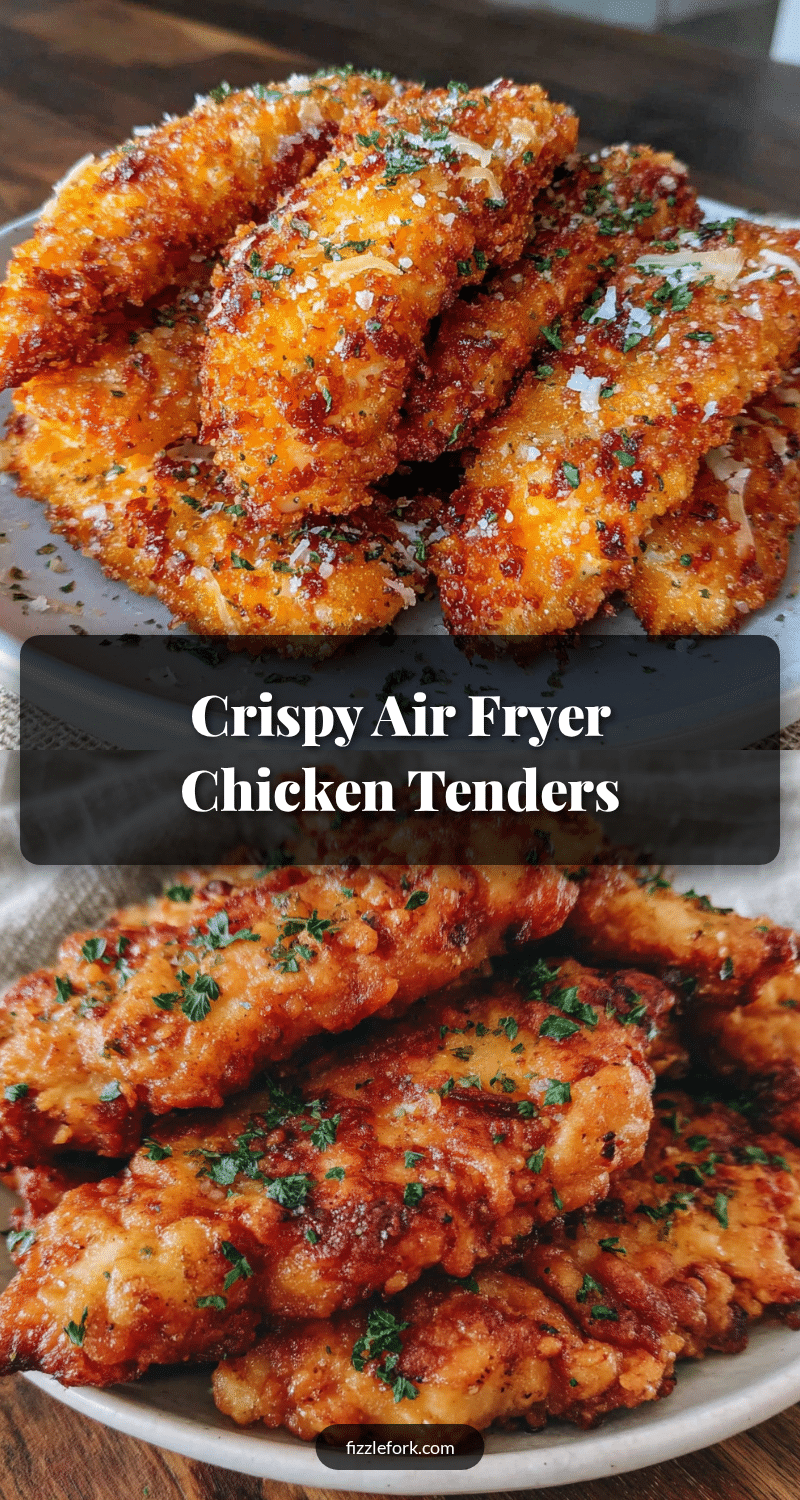
Easy Crispy Air Fryer Chicken Tenders: No Breading Mess
These Easy Crispy Air Fryer Chicken Tenders are a weeknight hero, delivering a satisfying, crispy exterior and tender, juicy meat with zero flour dust and no greasy oil to dispose of. Ready in under 20 minutes, this simple recipe uses a seasoned panko coating and a light spray of oil for a crunchy crust that rivals deep-fried versions.
- Prep Time: 10 minutes
- Cook Time: 10 minutes
- Total Time: 20 minutes
- Yield: 4 servings 1x
- Category: Main Course
- Cuisine: American
Ingredients
- 1 lb (450g) chicken breast tenders (or boneless, skinless chicken breasts cut into 1-inch strips)
- 1 cup (100g) panko breadcrumbs
- 1/4 cup (25g) grated Parmesan cheese
- 1 teaspoon garlic powder
- 1 teaspoon paprika (sweet or smoked)
- 1/2 teaspoon salt
- 1/4 teaspoon black pepper
- Olive oil cooking spray (or avocado oil spray)
Instructions
- Prep the Chicken: If using whole chicken breasts, slice them against the grain into 1-inch thick strips. Pat the chicken tenders completely dry with paper towels. Season lightly with a pinch of salt and pepper.
- Make the Coating: In a large mixing bowl, combine panko breadcrumbs, grated Parmesan cheese, garlic powder, paprika, salt, and black pepper. Stir well.
- Coat the Chicken: Add the chicken tenders to the bowl with the panko mixture. Using your hands, toss and press the coating firmly onto each piece until every nook and cranny is covered.
- Preheat the Air Fryer: Preheat your air fryer to 400°F (200°C) for about 3 minutes.
- Arrange & Spray: Lightly spray the air fryer basket with olive oil cooking spray. Place the coated chicken tenders in a single layer in the basket, ensuring they aren’t touching or overlapping (cook in batches if needed). Lightly spray the tops of the chicken tenders with the cooking spray.
- Air Fry: Cook at 400°F (200°C) for 8-10 minutes, flipping the tenders halfway through (at the 4-5 minute mark). When flipping, spray the other side with oil. The tenders are done when golden brown and crispy, and an instant-read thermometer inserted into the thickest part reads 165°F (74°C).
- Rest & Serve: Let the chicken tenders rest in the air fryer basket (turned off) for 1-2 minutes. Transfer to a serving plate and serve immediately with your favorite dipping sauces.
Notes
For the juiciest chicken, look for ‘air-chilled’ chicken breasts. Pat the chicken very dry before coating to ensure crispiness. Do not overcrowd the air fryer basket; cook in batches if necessary. The light spray of oil on the panko coating is essential for a golden, crunchy crust. Let the coated tenders sit for 5 minutes before air frying to help the coating adhere. Reheat leftovers in the air fryer at 375°F (190°C) for 3-4 minutes to restore crispiness. To freeze, cook and cool completely, then freeze in a single layer on a baking sheet before transferring to a freezer-safe bag for up to 2 months.
Nutrition
- Serving Size: 4-5 tenders
- Calories: 350
- Sugar: 1
- Sodium: 550
- Fat: 13.5
- Saturated Fat: 3.5
- Carbohydrates: 17.5
- Fiber: 1
- Protein: 37.5
Keywords: air fryer chicken tenders, crispy chicken tenders, easy chicken tenders, no breading mess, weeknight dinner, kid-friendly, gluten-free option, keto-friendly