I was standing in the middle of the grocery store last October, staring at a bin of clementines, when the scent hit me—that weird, waxy, faintly sweet smell of a just-peeled tangerine mixed with the sharpness of a pumpkin that’s been sitting on a porch too long. And suddenly I was seven years old at my Aunt Josie’s house, watching her turn a whole watermelon into a basket for fruit salad at her annual Halloween party. She’d passed away a few years before that, and I hadn’t thought about her fruit baskets in ages. But there I was, in Aisle 4, almost in tears over a citrus fruit. I grabbed a cart and started loading it up—clementines, green grapes, red apples, blackberries, a big carving pumpkin—and I knew exactly what I was making. This Halloween Fruit Tray Pumpkin wasn’t just going to be a snack for my own party that weekend; it was going to be my way of bringing a little bit of Aunt Josie’s magic back to the table.
Honestly, I didn’t even know if I could pull it off. I’d only watched her do it once, and I was more interested in stealing candy corn than taking mental notes. But maybe you’ve been there—that moment when a recipe just feels like it matters more than usual. I ended up buying two pumpkins because I accidentally dropped the first one in the parking lot. Classic me. But that cracked pumpkin became a funny story, and the second one? It became the centerpiece of my Halloween spread. This is that recipe.
Why You’ll Love This Recipe
Let me tell you why this Halloween Fruit Tray Pumpkin is about to become your new favorite party trick. I’ve tested this thing at three different gatherings now, and it never fails to get the “Wow, you made that?!” reaction. Here’s what makes it so great:
- Show-Stopping Presentation: It’s a fruit tray that looks like a pumpkin. Need I say more? It’s the kind of thing that makes people pull out their phones before they even grab a grape.
- Incredibly Easy to Make: I promise you, if I can do it without any carving skills, you can too. It’s more about assembly than artistry. You’ll have it done in about 30 minutes flat.
- Perfect for Hosting: This is the ultimate dish for a Halloween party, potluck, or any fall gathering. It serves a crowd beautifully and requires zero cooking. You can prep everything the night before and just assemble it before guests arrive.
- Healthy and Crowd-Pleasing: It’s basically a giant fruit platter shaped like a seasonal icon. Kids love it, adults appreciate it, and it balances out all the candy and sweets everyone else is serving.
- Naturally Customizable: You can use any fruits you like. I’ve done a tropical version with mango and pineapple, and a spooky “black and orange” version with blackberries and cantaloupe. It’s endlessly flexible.
This isn’t just another fruit tray. It’s a conversation starter, a photo op, and a genuinely delicious way to get people eating something healthy at a party full of sugar. The first time I set it out, I watched a grown man eat three handfuls of grapes just because they were “coming out of a pumpkin.” The presentation really does make the dish.
What Ingredients You Will Need
This recipe uses simple, fresh ingredients to create a stunning visual display. The beauty of it is that you can really use whatever fruit you have on hand or what’s in season, but here’s my go-to combination for maximum color and contrast.
For the Pumpkin Base
- 1 medium to large carving pumpkin (about 8-10 inches in diameter) (look for one with a flat bottom so it sits steady; a slightly lopsided one is fine—it adds character)
- 1 small sugar pumpkin or mini pumpkin (for the stem, about 4-5 inches tall) (this is optional but gives it that extra “pumpkin” look; I use it as a lid topper)
For the Fruit Filling
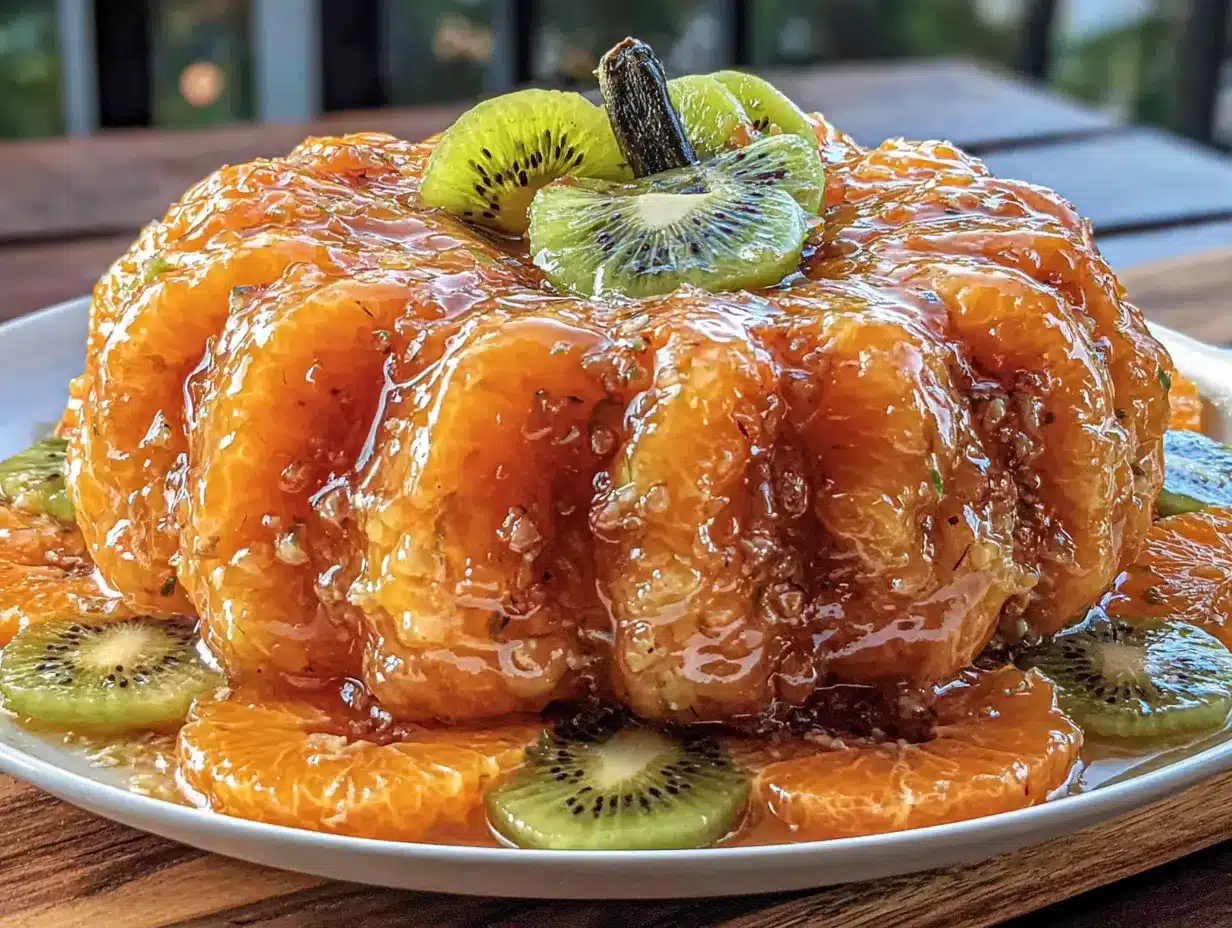
- 2 pounds of clementines or mandarin oranges, peeled and separated into segments (these are the “orange” part of the pumpkin color; I prefer clementines because they’re sweeter and seedless)
- 1 pound of green grapes, washed and patted dry (the green against the orange is a gorgeous contrast; I like the seedless ones)
- 1 pound of red or black grapes, washed and patted dry (adds a deeper, richer color to the mix)
- 1 large honeydew melon, cut into cubes or scooped into balls (the pale green adds a nice light color; a melon baller makes this look fancier)
- 1 pint of fresh blackberries (these look like little creepy eyeballs—perfect for Halloween; also they stain a bit, so handle gently)
- 1 pint of fresh raspberries (the deep red adds a pop of color; they’re a bit delicate, so add them last)
- 2 large Granny Smith apples, cored and cut into thin wedges (the tartness balances the sweetness; toss them in a little lemon juice to keep them from browning)
- 1 small pineapple, peeled, cored, and cut into chunks (optional, but the yellow adds another layer of color; I use it when I want a tropical twist)
For Decoration (Optional but Fun)
- Fresh mint leaves (for garnish; makes it look professional)
- Edible googly eyes (I found these at a party store; they’re hilarious on the pumpkin face)
- Pomegranate seeds (they look like little jewels scattered around; a bit messy but worth it)
Equipment Needed
You don’t need much for this, which is part of why I love it. Here’s what I use:
- A sharp chef’s knife (for cutting the pumpkin; a serrated knife works too, but a straight edge gives a cleaner cut)
- A large spoon or ice cream scoop (for scooping out the pumpkin guts; a metal spoon with a sharp edge works best)
- A melon baller (if you want fancy melon balls; totally optional, but it makes the fruit look more deliberate)
- A cutting board (preferably a large one; you’ll be doing a lot of chopping)
- A large mixing bowl (for tossing the fruit together; I use my biggest stainless steel one)
- Paper towels (for drying the pumpkin cavity; moisture is the enemy of a crisp fruit tray)
- Small bowls or ramekins (for holding dips if you want to serve them inside the pumpkin; I’ve used small glass bowls)
If you don’t have a melon baller, just cube the melon. If your knife is dull, sharpen it first—cutting a pumpkin with a dull knife is a recipe for frustration. I learned that the hard way my first time and ended up with a very jagged, sad-looking pumpkin edge.
Preparation Method
Alright, let’s get to it. Here’s how I make my Halloween Fruit Tray Pumpkin. Take your time with the pumpkin prep—it’s the foundation of the whole thing.
- Prep the Pumpkin: Wash the outside of your large pumpkin thoroughly with soap and water. Dry it completely. Using your sharp knife, carefully cut off the top of the pumpkin, about 2-3 inches from the stem, just like you would for a jack-o’-lantern. Set the top aside. If you have a small sugar pumpkin, you can place it on top of the cut lid later for a more dramatic stem effect.
- Scoop Out the Insides: Use your large spoon to scoop out all the seeds and stringy pulp from inside the pumpkin. Get it as clean as you can—you want a smooth, dry cavity. I usually use a paper towel to wipe down the inside walls to remove any remaining moisture. Don’t throw away the seeds! You can roast them later with some salt and paprika for a snack.
- Create a “Bowl” Edge: If you want a more finished look, you can use a small knife to create a zigzag or scalloped edge on the cut rim of the pumpkin. I’ve done this once and it looked amazing, but honestly, a straight cut is perfectly fine and takes half the time. For a party, I go with straight cuts.
- Prepare the Fruit: Wash all your fruit thoroughly. Peel the clementines and separate them into segments. Cut the honeydew in half, remove the seeds, and use your melon baller or knife to create cubes or balls. Core the apples and cut them into thin wedges—toss them in a bowl with a squeeze of lemon juice to prevent browning. Cut the pineapple into chunks if using. Keep all the fruit separate in bowls for now.
- Assemble the Fruit Tray: This is the fun part. Start by placing a layer of the larger, heavier fruits at the bottom of the pumpkin cavity—I use the honeydew balls and pineapple chunks first. Then, start layering in the clementine segments, grapes, and apple wedges. The goal is to create a mix of colors and textures that rises above the rim of the pumpkin. Don’t be afraid to pile it high—it should look abundant and overflowing.
- Add the Delicate Fruits Last: Gently place the blackberries and raspberries on top and around the edges. They’re fragile, so don’t bury them. The blackberries, in particular, look amazing when they’re peeking out from between the orange clementines.
- Garnish and Decorate: Tuck fresh mint leaves here and there for a pop of green. If you’re using edible googly eyes, stick them onto the front of the pumpkin with a tiny dab of cream cheese or peanut butter. Scatter pomegranate seeds around the base of the tray on your serving platter for a dramatic effect.
- Serve Immediately or Refrigerate: This is best served within an hour of assembly. If you need to prep ahead, cut all the fruit and store it in separate airtight containers in the fridge. Assemble the pumpkin bowl and fill it just before your guests arrive. I’ve prepped everything the night before and assembled it in 10 minutes before the doorbell rang—it works perfectly.
Cooking Tips & Techniques
After making this a few times, I’ve picked up some tricks that make the process smoother. Here’s what I wish I’d known from the start.
Choose the right pumpkin. Not all pumpkins are created equal for this. You want a carving pumpkin that’s relatively tall and has a flat, stable bottom. Avoid the ones that are too round or have a soft spot—they’ll tip over. I once bought a “pie pumpkin” thinking it would be cuter, and it was way too small and dense. Stick with the big carving pumpkins.
Dry the cavity thoroughly. This is the number one mistake people make. If there’s any moisture inside the pumpkin, it will make the fruit on the bottom soggy and sad. I use paper towels to wipe it down, and then I let it sit upside down on a towel for about 15 minutes to air dry. It makes a huge difference.
Cut fruit in uniform sizes. For the best visual effect, try to cut your melon, pineapple, and apples into similar-sized pieces. It looks more intentional and professional. I aim for bite-sized cubes that are about an inch across.
Don’t overfill. It’s tempting to cram as much fruit in there as possible, but if you overfill, the fruit will fall out when you move the tray. Leave about an inch of space at the top, and let the fruit mound naturally. A little overflow is fine—it looks abundant—but you don’t want a fruit avalanche.
Use a platter with a rim. Place your pumpkin on a large platter or a rimmed baking sheet. This catches any stray fruit, juice, or condensation. It also makes it easier to carry to the table. I use a white platter for contrast.
Prep your fruit the night before. This is a huge time-saver. Wash, peel, and cut all your fruit the night before your party. Store each type in a separate airtight container in the fridge. The next day, all you have to do is cut the pumpkin and assemble. It takes the stress out of hosting.
Variations & Adaptations
One of the best things about this recipe is how flexible it is. I’ve experimented with a few different versions, and they’ve all been hits. Here are some ideas to make it your own.
The Spooky “Black and Orange” Version: For a more Halloween-specific look, use only orange and black fruits. I use clementines, cantaloupe, and mango for the orange, and blackberries, black grapes, and dark plums for the black. It looks incredibly striking and thematic. I served this at a costume party and it was the most photographed thing on the table.
The Tropical Pumpkin: Swap out the fall fruits for a tropical mix. Use pineapple, mango, kiwi, star fruit (which looks amazing), and coconut flakes. It’s perfect for a Halloween party in a warmer climate or if you just want something different. I made this for a friend’s luau-themed Halloween party, and it was a fun twist.
The Mini Pumpkin Individual Servings: Instead of one big pumpkin, use several small sugar pumpkins or even acorn squashes. Cut the tops off, hollow them out, and fill each one with a different fruit. It’s adorable for a party where guests can grab their own “pumpkin cup.” I did this for a kids’ Halloween party, and each child got their own little pumpkin bowl—they loved it.
The Savory Twist: Okay, this one is a little out there, but hear me out. Instead of fruit, use the pumpkin as a bowl for a savory dip or a crudité platter. Fill it with baby carrots, celery sticks, cherry tomatoes, and cucumber spears. You can even put a small bowl of ranch dip in the center. It’s a great option if you’re already overloaded on sweets.
Serving & Storage Suggestions
This dish is best served at room temperature, so take it out of the fridge about 20 minutes before your guests arrive. The fruit will be perfectly chilled but not cold, and the pumpkin will look vibrant.
What to serve alongside it: This fruit tray is a great addition to any Halloween spread. I like to serve it alongside other finger foods like a cheese board, a charcuterie platter, or a bowl of spiced nuts. It also pairs beautifully with a warm dip like a caramel apple dip or a chocolate fondue. If you’re serving drinks, a sparkling apple cider or a pumpkin spice cocktail complements the fruit perfectly.
Storage: This is a dish that’s best eaten the day it’s made. The pumpkin will start to soften after a few hours, and the cut fruit will release moisture. If you have leftovers, remove the fruit from the pumpkin and store it in an airtight container in the fridge for up to 24 hours. The pumpkin itself can be composted or tossed—it won’t be good for much else after being hollowed out.
Reheating: You don’t reheat a fruit tray! But if you want to repurpose the pumpkin, you can roast the seeds (as I mentioned earlier) or use the pumpkin flesh for soup or puree. Just don’t try to cook the carved pumpkin—it’s been sitting out and isn’t ideal for eating.
How flavors develop: The fruit itself doesn’t change much, but the pumpkin does add a subtle, earthy aroma to the overall presentation. The longer it sits, the more the pumpkin’s scent mingles with the fruit, which I actually find quite pleasant. It smells like fall in a bowl.
Nutritional Information & Benefits
This is a healthy dish, which is a nice break from all the candy and sugar that usually dominates Halloween. Here’s a rough estimate per serving (about 1 cup of fruit, assuming the tray serves 12-15 people):
- Calories: Approximately 120-150
- Carbohydrates: 30-35g
- Fiber: 4-6g
- Sugar: 20-25g (natural sugars from fruit)
- Vitamin C: 60-80% of your daily value (thanks to the clementines and berries)
- Potassium: 10-15% of your daily value
The fruit is packed with antioxidants, vitamins, and fiber. The pumpkin itself isn’t eaten in this recipe, but the seeds (if you roast them) are a great source of magnesium and zinc. This dish is naturally gluten-free, dairy-free, and vegan, making it a safe choice for guests with dietary restrictions. Just be aware that berries can be a choking hazard for very young children, so you might want to cut them in half if serving to toddlers.
From a wellness perspective, I love having this on the table because it gives people a healthy option. You can indulge in a piece of candy corn, then grab a handful of grapes and feel a little better about yourself. It’s all about balance, right?
Conclusion
This Halloween Fruit Tray Pumpkin has become my signature party dish, and for good reason. It’s easy, impressive, and it always makes people smile. Every time I set it out, I think of Aunt Josie and her watermelon baskets, and I feel like I’m carrying on a little tradition of making food that’s not just delicious, but also fun. It’s the kind of recipe that makes you look like a hosting pro without any of the stress.
I really hope you try this for your next Halloween gathering. Don’t be afraid to make it your own—swap in your favorite fruits, add a funny face, or make a whole army of mini pumpkins. The best part is watching people’s faces light up when they see it. And honestly, that’s what hosting is all about, isn’t it?
If you make this, I’d love to hear about it! Drop a comment below and let me know what fruits you used, or tag me in your photos if you share them online. Happy Halloween, and happy snacking!
Frequently Asked Questions
How far in advance can I make the Halloween Fruit Tray Pumpkin?
You can prep all the fruit up to 24 hours in advance and store it in airtight containers in the fridge. However, I recommend cutting the pumpkin and assembling the tray no more than 2-3 hours before serving to keep the pumpkin from softening. The fruit will stay fresh and crisp.
Can I use a different type of squash instead of a pumpkin?
Absolutely! A large acorn squash, a butternut squash, or even a decorative gourd can work. Just make sure it’s stable and has a large enough cavity to hold the fruit. The flavor might be slightly different, but the visual effect is just as fun.
How do I keep the fruit from browning?
For apples and pears, toss them in a little lemon juice or pineapple juice after cutting. This slows down oxidation. For other fruits like bananas (if you use them), wait to cut them until just before serving. Keeping the fruit chilled also helps prevent browning.
Can I put a dip inside the pumpkin?
Yes! You can place a small, oven-safe bowl inside the pumpkin cavity before adding the fruit. Fill the bowl with a dip like caramel sauce, chocolate ganache, or a yogurt dip. Just make sure the bowl is stable and doesn’t tip over. I’ve done this with a small ramekin, and it worked great.
What do I do with the pumpkin after the party?
The carved pumpkin is best composted or thrown away, as it’s been sitting out and may have absorbed some moisture from the fruit. However, you can definitely roast the seeds! Wash them, toss them with a little oil and salt, and bake at 300°F for about 20-30 minutes until golden. They make a great snack.
Pin This Recipe!
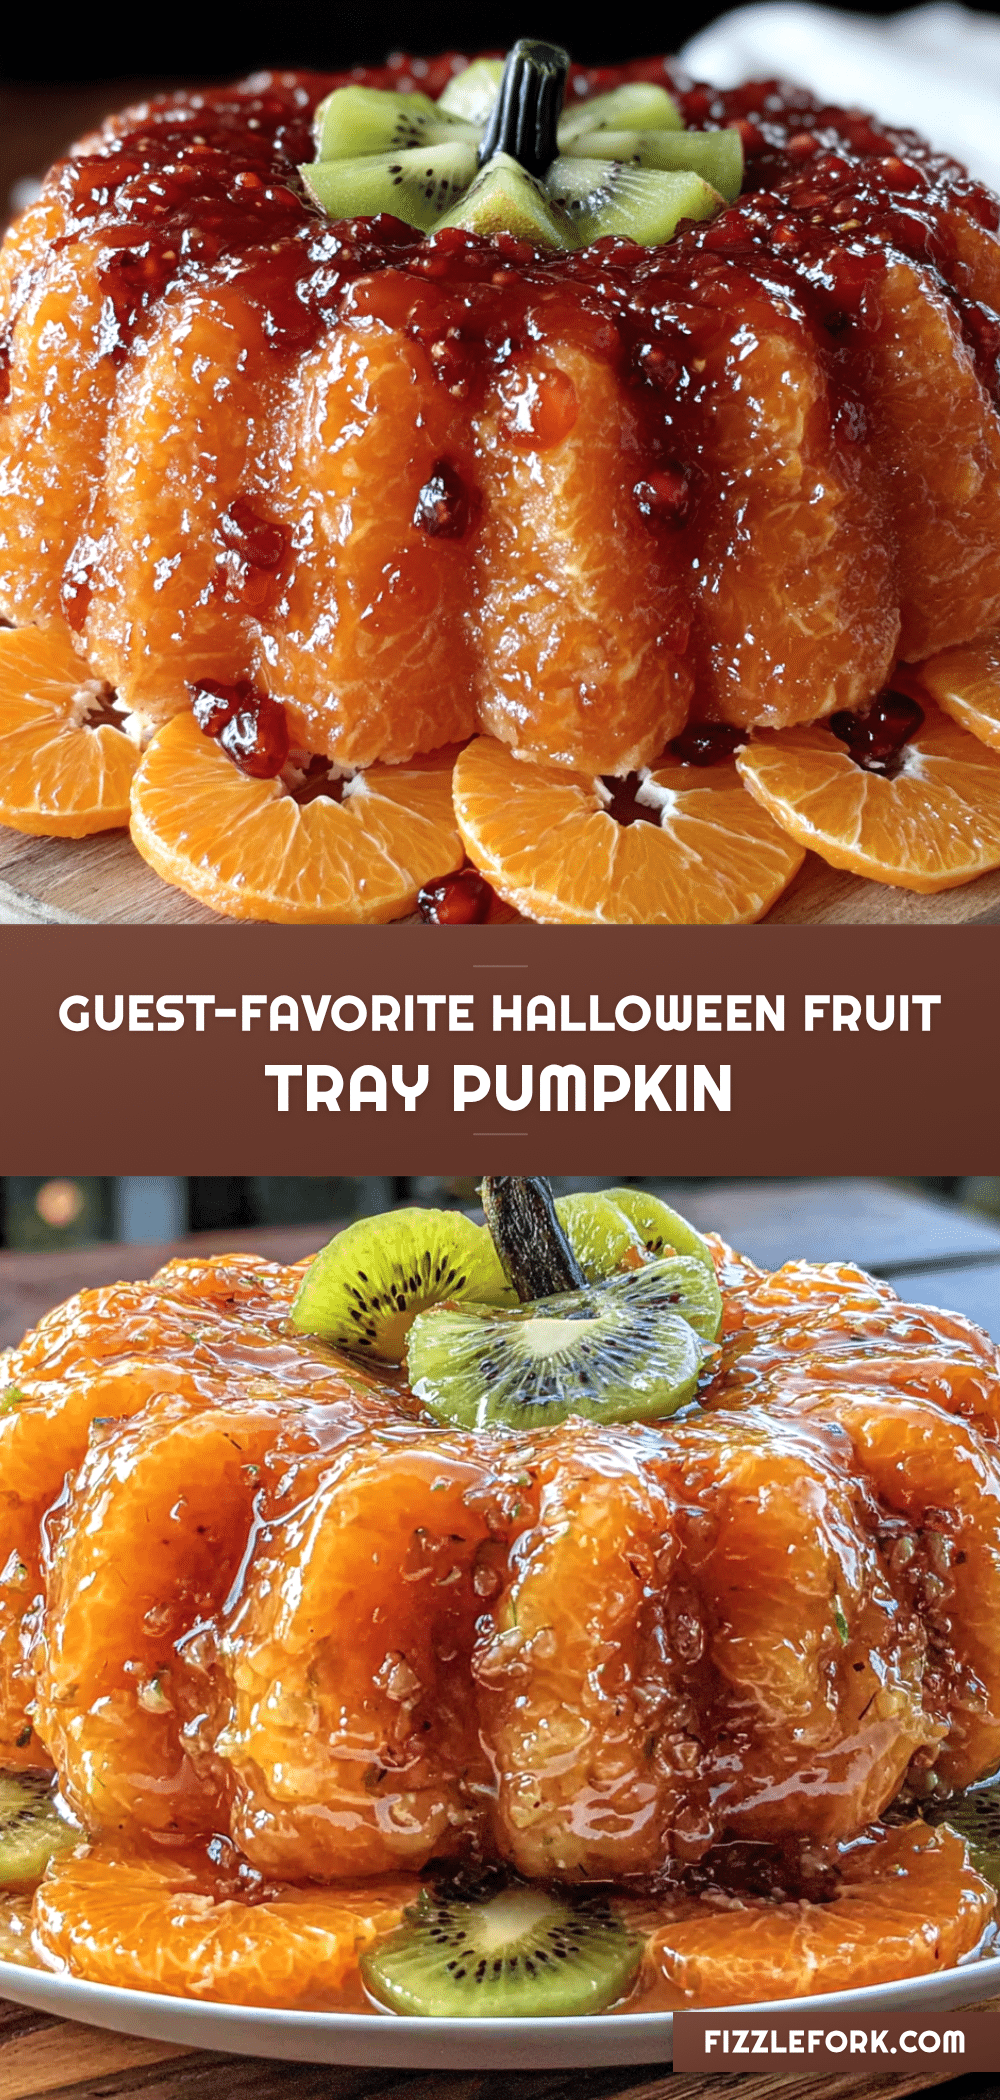
Easy Halloween Pumpkin Fruit Tray: Best Guest Favorite
A stunning fruit tray shaped like a pumpkin, perfect for Halloween parties. Easy to assemble with no cooking required, it’s a healthy and crowd-pleasing centerpiece that will impress your guests.
- Prep Time: 30 minutes
- Cook Time: 0 minutes
- Total Time: 30 minutes
- Yield: 12-15 servings 1x
- Category: Appetizer
- Cuisine: American
Ingredients
- 1 medium to large carving pumpkin (about 8–10 inches in diameter)
- 1 small sugar pumpkin or mini pumpkin (optional, for stem)
- 2 pounds clementines or mandarin oranges, peeled and separated into segments
- 1 pound green grapes, washed and patted dry
- 1 pound red or black grapes, washed and patted dry
- 1 large honeydew melon, cut into cubes or scooped into balls
- 1 pint fresh blackberries
- 1 pint fresh raspberries
- 2 large Granny Smith apples, cored and cut into thin wedges
- 1 small pineapple, peeled, cored, and cut into chunks (optional)
- Fresh mint leaves (for garnish)
- Edible googly eyes (optional)
- Pomegranate seeds (optional)
Instructions
- Wash the outside of your large pumpkin thoroughly with soap and water. Dry it completely. Using your sharp knife, carefully cut off the top of the pumpkin, about 2-3 inches from the stem, just like you would for a jack-o’-lantern. Set the top aside. If you have a small sugar pumpkin, you can place it on top of the cut lid later for a more dramatic stem effect.
- Use your large spoon to scoop out all the seeds and stringy pulp from inside the pumpkin. Get it as clean as you can—you want a smooth, dry cavity. Use a paper towel to wipe down the inside walls to remove any remaining moisture.
- If you want a more finished look, you can use a small knife to create a zigzag or scalloped edge on the cut rim of the pumpkin. For a party, a straight cut is perfectly fine.
- Wash all your fruit thoroughly. Peel the clementines and separate them into segments. Cut the honeydew in half, remove the seeds, and use your melon baller or knife to create cubes or balls. Core the apples and cut them into thin wedges—toss them in a bowl with a squeeze of lemon juice to prevent browning. Cut the pineapple into chunks if using. Keep all the fruit separate in bowls for now.
- Start by placing a layer of the larger, heavier fruits at the bottom of the pumpkin cavity—use the honeydew balls and pineapple chunks first. Then, start layering in the clementine segments, grapes, and apple wedges. The goal is to create a mix of colors and textures that rises above the rim of the pumpkin. Don’t be afraid to pile it high—it should look abundant and overflowing.
- Gently place the blackberries and raspberries on top and around the edges. They’re fragile, so don’t bury them.
- Tuck fresh mint leaves here and there for a pop of green. If you’re using edible googly eyes, stick them onto the front of the pumpkin with a tiny dab of cream cheese or peanut butter. Scatter pomegranate seeds around the base of the tray on your serving platter for a dramatic effect.
- Serve immediately or refrigerate. This is best served within an hour of assembly. If you need to prep ahead, cut all the fruit and store it in separate airtight containers in the fridge. Assemble the pumpkin bowl and fill it just before your guests arrive.
Notes
Choose a pumpkin with a flat bottom for stability. Dry the pumpkin cavity thoroughly to prevent soggy fruit. Cut fruit into uniform sizes for a professional look. Place the pumpkin on a rimmed platter to catch stray fruit or juice. Prep fruit the night before to save time on party day.
Nutrition
- Serving Size: 1 cup of fruit
- Calories: 120150
- Sugar: 2025
- Sodium: 510
- Fat: 0.5
- Carbohydrates: 3035
- Fiber: 46
- Protein: 12
Keywords: Halloween fruit tray, pumpkin fruit tray, Halloween appetizer, fruit platter, healthy Halloween snack, party fruit tray


