I was standing in the dairy aisle of the grocery store last Tuesday, staring at a carton of store-bought eggnog like it had personally offended me. The smell hit me first—not from the carton, but from somewhere deep in my memory. That distinct scent of nutmeg and cream, the kind that only shows up around December. And suddenly I was seven years old at my Aunt Carole’s kitchen table, watching her crack eggs into a big ceramic bowl with the kind of confidence that only comes from years of practice. Her knuckles were dusted with flour, and the radio was playing that one Christmas song everyone knows but nobody can name. I can still hear the gentle clink of the whisk against the bowl.
She passed away about five years ago, and honestly, I haven’t had a proper glass of eggnog since. The store stuff just doesn’t cut it—too sweet, too thick, and that weird artificial aftertaste that lingers on your tongue. Maybe you’ve been there, standing in front of a shelf, wondering why something so simple feels so far away. I grabbed a carton anyway, put it in my cart, and then put it back. I mean, what was I thinking? I knew exactly what I needed to do. I needed to make it myself, from scratch, just like she did. But I needed it to be fast, because let’s face it—Christmas prep is chaos enough without spending hours in the kitchen.
That’s how this quick homemade Christmas eggnog with nutmeg was born. It’s her recipe, streamlined for the rest of us who don’t have all afternoon but still want that real, honest-to-goodness taste of the holidays. No complicated steps, no double-boilers, no tempering eggs like you’re defusing a bomb. Just pure, creamy, spiced perfection in about ten minutes flat. And honestly, it tastes better than I remembered. Maybe because I finally got to make it myself.
Why You’ll Love This Recipe
This isn’t just another eggnog recipe floating around the internet. I’ve tested this version about six times now—yes, six—and I can tell you with complete confidence that it works. It’s the kind of recipe that makes you look like a kitchen hero without actually having to work that hard. Here’s why this easy homemade Christmas eggnog with nutmeg is going to become your new holiday tradition:
- Quick & Easy: Comes together in under 10 minutes. No joke. No cooking required, no complicated techniques. Just whisk and pour.
- Simple Ingredients: You likely already have everything in your kitchen right now. Eggs, milk, cream, sugar, nutmeg. That’s it. No fancy grocery trips needed.
- Perfect for Christmas: Whether you’re hosting a party, having a quiet night by the fire, or need something special for Santa, this eggnog fits every holiday moment.
- Crowd-Pleaser: I brought this to a neighborhood gathering last week, and three people asked for the recipe before I even finished my first cup. It’s that good.
- Unbelievably Delicious: The texture is silky without being gluey, and the nutmeg hits you in all the right places. It’s comfort in a glass.
What makes this recipe different from all the others? It’s the technique. Most homemade eggnog recipes require you to cook the eggs on the stovetop, which is fussy and easy to mess up. This version uses pasteurized eggs and a clever blending method that gives you that same rich, creamy texture without any of the stress. Plus, I’ve dialed in the spice ratio perfectly—enough nutmeg to taste it, but not so much that it overpowers everything else. It’s balanced, it’s beautiful, and it’s yours in under ten minutes.
This isn’t just good eggnog. It’s the kind that makes you close your eyes after the first sip. It’s Christmas in a cup, and you deserve it.
What Ingredients You Will Need
This recipe uses simple, wholesome ingredients to deliver that classic eggnog flavor without any of the fuss. Everything here is a pantry staple during the holidays, so you probably have most of it already. Let me walk you through each one and why it matters.
- 4 large eggs, pasteurized (pasteurized eggs are key here since we’re not cooking them—look for the label on the carton, or use liquid pasteurized egg product if you prefer)
- 1/4 cup granulated sugar (adds just the right amount of sweetness without being cloying; you can adjust this up or down depending on your taste)
- 2 cups whole milk (full-fat milk gives the best texture, but 2% works in a pinch—just know it won’t be quite as luxurious)
- 1 cup heavy cream (this is what makes it silky and rich; don’t skimp here, honestly, it’s Christmas)
- 1 teaspoon vanilla extract (pure vanilla, not imitation—trust me on this one)
- 1/2 teaspoon ground nutmeg, plus more for garnish (freshly grated is best if you have it, but pre-ground works great too; I recommend using a microplane for the garnish)
- Pinch of salt (just a tiny pinch—it balances the sweetness and brings all the flavors together)
- Optional: 2 tablespoons bourbon, rum, or brandy (for the adults; this is completely optional and can be left out or adjusted to taste)
Let me talk about the eggs for a second, because I know some of you are nervous about raw eggs. I get it. I was nervous too, the first time I made this. Using pasteurized eggs eliminates the risk while keeping that authentic homemade texture. You can find them in most grocery stores near the regular eggs—they’re usually labeled clearly. If you really can’t find them, you can use a simple syrup method instead, which I’ll cover in the tips section.
For the nutmeg, I have a strong opinion here. Freshly grated nutmeg is honestly a game-changer. It has this warm, slightly floral aroma that pre-ground nutmeg just can’t quite match. I keep a whole nutmeg in my spice drawer and grate it directly over the eggnog with a microplane. It takes an extra ten seconds, and the difference is noticeable. But if all you have is the pre-ground stuff, don’t stress—it’ll still be delicious. I’ve made it both ways, and both are winners.
As for the dairy, whole milk and heavy cream are the dream team here. The milk provides the body, and the cream adds that luscious mouthfeel that makes eggnog feel so indulgent. If you’re dairy-free, you can substitute with oat milk and coconut cream, but the flavor will be different—still good, just different. I tried it with almond milk once, and honestly, it was too thin. Stick with oat if you’re going that route.
Equipment Needed
You don’t need any fancy equipment for this easy homemade Christmas eggnog with nutmeg, which is part of what makes it so great. Here’s what you’ll need:
- Large mixing bowl (any medium-to-large bowl will work; I use a ceramic one that belonged to my aunt, but glass or stainless steel is fine)
- Whisk (a balloon whisk works best for getting that frothy texture; a fork will work in a pinch, but your arm will get tired)
- Measuring cups and spoons (standard set for accuracy; I recommend metal or glass over plastic, as they’re more durable)
- Pitcher or serving container (something with a spout makes pouring easier; a mason jar works too if you’re making a single batch)
- Microplane or fine grater (for grating fresh nutmeg on top; this is optional but highly recommended)
- Ladle (for serving, especially if you’re using a punch bowl or large container)
If you don’t have a whisk, you can use an electric hand mixer on low speed. Just be careful not to over-whip the eggs—you want them combined, not frothy like a meringue. I learned this the hard way when I made my first batch and ended up with eggnog that had a weird foam on top. It still tasted fine, but it didn’t look as pretty.
Budget-friendly tip: You don’t need to buy anything special for this recipe. A regular bowl and a fork will absolutely get the job done. The microplane is nice, but you can just sprinkle pre-ground nutmeg on top and call it a day. No judgment here.
Preparation Method
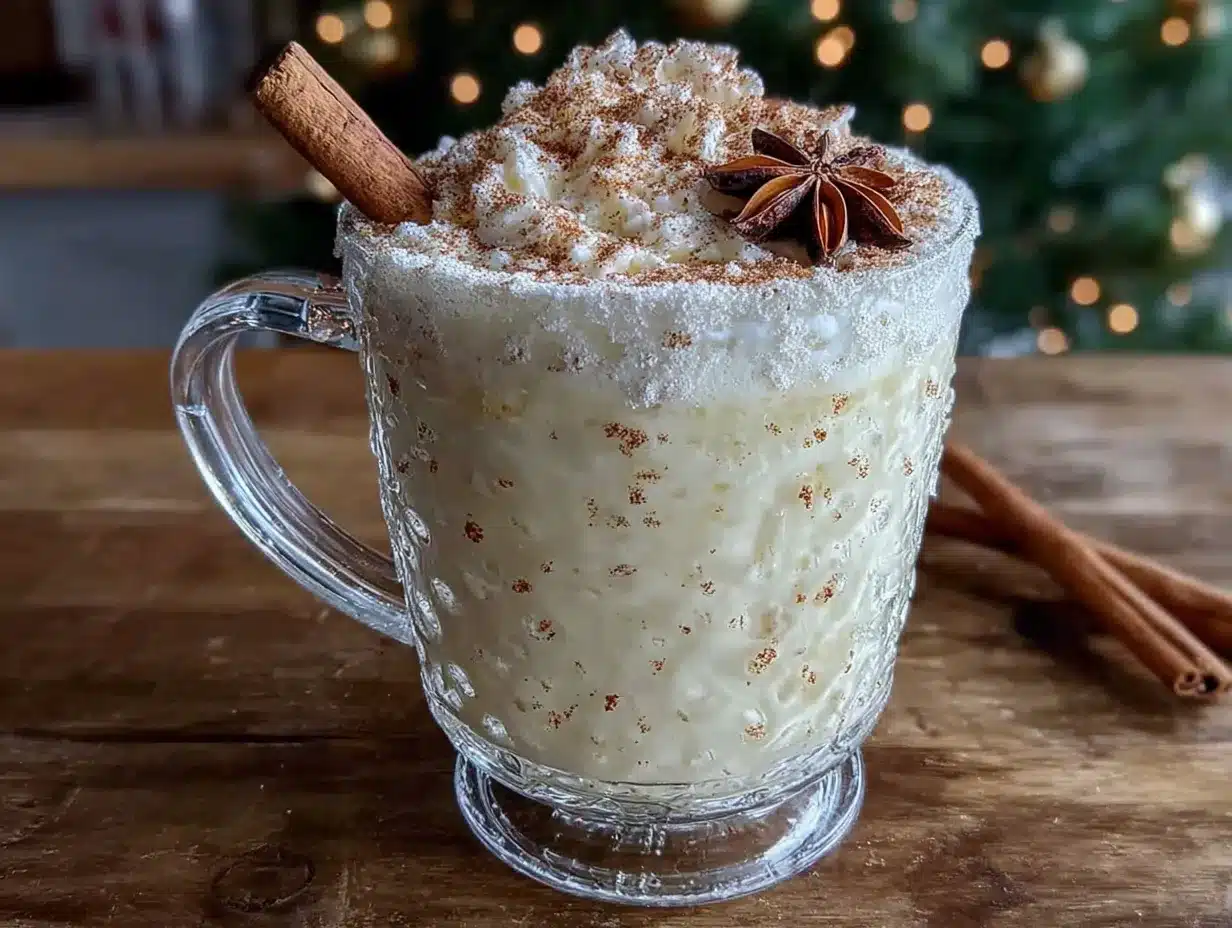
Alright, let’s get to it. This quick homemade Christmas eggnog with nutmeg comes together faster than you’d think. Follow these steps, and you’ll be sipping in no time.
- Separate the eggs. Crack your 4 pasteurized eggs and separate the yolks from the whites. Put the yolks in your large mixing bowl. You can save the whites for another use—like omelets or meringue cookies—or just discard them. I usually save mine and make a quick frittata the next morning.
- Whisk the yolks and sugar. Add the 1/4 cup of granulated sugar to the egg yolks. Whisk vigorously for about 2 minutes, until the mixture turns pale yellow and slightly thick. You’ll notice it gets a little lighter in color and starts to look creamy. This is where the magic begins. If your arm gets tired, take a break—it’s not a race.
- Add the dairy. Pour in the 2 cups of whole milk and 1 cup of heavy cream. Whisk until everything is well combined. The mixture will be thin at this point, and that’s totally fine. Don’t worry if it looks a little separated—it’ll come together in the next step.
- Season it. Add the 1 teaspoon of vanilla extract, 1/2 teaspoon of ground nutmeg, and a pinch of salt. Whisk again until everything is evenly distributed. Take a moment to smell it—that’s the smell of Christmas right there. If you’re adding alcohol, pour in your 2 tablespoons of bourbon, rum, or brandy now and stir gently.
- Chill (optional but recommended). Pour the eggnog into your pitcher or serving container and refrigerate for at least 30 minutes. This allows the flavors to meld together and the texture to thicken slightly. If you’re in a hurry, you can serve it immediately over ice—it’ll still be delicious, just a little thinner. I’ve done both, and honestly, the chilled version is noticeably better.
- Serve and garnish. Pour the eggnog into glasses or mugs. Grate a little fresh nutmeg over the top of each serving. If you’re feeling fancy, you can add a cinnamon stick or a dollop of whipped cream. I like to serve mine in small glass mugs so you can see the beautiful creamy color.
A few things to watch out for: If you notice any lumps in your eggnog, it’s probably because the sugar wasn’t fully dissolved. Make sure you whisk thoroughly in step 2. Also, if you’re adding alcohol, don’t go overboard—2 tablespoons per batch is plenty. Any more, and you’ll lose the delicate nutmeg flavor. Trust me on this, I learned that lesson the hard way one Christmas Eve.
The texture should be smooth and silky, with a slight thickness that coats the back of a spoon. If it’s too thin for your liking, you can add an extra splash of heavy cream. If it’s too thick, a little more milk will thin it right out. This recipe is forgiving, so don’t stress about getting it perfect.
Cooking Tips & Techniques
After making this easy homemade Christmas eggnog with nutmeg about a dozen times, I’ve picked up a few tricks that make a real difference. Let me share what I’ve learned.
Use pasteurized eggs. This is non-negotiable for a no-cook eggnog. Regular raw eggs carry a small risk of salmonella, and while the chances are low, it’s not worth the worry. Pasteurized eggs are heated to a temperature that kills bacteria without cooking the egg. They’re widely available and taste exactly the same. If you absolutely can’t find them, you can make a cooked version by gently heating the milk and cream mixture to 160°F, then slowly whisking it into the eggs. But honestly, the pasteurized route is so much easier.
Don’t over-whisk. I made this mistake my second time around. I was so excited that I whisked the yolks and sugar for like five minutes, and the mixture got almost fluffy. The eggnog ended up with a weird foam on top that didn’t look great. Two minutes of whisking is plenty—you want the sugar dissolved and the color to lighten, but you don’t want to incorporate too much air.
Let it rest. I know I said this is quick, and it is, but giving it at least 30 minutes in the fridge makes a huge difference. The flavors meld together, the nutmeg infuses the whole batch, and the texture becomes silkier. If you can wait an hour, even better. I usually make it in the morning and let it chill until the evening. The patience pays off.
Taste as you go. Everyone’s palate is different. Some people like more nutmeg, some like less. Some want it sweeter, some want it more spirit-forward. Taste your eggnog before you serve it and adjust accordingly. I always add a tiny bit more nutmeg at the end because I love that warm, spicy kick.
Make it ahead. This eggnog keeps beautifully in the fridge for up to 3 days. In fact, I think it tastes even better on day two—the flavors have had time to settle and deepen. Just give it a good stir before serving, as some separation is normal. I usually make a double batch on December 23rd so I have it ready for Christmas Eve and Christmas Day.
Variations & Adaptations
This quick homemade Christmas eggnog with nutmeg is wonderfully adaptable. Here are some variations I’ve tried and loved.
Dairy-Free Version: Substitute the whole milk with oat milk and the heavy cream with full-fat coconut cream. The coconut cream gives it that same luxurious texture, and the flavor is surprisingly neutral. I made this for a friend who’s lactose intolerant, and she said it was the best eggnog she’d had in years. Just make sure to whisk it really well, as coconut cream can be a little stubborn.
Spiced Eggnog: Add 1/4 teaspoon of cinnamon and a pinch of ground cloves along with the nutmeg. This gives it a chai-like warmth that’s perfect for cold winter nights. I tried this on a whim one evening, and now I can’t decide which version I like better. The spices complement each other beautifully without overwhelming the eggnog.
Vegan Option: Use a combination of silken tofu and unsweetened almond milk as the base. Blend everything together in a blender until smooth. It sounds weird, I know, but it actually works. The tofu gives it that thick, creamy texture, and the almond milk keeps it light. Add an extra teaspoon of vanilla to mask any tofu flavor. I was skeptical when a friend suggested this, but it’s genuinely good.
Extra Rich Version: Swap one cup of the whole milk for an additional cup of heavy cream. This makes it incredibly decadent—almost like drinking melted ice cream. Perfect for special occasions when you want to go all out. I only make this version on Christmas Eve itself, because it’s just too indulgent for regular use.
Lower Sugar Option: Reduce the sugar to 2 tablespoons and add a teaspoon of maple syrup for complexity. The maple adds a lovely depth that complements the nutmeg. I’ve also used honey, but the flavor is more pronounced and can compete with the spices. Maple is the way to go if you’re cutting back on sugar.
Serving & Storage Suggestions
This easy homemade Christmas eggnog with nutmeg is best served cold, straight from the fridge. I like to pour it into small glasses or mugs—about 4 to 6 ounces per serving—because it’s rich and you don’t need a huge amount to feel satisfied. A sprinkle of fresh nutmeg on top is non-negotiable in my house. It adds that final touch of aroma and flavor that makes it feel special.
For presentation, I sometimes serve it in a glass punch bowl with a ladle, especially if I’m having people over. It looks so festive, and guests can help themselves. I’ll float a few cinnamon sticks and star anise in the bowl for visual appeal. If I’m feeling extra fancy, I’ll rim the glasses with a mixture of sugar and cinnamon—just dip the rim in a little water, then into the sugar mixture. It’s a small touch that makes a big impression.
As for what to serve alongside, eggnog pairs beautifully with gingerbread cookies, shortbread, or a slice of fruitcake. The spicy sweetness of the cookies complements the creamy richness of the eggnog. I also love it with a simple vanilla biscotti for dipping. Honestly, it’s good with just about any Christmas treat.
Storage: Keep your eggnog in an airtight container in the refrigerator for up to 3 days. Give it a good stir before serving, as some separation is natural. Do not freeze it—the texture will become grainy and unpleasant when thawed. I learned this the hard way when I tried to save a batch for New Year’s. The flavor was still there, but the texture was off.
Reheating: This recipe is meant to be served cold, but if you prefer warm eggnog, gently heat it in a saucepan over low heat, stirring constantly. Do not let it boil, or it will curdle. Warm eggnog with a shot of dark rum is a cozy treat on a cold night. I’ve done this a few times, and it’s like drinking a hug.
Nutritional Information & Benefits
Here’s the thing about eggnog—it’s a treat, not a health food. But that doesn’t mean it can’t have some redeeming qualities. This quick homemade Christmas eggnog with nutmeg is made with real ingredients, which automatically puts it ahead of the store-bought stuff with its preservatives and artificial flavors.
Per 4-ounce serving (without alcohol):
- Calories: approximately 220
- Fat: 16g
- Carbohydrates: 14g
- Protein: 6g
- Sugar: 12g
The eggs provide high-quality protein and essential vitamins like B12 and D. The milk and cream offer calcium for bone health. And nutmeg? It’s actually been used in traditional medicine for its anti-inflammatory properties and its ability to aid digestion. Plus, that warm, spicy aroma has been shown to reduce stress and promote relaxation—exactly what you need during the holiday chaos.
For those with dietary concerns, this recipe can be adapted to be dairy-free or lower in sugar, as I mentioned in the variations section. It’s not gluten-free by nature, but it doesn’t contain any gluten ingredients, so it should be safe for most people with gluten sensitivities. Always check your specific ingredients if you have allergies.
My personal take? I don’t worry about the calories during the holidays. This is a once-a-year indulgence, and I believe in enjoying it fully. A small glass goes a long way, and the joy it brings is worth every single calorie.
Conclusion
This easy homemade Christmas eggnog with nutmeg is more than just a drink—it’s a memory in the making. It’s the taste of Aunt Carole’s kitchen, the warmth of a crackling fire, the laughter of family gathered around the table. And the best part? You can have it on your table in under ten minutes.
I hope you’ll try this recipe and make it your own. Add a little extra nutmeg if that’s your thing. Spike it with bourbon or keep it virgin. Serve it in fancy glasses or cozy mugs. However you make it, I promise it’ll be the best eggnog you’ve had outside of a childhood memory.
If you give this recipe a try, I’d love to hear about it. Leave a comment below and let me know how it turned out—did you add a special twist? Serve it at a party? Drink it all by yourself while wrapping presents? No judgment here. And if you’re looking for more holiday inspiration, check out my gingerbread cookies or homemade cranberry sauce to complete your Christmas menu.
From my kitchen to yours, Merry Christmas. Now go make some eggnog—you deserve it.
Frequently Asked Questions
Can I make this eggnog without raw eggs?
Absolutely. If you’re concerned about raw eggs, you can make a cooked version. Gently heat the milk and cream in a saucepan until it reaches 160°F, then slowly whisk it into the beaten egg yolks and sugar. Return the mixture to the saucepan and cook over low heat, stirring constantly, until it thickens slightly—about 3 to 4 minutes. Let it cool before refrigerating. The texture will be slightly different, but it’s just as delicious.
How long does homemade eggnog last in the fridge?
Properly stored in an airtight container, this eggnog will keep for 3 to 4 days in the refrigerator. Always give it a good stir before serving, as some separation is normal. If it develops an off smell or taste, or if you see any mold, discard it immediately. Trust your senses—they’re your best kitchen tool.
Can I make this eggnog dairy-free?
Yes! Substitute the whole milk with oat milk and the heavy cream with full-fat coconut cream. The coconut cream provides the richness you need, and oat milk has a neutral flavor that won’t compete with the nutmeg. I’ve tested this version, and it’s genuinely good—even my dairy-loving friends approved.
What’s the best alcohol to add to eggnog?
Bourbon, dark rum, and brandy are the classic choices. Bourbon adds a warm, vanilla-like sweetness. Dark rum brings a molasses depth. Brandy offers a fruity complexity. You can also use a combination—I sometimes do half bourbon, half rum. Start with 2 tablespoons per batch and adjust to your taste. Remember, you can always add more, but you can’t take it out.
Can I freeze homemade eggnog?
I don’t recommend it. Freezing changes the texture of the dairy, and when thawed, the eggnog becomes grainy and separated. It’s still safe to eat, but it won’t have that silky, luxurious mouthfeel. If you need to make it ahead, just prepare it up to 3 days in advance and keep it in the fridge. That’s plenty of time for holiday prep.
Pin This Recipe!
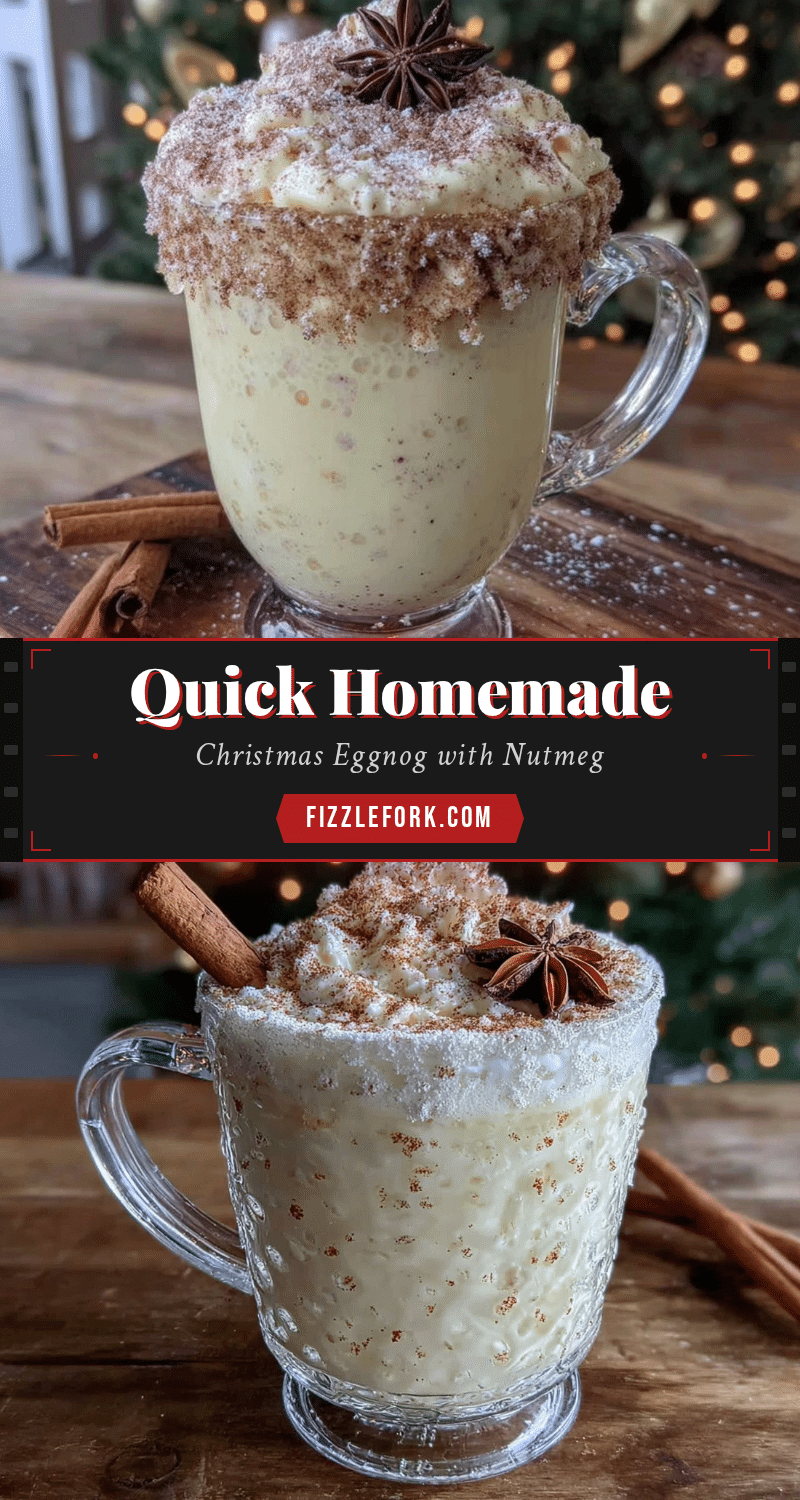
Easy Homemade Christmas Eggnog with Nutmeg
A quick and easy homemade eggnog recipe that captures the authentic taste of the holidays. Made with simple ingredients and ready in under 10 minutes, this creamy, spiced eggnog is perfect for Christmas gatherings.
- Prep Time: 10 minutes
- Cook Time: 0 minutes
- Total Time: 10 minutes (plus optional 30 minutes chilling)
- Yield: 4 servings 1x
- Category: Beverage
- Cuisine: American
Ingredients
- 4 large eggs, pasteurized
- 1/4 cup granulated sugar
- 2 cups whole milk
- 1 cup heavy cream
- 1 teaspoon vanilla extract
- 1/2 teaspoon ground nutmeg, plus more for garnish
- Pinch of salt
- Optional: 2 tablespoons bourbon, rum, or brandy
Instructions
- Separate the eggs. Crack the 4 pasteurized eggs and separate the yolks from the whites. Place the yolks in a large mixing bowl. Save the whites for another use or discard.
- Whisk the yolks and sugar. Add the 1/4 cup granulated sugar to the egg yolks. Whisk vigorously for about 2 minutes, until the mixture turns pale yellow and slightly thick.
- Add the dairy. Pour in the 2 cups whole milk and 1 cup heavy cream. Whisk until well combined.
- Season it. Add the 1 teaspoon vanilla extract, 1/2 teaspoon ground nutmeg, and a pinch of salt. Whisk again until evenly distributed. If using alcohol, add 2 tablespoons of bourbon, rum, or brandy and stir gently.
- Chill (optional but recommended). Pour the eggnog into a pitcher or serving container and refrigerate for at least 30 minutes to allow flavors to meld.
- Serve and garnish. Pour the eggnog into glasses or mugs. Grate fresh nutmeg over the top of each serving. Optionally, add a cinnamon stick or a dollop of whipped cream.
Notes
Use pasteurized eggs to eliminate the risk of salmonella. For best flavor, let the eggnog chill for at least 30 minutes. Freshly grated nutmeg is recommended for garnish. The eggnog can be stored in an airtight container in the refrigerator for up to 3 days. Do not freeze.
Nutrition
- Serving Size: 4 ounces
- Calories: 220
- Sugar: 12
- Sodium: 80
- Fat: 16
- Saturated Fat: 9
- Carbohydrates: 14
- Protein: 6
Keywords: eggnog, Christmas eggnog, homemade eggnog, easy eggnog, nutmeg eggnog, holiday drink, quick eggnog


