It was 11:37 PM on a random Wednesday in December, and I had this ridiculous, unstoppable craving for something sweet, cold, and crunchy. You know that feeling when your brain just refuses to settle until you’ve had something that satisfies a very specific, almost unexplainable itch? That was me, standing in my kitchen in my pajamas, staring into the pantry like it held the secrets to the universe. I didn’t have the fancy chocolate bark ingredients I’d pinned a hundred times, but I had a bag of white chocolate chips leftover from a failed cookie experiment, a box of candy canes I swore I wouldn’t buy again, and this weird, impulsive idea that just wouldn’t leave me alone.
Honestly, the name came first. I was texting a friend about my late-night kitchen chaos, and I jokingly called my creation “snowman poop” because… well, it was white, it was going to be chunky, and it felt like the kind of silly, irreverent thing you only think of when you’re half-asleep. She laughed so hard she demanded I actually make it. So there I was, melting chocolate at midnight, crushing candy canes with a rolling pin (which, let me tell you, made a mess I’m still finding sparkly red bits of), and feeling like a mad scientist. It was oddly meditative. The house was quiet, the only sound was the microwave humming, and I was making something that felt less like a recipe and more like a happy accident.
The first bite was a revelation. The creamy sweetness of the white chocolate, the cool burst of peppermint, and that satisfyingly loud *crunch* from the candy canes—it was everything I didn’t know I needed. I stood there at the counter, eating pieces straight off the parchment paper, and I knew this wasn’t just a one-time thing. This was the kind of ridiculously easy, wonderfully weird treat that you make for holiday parties, for cookie exchanges, or just for yourself on a quiet Tuesday night when the world feels a little too loud. Maybe you’ve been there, looking for something fun and festive without all the stress. This is that recipe. It’s silly, it’s simple, and it’s seriously addictive.
Why You’ll Love This Recipe
Let’s be real—during the holiday season, the last thing anyone needs is a complicated, multi-step recipe that leaves your kitchen looking like a flour bomb went off. This Easy Snowman Poop Peppermint White Chocolate Crunch is the exact opposite of that. It’s the recipe you turn to when you want something that looks impressive and tastes incredible, but takes almost zero actual effort. I’ve tested this more times than I care to admit (purely for quality control purposes, of course), and it never fails to deliver.
- Quick & Easy : From start to finish, you’re looking at about 15 minutes of active time. The hardest part is waiting for the chocolate to set in the fridge. It’s perfect for those last-minute holiday cravings or when you need a gift in a pinch.
- Simple Ingredients : You only need three main ingredients—white chocolate, candy canes, and a tiny bit of oil. No weird extracts, no specialty baking sections required. You probably have everything in your kitchen right now.
- Perfect for Holiday Gifting : This makes the most adorable, unexpected gift. Bag it up with a cute ribbon and a funny tag, and you’ve got a homemade present that people will actually remember. It’s a guaranteed conversation starter.
- Crowd-Pleaser : Kids think the name is hilarious, and adults love the nostalgic peppermint flavor. I’ve brought this to three different holiday gatherings, and it was the first thing to disappear every single time.
- Unbelievably Delicious : The texture is what gets you. It’s not just chocolate bark—it’s a crunchy, creamy, minty explosion. The white chocolate provides a smooth, sweet base, while the crushed candy canes add that satisfying snap and cooling sensation.
What makes this recipe different from every other peppermint bark out there? Honestly, it’s the simplicity. Most recipes call for tempering chocolate or layering different types. This one? You melt, you mix, you chill. That’s it. I’ve perfected the ratio of chocolate to candy cane so you get the perfect crunch in every single bite without the bark falling apart. It’s not just another version—it’s the one I keep coming back to year after year. This is the kind of treat that makes you close your eyes after the first bite. It’s comfort food reimagined for the holidays—faster, easier, but with the same soul-soothing satisfaction. Perfect for impressing guests without an ounce of stress.
What Ingredients You Will Need
This recipe uses the simplest of ingredients to create something that feels surprisingly special. The magic is really in the combination of textures and that classic holiday flavor pairing. Here’s everything you’ll need:
- 12 ounces white chocolate chips or baking bars, chopped – The star of the show. I personally prefer Ghirardelli white chocolate chips for their creamy melt and reliable texture. If you use white candy melts (like Wilton), they work too, but the flavor won’t be as rich. Look for real white chocolate that contains cocoa butter for the best taste.
- 1/2 teaspoon coconut oil or vegetable oil – This is my secret trick. A tiny bit of oil helps the white chocolate melt more smoothly and gives the finished bark a beautiful, glossy sheen. It also helps prevent the chocolate from seizing up. Coconut oil adds a very subtle, lovely flavor, but vegetable oil works perfectly if that’s what you have.
- 1 cup crushed candy canes (about 6-8 full-sized candy canes) – You want them crushed, not pulverized. Small pieces and a little bit of dust are perfect. I like using traditional peppermint candy canes, but you can experiment with other flavors like wintergreen or even cinnamon. Avoid starlight mints, as they are much harder and can be difficult to bite through.
- Optional: 1/4 cup white chocolate chips for drizzling – This is purely for looks, but it does make the bark look extra fancy. If you’re making this for a gift or a party, the drizzle adds a nice touch.
- Optional: A pinch of flaky sea salt – Don’t skip this if you have it! The salt cuts through the sweetness of the white chocolate and makes the peppermint flavor pop. Maldon sea salt is my go-to for this.
Ingredient Selection Tips: When choosing your candy canes, make sure they are fresh and not stale. Stale candy canes can be soft and won’t give you that satisfying crunch. Also, check the expiration date on your white chocolate. Old white chocolate can sometimes be grainy or hard to melt properly. For a truly festive look, you can find peppermint candy canes with red and white stripes, but the classic ones work just fine.
Substitution Guidance: If you need a dairy-free option, look for a high-quality dairy-free white chocolate. I’ve used the brand “Enjoy Life” with good results, though the texture is slightly different. For a lower-sugar version, you can use sugar-free white chocolate chips, but be aware that they melt differently and may not set as firmly. You can also swap the candy canes for crushed peppermint candies, but again, watch out for the hardness.
Equipment Needed
You don’t need a fancy kitchen to pull this off. Here’s the basic gear you’ll need:
- Baking sheet – A standard half-sheet pan (13×18 inches) works perfectly. Line it with parchment paper or a silicone baking mat for easy removal.
- Medium microwave-safe bowl – For melting the white chocolate. Glass or ceramic works best.
- Rubber spatula – For stirring and spreading the chocolate. A silicone spatula is ideal because it won’t scratch your bowl and it’s easy to clean.
- Ziploc bag or piping bag – For the optional drizzle. A simple sandwich bag with the corner snipped off works just as well as a fancy piping bag.
- Rolling pin or meat mallet – For crushing the candy canes. I’ve used both, and honestly, a rolling pin gives you more control. Just place the candy canes in a Ziploc bag and go to town. It’s a great way to release some holiday stress!
- Small offset spatula or butter knife – For spreading the chocolate into an even layer. Not strictly necessary, but it helps get a nice, uniform thickness.
Personal Tip: I used to use a food processor to crush my candy canes, but I found it turned them into too fine a powder. You want some texture! The rolling pin method gives you a perfect mix of small pieces and a little bit of dust, which is exactly what you want. Also, if you don’t have an offset spatula, the back of a spoon works surprisingly well for spreading the chocolate.
Preparation Method

- Prepare your candy canes. Place your candy canes in a sturdy Ziploc bag. Seal it, making sure to get all the air out. Now, the fun part—take your rolling pin and gently but firmly crush the candy canes. You want a mix of small pieces and a little bit of fine dust. Don’t go overboard; you don’t want powder. Set aside about 2 tablespoons of the crushed candy for the topping.
- Line your baking sheet. Take your baking sheet and line it with a piece of parchment paper. Make sure the paper is large enough to hang over the edges a little—this will make lifting the finished bark out much easier. If you have a silicone baking mat, that works even better.
- Melt the white chocolate. Place your white chocolate chips (or chopped white chocolate) and the coconut oil in a medium microwave-safe bowl. Microwave in 30-second intervals, stirring well after each interval. White chocolate is notorious for burning, so don’t walk away! It usually takes about 1.5 to 2 minutes total. Stop when most of the chips are melted and the mixture is smooth when you stir it. The residual heat will melt the rest.
- Add the crushed candy canes. Once your white chocolate is completely smooth and glossy, add the majority of your crushed candy canes (reserving that 2 tablespoons for the top). Fold them in gently with your rubber spatula until they are evenly distributed. The mixture will start to thicken slightly as the candy cane pieces cool the chocolate—that’s completely normal.
- Spread the mixture. Pour the white chocolate and candy cane mixture onto your prepared baking sheet. Use your offset spatula or the back of a spoon to spread it into an even layer. Aim for about 1/4-inch thickness. It doesn’t have to be perfect—rustic is part of the charm! Don’t spread it too thin, or it will be fragile.
- Add the toppings. Immediately sprinkle the reserved crushed candy canes over the top. If you’re using the flaky sea salt, sprinkle a tiny pinch over the whole thing now. If you want to add the optional white chocolate drizzle, melt a small handful of extra white chocolate chips in the microwave (about 30 seconds) and drizzle it over the top using a spoon or a piping bag.
- Chill until set. Place the baking sheet in the refrigerator for at least 30 minutes, or until the chocolate is completely firm and set. If you’re in a hurry, you can pop it in the freezer for about 15 minutes, but keep an eye on it so it doesn’t get too cold and brittle.
- Break into pieces. Once the bark is completely set, lift it off the baking sheet using the parchment paper. Place it on a cutting board. Now, the best part—break it into irregular, rustic pieces with your hands. Or, if you want cleaner edges, use a sharp knife to cut it into squares or triangles. The jagged, imperfect pieces are part of the “snowman poop” aesthetic!
Troubleshooting Tip: If your white chocolate seizes up (becomes thick and grainy), you likely got a tiny bit of water in it. Unfortunately, there’s no saving it once that happens. To prevent this, make sure your bowl and spatula are completely dry. Also, don’t cover the bowl while microwaving, as condensation can drip in. If the mixture seems too thick to spread, you can add another 1/4 teaspoon of coconut oil and stir vigorously.
Cooking Tips & Techniques
After making this recipe about a dozen times (it’s a tough job, but someone’s got to do it), I’ve picked up a few tricks that make the process even smoother. Let me share some of the lessons I’ve learned the hard way so you don’t have to.
Don’t Overheat the Chocolate. This is the number one mistake people make. White chocolate has a lower melting point than milk or dark chocolate, and it burns easily. It can go from perfectly melted to a scorched, lumpy mess in seconds. Always use low power (50% power) on your microwave and stir, stir, stir. The chocolate should be mostly melted with a few small lumps before you stop microwaving. The stirring will finish the job.
The Oil is Non-Negotiable. I tried making this without the oil once because I thought it was an unnecessary step. Big mistake. The white chocolate was thick, difficult to spread, and the finished bark was dull and matte. That little bit of oil (coconut or vegetable) makes the chocolate fluid and gives it that beautiful, professional-looking shine. Trust me on this one.
Crush Strategically. You want a variety of sizes in your crushed candy canes. Some larger pieces for a satisfying crunch, some medium pieces for texture, and a little bit of dust that will melt slightly into the chocolate and give it a subtle pink tint. To achieve this, I crush the candy canes in stages—first a few gentle taps, then a few harder rolls. I also like to pick out a few larger pieces to press into the top for visual appeal.
Timing is Everything. Have all your ingredients measured and ready before you start melting the chocolate. Once the white chocolate is melted, you need to work quickly. If it starts to set before you’ve spread it, it will be difficult to get an even layer. This is not a recipe where you want to be rummaging through your pantry looking for the candy canes while your chocolate is cooling.
My Biggest Failure: The first time I made this, I used stale candy canes that had been sitting in my pantry since last Christmas. The result? The candy canes were soft and chewy instead of crunchy. The bark was a floppy, disappointing mess. Now, I always use fresh, crisp candy canes. If they bend instead of snap, they’re too old. Also, I once forgot to line my baking sheet with parchment. Let’s just say that was a very sticky, very frustrating cleanup situation. Don’t be like me—always use parchment paper!
Variations & Adaptations
One of the best things about this recipe is how endlessly adaptable it is. Once you have the basic technique down, you can play around with flavors and textures to make it your own. Here are a few variations I’ve tried and loved:
Dark Chocolate Peppermint Crunch: Swap the white chocolate for high-quality dark chocolate (70% cocoa or higher). The bitterness of the dark chocolate is a fantastic counterpoint to the sweet, minty candy canes. This version feels a little more sophisticated and is perfect for the dark chocolate lovers in your life. You won’t need the coconut oil for this version, as dark chocolate melts more smoothly on its own.
Milk Chocolate Snowman Poop: For a milder, creamier flavor, use milk chocolate chips instead of white. This version is incredibly popular with kids. The milk chocolate is so sweet and smooth that it almost tastes like a candy bar. I like to add a handful of mini marshmallows to this version for a “hot cocoa” vibe.
Vegan & Dairy-Free Version: As I mentioned, you can use dairy-free white chocolate. I’ve also made this with a mix of dairy-free dark chocolate and coconut cream for an extra creamy texture. The key is to find a vegan white chocolate that melts well. The brand “Milkless” makes a pretty good one. The texture will be slightly softer, so you’ll want to keep it stored in the fridge.
Add-In Extravaganza: Don’t stop at just candy canes! Try adding 1/4 cup of crushed pretzels for a salty-sweet crunch, 1/4 cup of dried cranberries for a tart pop of flavor, or 1/4 cup of toasted chopped nuts (like pecans or almonds) for extra richness. I made a version with crushed Oreos and peppermint once, and it was dangerously good. The possibilities are endless.
Spicy Snowman Poop: For the adventurous eater, add a pinch of cayenne pepper or a sprinkle of chili powder to the white chocolate along with the candy canes. The heat from the spice mingles with the cool peppermint in a surprisingly addictive way. Start with just a tiny pinch—you can always add more, but you can’t take it away!
Serving & Storage Suggestions
This Snowman Poop Peppermint White Chocolate Crunch is best served cold or at cool room temperature. The chocolate should be firm and snappy, and the candy canes should offer a clean, crisp crunch. I like to take it out of the fridge about 5 minutes before serving so it’s not ice-cold, but still perfectly firm.
Presentation Ideas: For holiday parties, arrange the broken pieces on a festive platter or in a decorative tin. You can also pile them into a clear glass jar tied with a red ribbon for a simple, rustic look. For gifting, place the pieces in a cellophane bag, tie it with a festive twist tie, and attach a funny tag that says “Snowman Poop” or “Reindeer Fuel.” It always gets a laugh.
Complementary Dishes: This crunch is fantastic on its own, but it also pairs beautifully with other treats. Serve it alongside a cup of hot cocoa, a mug of peppermint mocha coffee, or a scoop of vanilla ice cream for an indulgent dessert. It also makes a great topping for brownies or a festive addition to a holiday cookie platter.
Storage Instructions: Store your Snowman Poop in an airtight container in the refrigerator. It will keep well for up to 2 weeks. I actually think the flavor gets better after a day or two as the peppermint flavor mellows and melds with the chocolate. Do not store it at room temperature for more than a few hours, especially if your kitchen is warm, as the white chocolate can become soft and sticky.
Freezing Instructions: This bark freezes beautifully! Place the pieces in a single layer in a freezer-safe container or Ziploc bag, separating layers with parchment paper. It will keep in the freezer for up to 3 months. To thaw, simply transfer the container to the refrigerator for a few hours or let it sit at room temperature for about 10 minutes. The texture will be just as good as the day you made it.
Flavor Development: One thing I’ve noticed is that the peppermint flavor becomes more pronounced and integrated after the bark has been chilled for a day. The initial sharpness of the candy cane mellows out, and the white chocolate becomes even creamier. So if you can resist eating it all immediately, it actually gets better with a little time!
Nutritional Information & Benefits
Let’s be honest—this is a treat, not a health food. But that doesn’t mean it can’t have a place in a balanced lifestyle, especially during the holidays. Here’s a rough nutritional breakdown per serving (about 1 ounce, or a piece roughly 2×2 inches):
- Calories: Approximately 150-170
- Fat: 9-10g
- Carbohydrates: 18-20g
- Sugar: 16-18g
- Protein: 1-2g
Potential Health Benefits (with a grain of salt!): Peppermint has been used for centuries to aid digestion and soothe upset stomachs. So, in a way, eating this after a big holiday meal might actually help you feel better! White chocolate contains a small amount of calcium from the milk solids. And honestly, the mental health benefit of enjoying a small, delicious treat and sharing it with loved ones is real. Joy is good for you.
Dietary Considerations: This recipe is naturally vegetarian. As mentioned, it can be made vegan and dairy-free with appropriate substitutions. It does contain dairy and sugar. It is gluten-free as written (always check your candy cane labels, but most are gluten-free). The main allergens to be aware of are milk and (if using) nuts from any add-ins.
My Personal Perspective: I believe in the 80/20 rule. Eat nourishing, whole foods 80% of the time, and leave 20% for joyful indulgences like this. A small piece of this Snowman Poop after a long day is a moment of pure, simple happiness. It’s not about deprivation—it’s about balance. And sometimes, balance looks like a handful of white chocolate and peppermint crunch.
Conclusion
Honestly, this Easy Snowman Poop Peppermint White Chocolate Crunch is the recipe I never knew I needed until I made it. It’s silly, it’s simple, and it’s absolutely delicious. It’s the kind of recipe that proves you don’t need fancy techniques or a dozen ingredients to create something truly special. You just need a little bit of creativity, a willingness to laugh at yourself, and a craving for something sweet and crunchy.
I love this recipe because it brings people together. The name makes everyone smile, the flavor makes everyone happy, and the fact that it takes almost no effort makes everyone feel like a kitchen rockstar. Whether you’re making it for a holiday party, a gift for a neighbor, or just a late-night treat for yourself (no judgment here), I promise you won’t be disappointed.
So go ahead—raid your pantry, crush some candy canes, and make a mess in your kitchen. This is the kind of recipe that’s meant to be fun. And if you come up with your own crazy variation, please share it in the comments below! I’d love to hear what you came up with. Don’t forget to pin this recipe for later and tag me in your photos—I can’t wait to see your Snowman Poop creations!
Frequently Asked Questions
Can I use white chocolate candy melts instead of real white chocolate?
Yes, you can! Candy melts are designed to melt smoothly and set firmly, so they work very well for this recipe. However, the flavor won’t be as rich or creamy as real white chocolate. If you’re using candy melts, you can skip the coconut oil, as they already contain oil for easy melting.
My white chocolate seized up and became grainy. What went wrong?
This usually happens when a tiny amount of water gets into the chocolate. Make sure your bowl and spatula are completely dry. Also, avoid covering the bowl while microwaving, as condensation can drip in. If your chocolate does seize, unfortunately, there’s no way to fix it. You’ll need to start over with fresh chocolate.
How do I get clean, even pieces instead of jagged shards?
If you want clean edges, use a sharp chef’s knife to cut the bark into squares or triangles while it’s still slightly cool but not rock hard. For the most precise cuts, chill the bark until firm, then let it sit at room temperature for a few minutes before cutting. This will prevent the chocolate from shattering.
Can I make this recipe without a microwave?
Absolutely! You can melt the white chocolate using a double boiler. Simply bring a pot of water to a simmer, place a heat-safe bowl on top (making sure the bottom doesn’t touch the water), and melt the chocolate gently, stirring frequently. This method takes a little longer but gives you more control and reduces the risk of burning.
How far in advance can I make this for a party?
You can make this up to 2 weeks in advance! Store it in an airtight container in the refrigerator, and it will be just as delicious on the day of your party. I actually recommend making it a day or two ahead, as the flavors meld together beautifully. Just make sure it’s stored properly so it doesn’t absorb any weird fridge odors.
Pin This Recipe!

Easy Snowman Poop Peppermint White Chocolate Crunch
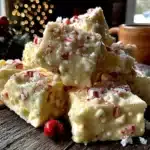
A quick and easy holiday treat made with white chocolate and crushed candy canes. This silly, simple, and seriously addictive recipe is perfect for last-minute cravings, holiday gifting, or a fun late-night snack.
- Prep Time: 15 minutes
- Cook Time: 2 minutes
- Total Time: 47 minutes
- Yield: 12 servings 1x
- Category: Dessert
- Cuisine: American
Ingredients
- 12 ounces white chocolate chips or baking bars, chopped
- 1/2 teaspoon coconut oil or vegetable oil
- 1 cup crushed candy canes (about 6–8 full-sized candy canes)
- Optional: 1/4 cup white chocolate chips for drizzling
- Optional: A pinch of flaky sea salt
Instructions
- Prepare your candy canes: Place candy canes in a sturdy Ziploc bag, seal, and crush with a rolling pin to a mix of small pieces and fine dust. Set aside about 2 tablespoons for topping.
- Line a baking sheet with parchment paper or a silicone baking mat.
- Melt white chocolate and coconut oil in a medium microwave-safe bowl in 30-second intervals, stirring well after each, until smooth (about 1.5 to 2 minutes total).
- Fold in the majority of crushed candy canes (reserving 2 tablespoons) until evenly distributed.
- Pour mixture onto prepared baking sheet and spread into an even layer about 1/4-inch thick using an offset spatula or spoon.
- Immediately sprinkle reserved crushed candy canes on top. Add a pinch of flaky sea salt if desired. For optional drizzle, melt extra white chocolate chips and drizzle over top.
- Refrigerate for at least 30 minutes (or freeze for 15 minutes) until completely firm.
- Lift bark from baking sheet using parchment paper, then break into irregular pieces or cut into squares.
Notes
Use fresh, crisp candy canes for the best crunch. Do not overheat white chocolate; it burns easily. The coconut oil helps the chocolate melt smoothly and gives a glossy finish. Store in an airtight container in the refrigerator for up to 2 weeks. Freezes well for up to 3 months.
Nutrition
- Serving Size: 1 ounce (about 2x2 i
- Calories: 160
- Sugar: 17
- Sodium: 25
- Fat: 9.5
- Saturated Fat: 6
- Carbohydrates: 19
- Protein: 1.5
Keywords: snowman poop, peppermint white chocolate crunch, easy holiday treat, white chocolate bark, candy cane bark, no-bake dessert, Christmas treat


