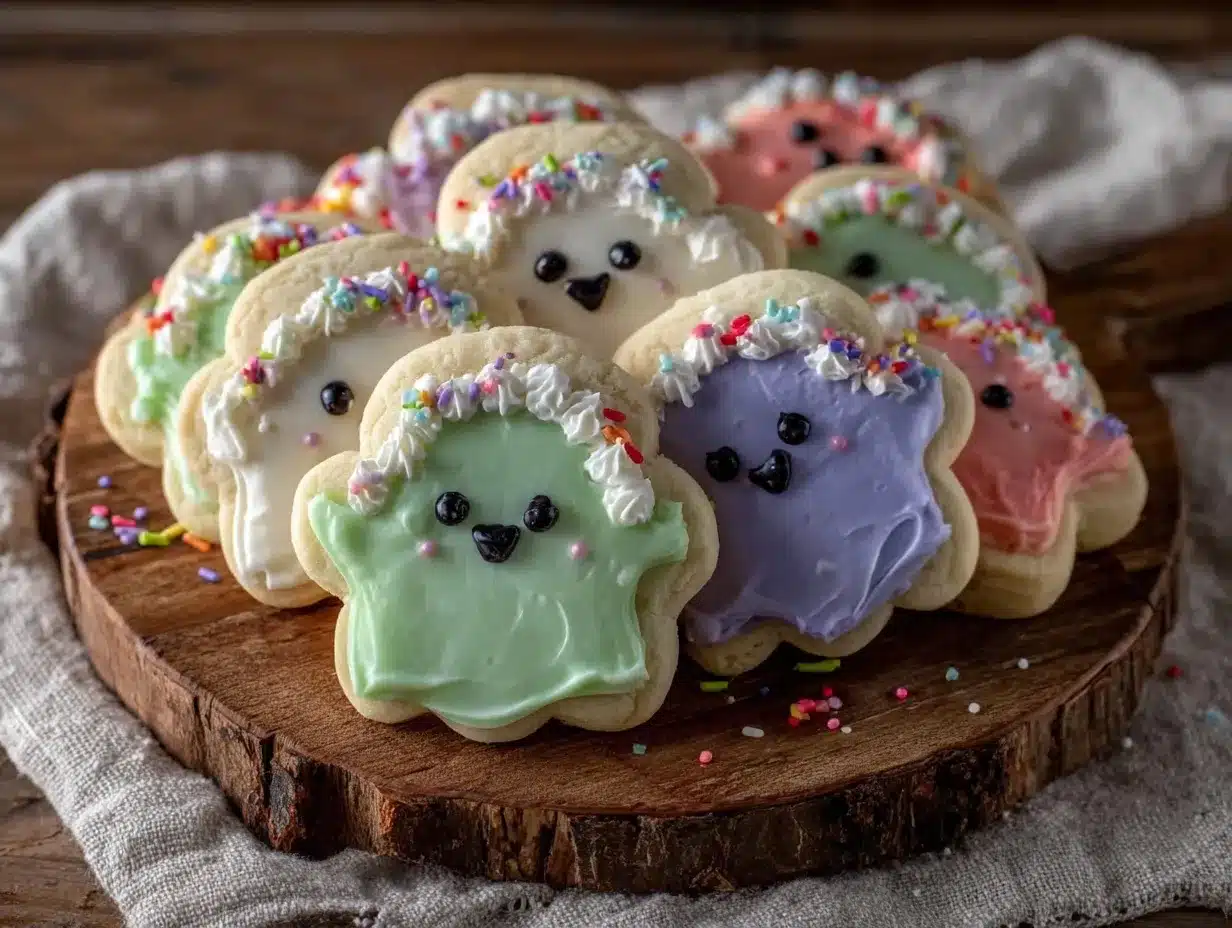
Velvety smooth icing, gently glossy under soft afternoon light, and those little sugar crystals that catch your eye just right — that’s the whole point. The texture of these pastel Halloween ghost sugar cookies is what I made this recipe for — everything else is secondary. You know how some cookies just feel like a celebration in your fingers before you even bite into them? These do that. There’s a delicate snap on the edges, and then a tender crumb that almost melts, leaving a gentle softness that feels like a whisper of fall. I remember one afternoon, trying to get the ghost shapes just right with my little niece, who was way more interested in how the icing spread like satin over the dough. The pastel colors — blues, pinks, and a pale lavender — weren’t your usual Halloween brights, but they made the spooky shapes feel more playful than scary. Honestly, it was that contrast between the ghostly shapes and the soft, muted colors that made the whole baking session stick in my mind.
It’s funny how something as simple as sugar cookies can hold a quiet charm when the texture and look come together just right. The icing isn’t thick or gloopy, but smooth and just enough to glimmer without hiding the cookie’s shape. I can’t say it’s the kind of Halloween treat that’s all about the sugar rush — it’s more like a gentle invitation to slow down and enjoy the little details, the pastel ghosts softly peeking out from their sugar-dusted sheets. That’s why this recipe stuck with me — it’s the kind of baking that feels like a small, soft celebration, the kind you want to share quietly and watch little hands reach for one after another.
Why You’ll Love This Recipe
Having baked countless sugar cookies over the years, I can honestly say this recipe nails that balance between festive fun and delicate texture. These pastel Halloween ghost sugar cookies aren’t just cute; they’re reliable and easy, which is a rare combo in holiday baking.
- Quick & Easy: The dough comes together in under 20 minutes, and chilling time included, you’re looking at a quick bake perfect for last-minute Halloween plans.
- Simple Ingredients: No fancy or hard-to-find ingredients here — basic pantry staples that you probably already have, so no stress running around before the spooky fun.
- Perfect for Festive Fun: Whether it’s a school party, a family gathering, or just a cozy afternoon treat, these pastel ghosts bring a gentle, whimsical vibe to Halloween without being over the top.
- Crowd-Pleaser: I’ve had these vanish at all kinds of events — kids love the playful shapes and soft colors, and adults appreciate that they’re not too sweet or heavy.
- Unbelievably Delicious: The texture combo — tender crumb with just the right snap and smooth, light icing — brings comforting nostalgia with a modern twist.
What sets this apart is the pastel palette. Most Halloween cookies lean into black and orange, but these cookies’ soft hues make them feel fresh and unexpected. Plus, the frosting technique I use keeps the icing perfectly smooth and glossy, not overly thick or sticky. I’ve tweaked this recipe through many baking sessions, including a fun afternoon when I paired these with a batch of easy crispy lemon herb chicken for a fall dinner party. The cookies stole the show, surprisingly.
What Ingredients You Will Need
This recipe uses simple, wholesome ingredients to create that perfect tender cookie base and the smooth pastel icing that makes these ghosts pop. Most are pantry staples, and you can easily swap a few for dietary needs.
- For the Cookie Dough:
- All-purpose flour, 2 ¾ cups (345 grams) — I recommend King Arthur for consistent texture
- Baking powder, 1 teaspoon
- Salt, ½ teaspoon
- Unsalted butter, 1 cup (227 grams), softened — softened but not melted for easy creaming
- Granulated sugar, 1 ½ cups (300 grams)
- Large eggs, 1 (room temperature)
- Pure vanilla extract, 1 teaspoon
- Almond extract, ¼ teaspoon (optional, adds subtle depth)
- For the Pastel Royal Icing:
- Powdered sugar, 4 cups (480 grams), sifted
- Meringue powder, 3 tablespoons (for stability and shine)
- Warm water, 7-8 tablespoons (adjust for consistency)
- Food coloring gels in pastel shades — pale pink, baby blue, lavender, and soft mint (gel works best for vibrant color without thinning)
- Vanilla or almond extract, ½ teaspoon for flavor
If you’re looking for gluten-free options, swapping the all-purpose flour for a 1-to-1 gluten-free baking flour works well here. For dairy-free, use vegan butter sticks like Earth Balance, and swap the egg for a flax egg (1 tablespoon ground flaxseed + 3 tablespoons water).
Equipment Needed
- Stand mixer or hand mixer — I prefer a stand mixer for the creaming steps, but a sturdy hand mixer works fine
- Mixing bowls — at least two, one for dough, one for icing
- Rolling pin — a smooth, medium-weight pin is ideal to get even dough thickness
- Ghost-shaped cookie cutters — various sizes if you want, but a medium 3-4 inch cutter is perfect
- Baking sheets lined with parchment paper or silicone mats — prevents sticking and makes cleanup easier
- Piping bags with small round tips or squeeze bottles — for controlled icing application
- Spatula and bench scraper — handy for dough handling and scraping bowls
If you don’t have a stand mixer, chilling the dough a bit longer after mixing by hand can help with rolling easier. For piping, a zip-top bag with a tiny corner snipped works well if you’re in a pinch. I’ve found that silicone mats last longer and give a more consistent baking surface than parchment, but both are fine.
Preparation Method
- Mix Dry Ingredients: In a medium bowl, whisk together 2 ¾ cups (345 grams) all-purpose flour, 1 teaspoon baking powder, and ½ teaspoon salt. Set aside. (This ensures even distribution and avoids lumps.) — 5 minutes
- Cream Butter and Sugar: In your mixer bowl, beat 1 cup (227 grams) softened unsalted butter and 1 ½ cups (300 grams) granulated sugar on medium speed until light and fluffy, about 3-4 minutes. You’ll know it’s ready when the mixture has a pale color and feels airy. — 4 minutes
- Add Eggs and Extracts: Add 1 large egg (room temperature), 1 teaspoon vanilla extract, and optional ¼ teaspoon almond extract. Beat until combined, scraping the bowl as needed. — 2 minutes
- Incorporate Dry Ingredients: Gradually add the flour mixture to the wet ingredients on low speed. Mix just until combined — don’t overmix or the cookies get tough. The dough will be soft but manageable. — 3 minutes
- Chill the Dough: Divide the dough into two discs, wrap tightly in plastic wrap, and refrigerate for at least 1 hour (or up to overnight). Chilling firms the dough, making it easier to roll and keeps cookies from spreading too much. — 60+ minutes
- Preheat Oven and Prepare Baking Sheets: Set your oven to 350°F (175°C). Line baking sheets with parchment paper or silicone mats. — 10 minutes
- Roll and Cut: Lightly flour your work surface and rolling pin. Roll one disc of dough to about ¼ inch (6 mm) thickness. Use ghost-shaped cookie cutters to cut shapes. Transfer cookies to baking sheets, spacing about 1 inch (2.5 cm) apart. Gather scraps, re-roll lightly, and cut more shapes. — 15 minutes
- Bake: Bake cookies for 8-10 minutes, until edges just start to turn golden but centers remain pale. Overbaking dulls the pastel look and makes cookies too crisp. Let cookies cool on sheets for 5 minutes, then transfer to wire racks to cool completely. — 10 minutes baking + 5 minutes cooling on sheets
- Prepare Royal Icing: While cookies cool, mix 4 cups (480 grams) sifted powdered sugar, 3 tablespoons meringue powder, and 7-8 tablespoons warm water in a bowl. Beat until icing holds stiff peaks but is still spreadable. Separate into 4 bowls and tint each with a small amount of pastel gel food coloring. Adjust consistency with water if needed — icing should flow smoothly but hold shape for piping. — 15 minutes
- Decorate: Using piping bags or squeeze bottles, outline each cookie in the pastel color of your choice. Let outlines dry slightly (about 10 minutes), then flood inside with thinner icing of the same color for that smooth satin finish. Use a toothpick to pop air bubbles. Once dry, add simple ghost faces with black icing or edible markers. Allow to dry completely before stacking or packaging. — 30-45 minutes
Pro Tip: If your royal icing thickens while decorating, add a few drops of water and stir gently. For best texture, let cookies dry at room temperature overnight. Avoid refrigerating decorated cookies as moisture can dull the finish.
Cooking Tips & Techniques
Getting pastel ghost sugar cookies just right takes a few tricks I’ve picked up over many baking sessions. First, don’t rush the chilling step — cold dough is key to clean cut shapes without sticky edges. I once tried skipping chilling because I was impatient, and the cookies spread like crazy, losing their ghostly form. Lesson learned!
When rolling dough, a light dusting of flour is enough — too much and the cookies become dry and crumbly. I like to roll between two sheets of parchment paper when I’m in a hurry; it saves flour and cleanup.
Royal icing can feel intimidating, but meringue powder is a game changer for stability. Mixing it with just enough water to hold shape but still flood easily is a balance you’ll nail with practice. If icing is too stiff, it won’t flood; too thin, and it runs off the cookie edges. I always keep a toothpick handy to nudge icing into corners and pop bubbles.
For pastel colors, gel food coloring is best because it doesn’t thin the icing like liquid dyes do. Start with a little and add more if needed — it’s easier to darken than lighten. Also, piping a neat outline first creates a dam so flooding icing doesn’t run off, giving you that smooth satin look.
Timing helps too — I usually decorate in stages: outline, wait 10 minutes, flood, then add details last. It keeps colors crisp and prevents bleeding.
Variations & Adaptations
- Flavor Variations: Add a teaspoon of lemon zest to the dough for a bright twist, or swap vanilla for almond extract for a nutty note that pairs beautifully with pastel colors.
- Color Customization: Use bolder or seasonal colors like pumpkin orange or mint green for different vibes, or even try a watercolor icing effect by blending two pastel shades on one cookie.
- Dietary Adjustments: For gluten-free, use a trusted 1-to-1 gluten-free flour blend. For dairy-free, substitute vegan butter and a flax egg. For egg-free, try a commercial egg replacer or applesauce (about ¼ cup) but expect a slightly different texture.
- Alternative Icing: If royal icing feels intimidating, a simple glaze made from powdered sugar and milk (or dairy-free milk) can be tinted pastel and brushed on, though it won’t be as shiny or sturdy.
- Shape Play: Instead of ghosts, try pastel pumpkins or bats using the same dough and icing technique for a fun twist. I once paired these ghosts with pastel funfetti birthday cake slices — a weird but wonderful combo that surprised my guests (funfetti birthday cake recipe).
Serving & Storage Suggestions
These pastel Halloween ghost sugar cookies are best served at room temperature to showcase their tender crumb and smooth icing. Arrange them on a festive plate or tiered tray for a charming spooky display that’s more cute than creepy.
Pairing them with a warm apple cider or a creamy hot chocolate (bonus points for marshmallows shaped like ghosts!) makes for a cozy autumn treat. For a light brunch twist, serve alongside a batch of no-churn salted caramel ice cream — the pastel cookies add a whimsical crunch.
Store baked cookies in an airtight container at room temperature for up to 5 days. If decorated with royal icing, place parchment paper between layers to avoid sticking. For longer storage, freeze plain baked cookies before icing for up to 3 months, thaw completely before decorating.
When reheating, avoid microwaving as it can soften the icing too much. Instead, let frozen cookies thaw naturally to keep the icing’s texture intact. Flavors tend to mellow and blend nicely after a day or two, so these cookies can be made ahead for Halloween gatherings.
Nutritional Information & Benefits
Each cookie (based on 24 cookies from the batch) contains approximately:
| Calories | 150 |
|---|---|
| Total Fat | 7g |
| Saturated Fat | 4g |
| Carbohydrates | 20g |
| Sugars | 12g |
| Protein | 1g |
While these sugar cookies are a treat, the use of real butter and natural extracts adds a touch of wholesome flavor that feels less artificial. Using meringue powder instead of raw egg whites in the icing reduces food safety risks, which is important for kid-friendly recipes.
These cookies are naturally gluten-containing, but swapping the flour for gluten-free blends works well for those with sensitivities. They are free from nuts unless you add almond extract, which you can omit. From a wellness standpoint, these cookies satisfy sweet cravings with manageable portion sizes, perfect for mindful holiday indulgence.
Conclusion
Perfect pastel Halloween ghost sugar cookies are more than just festive treats; they’re an experience of texture, color, and subtle flavor that turn baking into a moment of calm fun. The soft snap, the smooth satin icing, and the gentle colors make these cookies a quiet star at any Halloween gathering. I love how this recipe is forgiving enough for a beginner but satisfying for a seasoned baker looking for that perfect balance.
Feel free to tweak the colors, swap extracts, or try new shapes — making it your own is part of the fun. And if you’re someone who enjoys a little sweet with your savory, these cookies pair beautifully with dishes like the quick garlic butter shrimp pasta I’ve shared before. I’m excited to hear how you customize your pastel ghosts — every baker’s touch brings something new to the table.
Happy baking and spooky sweet celebrations!
FAQs About Perfect Pastel Halloween Ghost Sugar Cookies
Can I make the cookie dough ahead of time?
Yes! The dough can be made and refrigerated for up to 3 days or frozen for up to 3 months. Just thaw in the fridge before rolling.
What if I don’t have meringue powder for the royal icing?
You can use pasteurized egg whites, but meringue powder is safer and more convenient. Alternatively, a simple powdered sugar glaze works in a pinch but won’t be as sturdy.
How do I prevent the cookies from spreading too much?
Chilling the dough well before baking and not overworking it helps keep the shapes sharp. Also, don’t use too much butter or let the dough sit at room temperature too long before baking.
Can I use food coloring liquids instead of gels?
Gel colors are best to keep the icing thick and vibrant. Liquids can thin the icing and make it runnier, which affects the pastel effect and drying time.
How long do decorated cookies last? Should I refrigerate them?
Decorated cookies keep well at room temperature for up to 5 days in an airtight container. Refrigeration can cause condensation and dull the icing finish, so it’s best avoided.
Pin This Recipe!
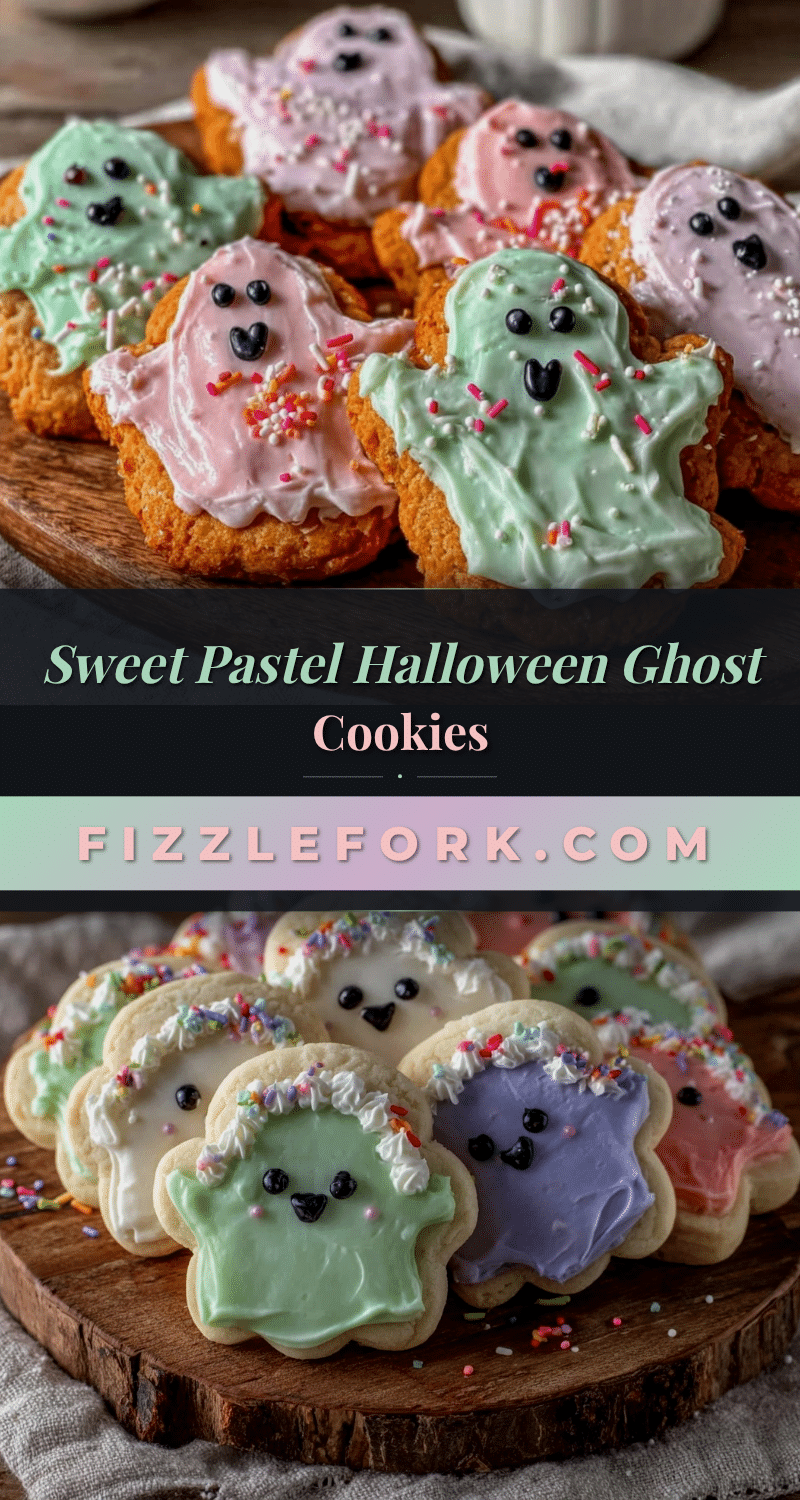
Perfect Pastel Halloween Ghost Sugar Cookies
Delicate pastel-colored Halloween ghost sugar cookies with a tender crumb and smooth royal icing, perfect for festive fun and gentle celebrations.
- Prep Time: 20 minutes
- Cook Time: 10 minutes
- Total Time: 1 hour 40 minutes
- Yield: 24 cookies 1x
- Category: Dessert
- Cuisine: American
Ingredients
- 2 ¾ cups (345 grams) all-purpose flour
- 1 teaspoon baking powder
- ½ teaspoon salt
- 1 cup (227 grams) unsalted butter, softened
- 1 ½ cups (300 grams) granulated sugar
- 1 large egg, room temperature
- 1 teaspoon pure vanilla extract
- ¼ teaspoon almond extract (optional)
- 4 cups (480 grams) powdered sugar, sifted
- 3 tablespoons meringue powder
- 7–8 tablespoons warm water
- Food coloring gels in pastel shades (pale pink, baby blue, lavender, soft mint)
- ½ teaspoon vanilla or almond extract for icing flavor
Instructions
- Mix dry ingredients: whisk together flour, baking powder, and salt in a medium bowl. Set aside.
- Cream butter and sugar: beat softened butter and granulated sugar on medium speed until light and fluffy, about 3-4 minutes.
- Add eggs and extracts: add egg, vanilla extract, and optional almond extract; beat until combined.
- Incorporate dry ingredients: gradually add flour mixture to wet ingredients on low speed; mix just until combined.
- Chill the dough: divide dough into two discs, wrap in plastic wrap, refrigerate for at least 1 hour.
- Preheat oven to 350°F (175°C) and prepare baking sheets with parchment paper or silicone mats.
- Roll and cut: lightly flour surface and rolling pin; roll dough to ¼ inch thickness; cut ghost shapes and place on baking sheets about 1 inch apart.
- Bake cookies for 8-10 minutes until edges start to turn golden but centers remain pale; cool on sheets 5 minutes then transfer to wire racks.
- Prepare royal icing: mix powdered sugar, meringue powder, and warm water until stiff peaks form but icing is spreadable; divide and tint with pastel gel colors.
- Decorate: outline cookies with piping bags or squeeze bottles; let outlines dry 10 minutes; flood inside with thinner icing; pop air bubbles with toothpick; add ghost faces with black icing or edible markers; let dry completely.
Notes
Chill dough well to prevent spreading and maintain shape. Use gel food coloring for vibrant pastel colors without thinning icing. Let decorated cookies dry overnight at room temperature for best texture. Avoid refrigerating decorated cookies to prevent dulling the icing finish. If royal icing thickens, add a few drops of water and stir gently.
Nutrition
- Serving Size: 1 cookie
- Calories: 150
- Sugar: 12
- Sodium: 0.1
- Fat: 7
- Saturated Fat: 4
- Carbohydrates: 20
- Protein: 1
Keywords: Halloween cookies, sugar cookies, pastel cookies, ghost cookies, royal icing, festive baking, easy sugar cookies


