The peanut butter jar was down to its last sticky scrape, and I had exactly one square of semi-sweet chocolate left in the pantry—the kind you save for emergencies. My nephew was coming over to help decorate for Halloween, and I needed something that looked impressive but didn’t require a last-minute grocery run. I stared at those two ingredients like they were supposed to magically turn into dinner. They didn’t. But they did turn into something better.
I started creaming the peanut butter with sugar, thinking I’d just make regular peanut butter cookies, the kind my grandma used to bake. But then I spotted the chocolate melting in a little bowl on the counter, and something clicked. What if I drizzled it on top in a pattern? Not just any pattern—a web. A spider web. My nephew is obsessed with spiders (he’s at that age where everything creepy-crawly is the coolest thing on earth), so I knew he’d lose his mind over cookies that looked like they belonged in a haunted house. And honestly? So did I.
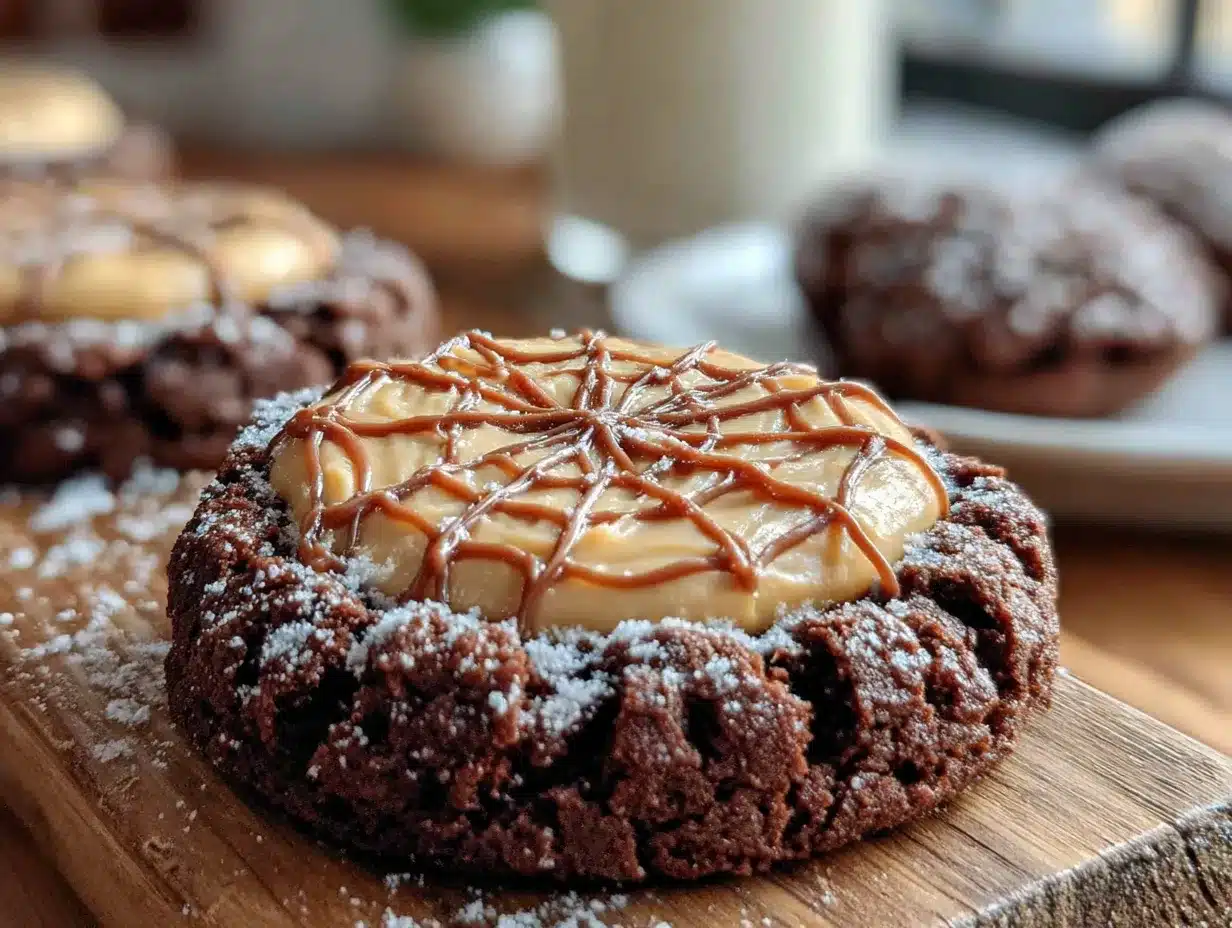
These Perfect Spider Web Chocolate Peanut Butter Cookies ended up being the most fun I’ve had baking in months. The chocolate-peanut butter combo is already a classic, but the web design makes them feel like a party trick. They’re the kind of cookie that makes people stop mid-conversation and say, “Wait, you made those?” And the best part? They taste even better than they look—soft, chewy, with that perfect salty-sweet balance that keeps your hand reaching for just one more. I’ve made them three times since that first pan, and I’m pretty sure they’re going to become a yearly tradition around here.
Why You’ll Love This Recipe
Let me tell you why these cookies are about to become your new favorite Halloween treat. I’ve tested this recipe more times than I care to admit—some batches came out too flat, others too crunchy, and a few looked like a spider actually crawled through the chocolate instead of a piping bag. But this version? This one is perfect.
- No Chilling Required : The dough goes straight from the bowl to the oven. No waiting, no fridge time, just instant cookie gratification.
- Simple Pantry Ingredients : You probably have everything already. Butter, peanut butter, sugar, flour, an egg, vanilla, and a little chocolate. That’s it.
- Perfect for Halloween Parties : These cookies steal the show on any dessert table. They’re spooky without being scary, and kids absolutely love helping with the web design.
- Foolproof Chocolate Web Technique : I’ll walk you through exactly how to pipe the spider web pattern so it comes out clean and professional-looking every time.
- Incredible Texture : The edges are slightly crisp, the centers are soft and chewy, and the peanut butter flavor is rich without being overwhelming.
I’ve been baking peanut butter cookies since I was tall enough to reach the counter, and I can honestly say this is my favorite variation. The chocolate web isn’t just for show—it adds a little snap of chocolate in every bite that makes these cookies feel special. Plus, they’re way easier than they look. I’ve had friends text me photos of their own spider web cookies saying, “I can’t believe I actually did this!” and that feeling never gets old.
What Ingredients You Will Need
This recipe uses simple, wholesome ingredients that come together to create something truly memorable. Most of these are pantry staples, so you can whip up a batch whenever the mood strikes—or when a Halloween craving hits unexpectedly.
- Unsalted butter, softened (1/2 cup or 1 stick) — I prefer using unsalted so I can control the salt level. If you only have salted butter, just reduce the added salt by half.
- Creamy peanut butter (1/2 cup) — Go with a standard brand like Jif or Skippy for the best texture. Natural peanut butter that separates will make the cookies greasy and prone to spreading. Trust me, I learned this the hard way.
- Granulated sugar (1/2 cup) — Adds sweetness and helps create those signature crinkly tops.
- Light brown sugar (1/2 cup), packed — This gives the cookies moisture and a hint of molasses flavor that pairs beautifully with peanut butter.
- One large egg, room temperature — Cold eggs can shock the butter and make the dough stiff. Let it sit on the counter for 15 minutes if you forgot to take it out ahead of time.
- Vanilla extract (1 teaspoon) — Pure vanilla makes a difference here, but imitation works fine in a pinch.
- All-purpose flour (1 1/2 cups) — Spoon and level your flour for the most accurate measurement. Scooping directly with the measuring cup packs in too much flour and makes cookies dry.
- Baking soda (1 teaspoon) — Helps the cookies spread just enough without turning into pancakes.
- Salt (1/2 teaspoon) — Balances the sweetness and enhances the peanut butter flavor.
- Semi-sweet chocolate chips (1/2 cup) — You’ll melt these down for the spider web design. I recommend Ghirardelli or Guittard for smooth, glossy melted chocolate.
- Optional: Flaky sea salt — A tiny sprinkle on top before serving takes these cookies to another level. The salt crystals pop against the sweet chocolate and peanut butter.
For the chocolate web, I’ve found that semi-sweet works best because it’s not too sweet and sets up firmly at room temperature. Dark chocolate also works if you prefer a more intense flavor. Just avoid white chocolate for the web pattern—it can be finicky and doesn’t contrast as nicely against the cookie.
Equipment Needed
You don’t need anything fancy for these cookies, which is part of why I love this recipe so much. Here’s what you’ll want to have on hand:
- Mixing bowls (one large, one small) — A medium-sized bowl for the wet ingredients and a smaller one for the dry ingredients.
- Electric hand mixer or stand mixer — You can mix by hand with a wooden spoon, but the creaming step is much easier with a mixer. I use my trusty KitchenAid for almost everything.
- Baking sheets (2 sheets) — Light-colored aluminum sheets work best for even browning. Dark sheets can cause the bottoms to burn before the centers are done.
- Parchment paper or silicone baking mat — Non-negotiable for preventing sticking and ensuring even baking.
- Small piping bag or zip-top bag — For the chocolate web. A zip-top bag with a tiny corner snipped off works perfectly and is way easier to clean than a real piping bag.
- Cooling rack — Lets air circulate under the cookies so they cool evenly and the chocolate sets properly.
- Measuring cups and spoons — For accurate ingredient measurements.
If you don’t have a piping bag, seriously, just use a sandwich bag. I’ve done it dozens of times and it works like a charm. Just make sure the hole you snip is very small—you want a thin line of chocolate, not a thick blob.
Preparation Method
Preheat your oven to 350°F (175°C) and line two baking sheets with parchment paper. This recipe makes about 24 cookies, so you’ll need space for two batches unless you have a massive oven.
- Cream the butter and sugars. In a large mixing bowl, beat the softened butter, granulated sugar, and brown sugar together until light and fluffy—about 2-3 minutes with an electric mixer on medium speed. You’ll know it’s ready when the mixture looks pale and slightly increased in volume. The butter should be soft but not melted; if it’s too warm, the cookies will spread into thin, crispy discs instead of staying thick and chewy.
- Add the peanut butter, egg, and vanilla. Beat in the creamy peanut butter until fully combined, then add the egg and vanilla extract. Mix just until everything comes together—about 30 seconds. Don’t overmix here, or you’ll develop too much gluten and end up with tough cookies.
- Combine the dry ingredients. In a separate small bowl, whisk together the all-purpose flour, baking soda, and salt. This ensures the baking soda and salt are evenly distributed throughout the dough.
- Mix the dry into the wet. Gradually add the dry ingredient mixture to the wet ingredients, mixing on low speed until just combined. You should see a few streaks of flour remaining—that’s your cue to stop. Overmixing at this stage is the number one cause of dense, hockey-puck cookies.
- Shape the cookies. Scoop rounded tablespoons of dough (about 1.5 tablespoons each) and roll them into smooth balls. Place them 2 inches apart on the prepared baking sheets. For that classic crinkled look, press the tines of a fork gently into the top of each ball in a crisscross pattern—but don’t flatten them too much. You want them to stay slightly domed.
- Bake. Bake for 10-12 minutes, rotating the pans halfway through. The cookies should look puffed and lightly golden around the edges but still soft in the center. They will continue to set as they cool, so don’t wait for them to look fully done in the oven. I pull mine out at exactly 11 minutes for that perfect chewy texture.
- Cool completely. Let the cookies rest on the baking sheet for 5 minutes, then transfer them to a wire cooling rack. They need to be completely cool before you add the chocolate web—otherwise, the chocolate will melt and slide right off.
- Melt the chocolate. Place the semi-sweet chocolate chips in a small microwave-safe bowl. Microwave in 20-second intervals, stirring between each, until the chocolate is smooth and fully melted. Be careful not to overheat—burnt chocolate is gritty and useless. Alternatively, you can melt it in a double boiler on the stovetop if you prefer more control.
- Pipe the spider web. Transfer the melted chocolate to a small piping bag or a zip-top bag with a tiny corner snipped off. Starting from the center of each cookie, pipe a small dot. Then pipe concentric circles around that dot, spacing them about 1/4 inch apart. Finally, drag a toothpick from the center outward through all the circles, creating the web effect. Repeat every 1/2 inch around the cookie to create a full web pattern. Wipe the toothpick clean between each drag for the cleanest lines.
- Set the chocolate. Let the cookies sit at room temperature for about 30 minutes to allow the chocolate to firm up. If you’re in a hurry, pop them in the refrigerator for 10-15 minutes.
One thing I learned after my first few attempts: don’t pipe the chocolate when it’s too hot. Let it cool slightly—about 5 minutes after melting—so it’s still fluid but not runny. If it’s too hot, it will pool on top of the cookie instead of staying in clean lines.
Cooking Tips & Techniques
I’ve messed up this recipe more times than I’d like to admit, so let me save you some trouble. Here are the biggest lessons I’ve learned:
Watch your butter temperature. This is the single most important factor in how your cookies turn out. If your butter is too soft or melted, the cookies will spread into thin, greasy discs. If it’s too cold, they won’t spread enough and will stay puffy and cake-like. The sweet spot is when you can press your finger into the butter and it leaves an indent without sinking all the way through.
Don’t skip the fork marks. I know it feels like an old-fashioned step, but pressing that crisscross pattern into the dough does more than make them look pretty. It helps the cookies bake evenly and gives them that classic peanut butter cookie texture—slightly crisp on the outside, soft on the inside. Just don’t press too hard or you’ll flatten them into oblivion.
Use a toothpick for the web, not a knife. The first time I tried making the spider web pattern, I used the tip of a butter knife to drag through the chocolate circles. It was a disaster—the lines were too thick and the chocolate blobbed together. A toothpick gives you thin, delicate lines that look like actual spider silk. Plus, it’s way easier to control.
Work in batches. Don’t try to pipe the chocolate web on all 24 cookies at once. The chocolate will start to set in the piping bag, and you’ll end up with uneven lines. Pipe 6-8 cookies at a time, then take a break. Your hands will thank you, and the webs will look much cleaner.
Let the cookies cool completely. I know it’s tempting to rush this step, especially when the kitchen smells incredible. But if you pipe chocolate onto warm cookies, it will melt into a puddle and you’ll lose the web pattern entirely. Patience is your friend here.
One of my biggest fails? I once tried to make these cookies on a humid summer day, and the chocolate refused to set properly. If you’re baking in high humidity, pop the finished cookies in the fridge for 15 minutes to help the chocolate firm up. Problem solved.
Variations & Adaptations
One of the best things about this recipe is how easy it is to tweak. Here are some variations I’ve tried and loved:
Gluten-Free Version : Swap the all-purpose flour with a 1:1 gluten-free baking flour blend. I’ve had great results with King Arthur Measure for Measure—the cookies come out slightly more tender but just as delicious. Add an extra tablespoon of flour if the dough feels too sticky.
Dark Chocolate Web : Use dark chocolate chips (60-70% cacao) instead of semi-sweet for a richer, more sophisticated flavor. The bitterness of the dark chocolate cuts through the sweetness of the cookie beautifully. This is my personal favorite variation for adult gatherings.
White Chocolate Spider Web : For a spookier look, use white chocolate for the web pattern. The white stands out against the golden cookie like ghostly silk. Just be careful when melting white chocolate—it’s more delicate and can seize if overheated. Add a teaspoon of coconut oil to keep it smooth.
Peanut Butter Swirl Version : Before baking, swirl a teaspoon of extra peanut butter into the center of each cookie dough ball. It creates a gooey, molten center that’s absolutely irresistible. I tried this on a whim one afternoon and haven’t looked back.
Add-In Options : Fold in 1/2 cup of mini chocolate chips, chopped peanuts, or even crushed pretzels for extra texture. Just be careful not to overmix when adding them—fold gently with a spatula.
If you’re serving these at a Halloween party, consider pairing them with our spooky witch finger pretzel treats for a full spooky spread. The combination of sweet cookies and salty pretzels is always a hit with kids and adults alike.
Serving & Storage Suggestions
These cookies are best served at room temperature, when the chocolate web is firm but still has a little snap when you bite into it. I like to arrange them on a dark platter or cake stand to make the spider web pattern really pop. A light dusting of powdered sugar around the edges adds a ghostly, haunted-house vibe that’s perfect for Halloween.
For a dessert table that’ll wow your guests, serve these alongside our black velvet Halloween cupcakes and a bowl of candy corn. The variety of textures and flavors keeps people coming back for more.
Storage : Store the cookies in an airtight container at room temperature for up to 5 days. Layer them between sheets of parchment paper to prevent the chocolate webs from sticking together. If you stack them without parchment, you’ll end up with a sad, smudged mess—trust me on this one.
Freezing : You can freeze the baked cookies (without the chocolate web) for up to 3 months. Thaw them at room temperature, then pipe the chocolate web fresh before serving. The chocolate doesn’t freeze well and can develop a white bloom that looks unappetizing. Alternatively, freeze the unbaked cookie dough balls on a baking sheet, then transfer them to a freezer bag. Bake straight from frozen, adding 2-3 minutes to the baking time.
Reheating : If you want that just-baked warmth, pop a cookie in the microwave for 8-10 seconds. The chocolate will soften slightly, and the peanut butter flavor becomes even more pronounced. Just don’t overdo it, or the chocolate will melt into a puddle.
One thing I love about these cookies is that the flavors actually improve after a day. The peanut butter and chocolate meld together, and the texture softens just a little. They’re still delicious on day four, though they rarely last that long in my house.
Nutritional Information & Benefits
Let’s be real—these are cookies, not health food. But they do have some redeeming qualities worth mentioning. Each cookie (based on 24 servings) contains approximately:
- Calories: 165
- Fat: 10g
- Carbohydrates: 18g
- Protein: 4g
- Sugar: 11g
- Fiber: 1g
Peanut butter is a good source of plant-based protein and healthy monounsaturated fats, which can help keep you feeling full and satisfied. It also contains vitamin E, magnesium, and potassium. Dark chocolate (if you use it) is rich in antioxidants called flavonoids, which support heart health. So while these aren’t exactly a health food, they’re not the worst thing you could eat either.
For those with dietary restrictions, these cookies contain gluten, dairy, and peanuts. I’ve included gluten-free and dairy-free variations above if you need to adapt the recipe. Always check your ingredient labels if you’re cooking for someone with allergies—some chocolate chips contain dairy, and some peanut butters are processed in facilities that also handle tree nuts.
Personally, I think the best way to enjoy these cookies is in moderation, with a tall glass of cold milk and absolutely no guilt. Life’s too short to stress about a cookie now and then.
Conclusion
These Perfect Spider Web Chocolate Peanut Butter Cookies are everything I want in a Halloween treat—they’re fun to make, gorgeous to look at, and absolutely delicious to eat. The combination of soft, chewy peanut butter cookie with that delicate chocolate web is honestly addictive. I’ve made them for Halloween parties, classroom treats, and lazy Sunday baking sessions, and they never fail to get compliments.
What I love most about this recipe is how approachable it is. You don’t need to be a professional baker or have fancy equipment. Just a little patience, a steady hand, and the willingness to get a little chocolate on your fingers. The spider web pattern looks complicated, but once you get the hang of it, it’s actually meditative. There’s something satisfying about watching those concentric circles transform into a web with just a few toothpick drags.
I’d love to hear how your cookies turn out! Did you try a fun variation? Did your kids help with the web design? Drop a comment below and let me know—I read every single one. And if you’re looking for more Halloween inspiration, don’t miss our easy spider web charcuterie board for a savory twist on the theme. Happy baking, and may your chocolate webs be ever in your favor!
Frequently Asked Questions
Can I use crunchy peanut butter instead of creamy?
You can, but the texture will be different. The peanut pieces can make the dough a bit crumbly and harder to shape. If you love crunch, go for it—just know the cookies might spread a little more during baking.
Why did my cookies spread too much?
This usually happens when the butter is too soft or the dough is too warm. Make sure your butter is softened but not melted, and chill the dough balls for 15 minutes if your kitchen is particularly warm. Also, check that you measured your flour correctly—too little flour can cause excessive spreading.
Can I make the chocolate web ahead of time?
I wouldn’t recommend it. The chocolate web is best piped fresh on the day you plan to serve the cookies. If you pipe it too far in advance, the chocolate can develop a white bloom or lose its shine. The cookies themselves can be baked a day ahead and stored without the web.
How do I get the chocolate web to look perfect every time?
Practice makes perfect, but here’s my best tip: pipe the concentric circles close together (about 1/4 inch apart) and drag the toothpick all the way from the center to the edge in one smooth motion. Wipe the toothpick clean between each drag. The cleaner the toothpick, the cleaner the web lines.
Can I double this recipe?
Absolutely! This recipe doubles beautifully. Just make sure you have enough baking sheets and space in your oven to work in batches. The dough also freezes well, so you can make a double batch and freeze half for later.
Pin This Recipe!

Best Spider Web Peanut Butter Cookies Easy Recipe

These soft and chewy peanut butter cookies are topped with a delicate chocolate spider web pattern, making them the perfect spooky treat for Halloween parties. Easy to make with simple pantry ingredients and no chilling required.
- Prep Time: 15 minutes
- Cook Time: 11 minutes
- Total Time: 56 minutes
- Yield: 24 servings 1x
- Category: Dessert
- Cuisine: American
Ingredients
- 1/2 cup unsalted butter, softened
- 1/2 cup creamy peanut butter
- 1/2 cup granulated sugar
- 1/2 cup light brown sugar, packed
- 1 large egg, room temperature
- 1 teaspoon vanilla extract
- 1 1/2 cups all-purpose flour
- 1 teaspoon baking soda
- 1/2 teaspoon salt
- 1/2 cup semi-sweet chocolate chips
- Optional: flaky sea salt for garnish
Instructions
- Preheat oven to 350°F (175°C) and line two baking sheets with parchment paper.
- In a large mixing bowl, beat softened butter, granulated sugar, and brown sugar together until light and fluffy, about 2-3 minutes.
- Beat in creamy peanut butter until fully combined, then add egg and vanilla extract. Mix just until combined, about 30 seconds.
- In a separate small bowl, whisk together all-purpose flour, baking soda, and salt.
- Gradually add dry ingredients to wet ingredients, mixing on low speed until just combined. Do not overmix.
- Scoop rounded tablespoons of dough (about 1.5 tablespoons each) and roll into smooth balls. Place 2 inches apart on prepared baking sheets. Gently press fork tines in a crisscross pattern on top of each ball.
- Bake for 10-12 minutes, rotating pans halfway through. Cookies should be puffed and lightly golden around edges but still soft in center.
- Let cookies rest on baking sheet for 5 minutes, then transfer to a wire cooling rack to cool completely.
- Melt semi-sweet chocolate chips in a microwave-safe bowl in 20-second intervals, stirring between each, until smooth.
- Transfer melted chocolate to a small piping bag or zip-top bag with a tiny corner snipped off. Pipe a small dot in the center of each cookie, then pipe concentric circles around the dot, spacing about 1/4 inch apart.
- Drag a toothpick from the center outward through all circles to create a web effect. Repeat every 1/2 inch around the cookie. Wipe toothpick clean between each drag.
- Let cookies sit at room temperature for about 30 minutes to allow chocolate to firm up, or refrigerate for 10-15 minutes.
Notes
Do not pipe chocolate when too hot; let it cool slightly for clean lines. For best results, pipe 6-8 cookies at a time to prevent chocolate from setting in the bag. If baking in high humidity, refrigerate finished cookies for 15 minutes to help chocolate firm up.
Nutrition
- Serving Size: 1 cookie
- Calories: 165
- Sugar: 11
- Sodium: 120
- Fat: 10
- Saturated Fat: 4
- Carbohydrates: 18
- Fiber: 1
- Protein: 4
Keywords: spider web cookies, peanut butter cookies, Halloween cookies, chocolate peanut butter cookies, easy Halloween dessert