My husband took a bite of this banana walnut bread on a Tuesday afternoon, chewed for a second, and then just stared at the piece in his hand. He said, “This is it. This is the one you’ve been chasing.” And honestly, he wasn’t wrong. I’d been on a bit of a banana bread kick for weeks—testing different fat ratios, playing with baking times, trying to get that elusive balance where the crumb is tender but not gummy, the crust is golden but not tough, and the banana flavor actually tastes like bananas and not just sugar. I’d made some good loaves, sure. But this one? He didn’t even wait for it to cool fully before cutting that first slice. The steam was still curling up, and he just went for it. That’s when I knew.
What makes this the perfect moist banana walnut bread isn’t one single trick. It’s a few small, intentional choices that add up to a loaf that’s honestly hard to stop eating. The walnuts get toasted first, which changes everything about their flavor. The bananas need to be properly spotty—like, almost embarrassingly overripe. And there’s a little something extra in the fat department that keeps this bread soft for days, not just the first few hours. I’ve tested this recipe more times than I care to admit, and every single batch confirmed the same thing: this is the version worth keeping. It’s not fussy or complicated. It just works.
I started making banana bread back when I was in my first tiny apartment with a hand-me-down loaf pan that was probably older than me. That first loaf was dry and dense and honestly pretty sad. But I kept at it because banana bread is one of those things you can make with stuff you already have, and it makes your kitchen smell like a hug. Over the years, I’ve tweaked and adjusted and learned what actually makes a difference versus what’s just food blog fluff. This recipe is everything I wish I’d had back then. It’s forgiving enough for a beginner but good enough to impress someone who knows their way around a kitchen.
Why You’ll Love This Recipe
Let me tell you why this loaf is different from every other banana walnut bread you’ve tried. It all comes down to texture and taste, and I’ve got the details dialed in.
- Unbelievably Moist – This bread stays soft and tender for days thanks to a combination of melted butter and oil. The butter gives you flavor, the oil gives you moisture, and together they create a crumb that practically melts.
- Perfectly Balanced Walnut Crunch – Toasting the walnuts before folding them into the batter makes them taste warmer and nuttier. They stay crunchy even after baking, so every bite has that satisfying contrast.
- Real Banana Flavor – No fake banana taste here. Using three medium very ripe bananas gives you natural sweetness and that unmistakable flavor that actually tastes like the fruit.
- Simple Ingredients – You probably have almost everything in your pantry right now. No weird specialty items, no expensive extracts, just honest baking staples.
- Family-Approved – My kids asked for this three mornings in a row without being prompted. That never happens. They ate it for breakfast, after school, and even asked for it as a bedtime snack.
- Beginner-Friendly – The method is straightforward and forgiving. You don’t need a stand mixer or any fancy techniques. Just a bowl, a whisk, and a spatula.
This isn’t just another banana bread recipe you’ll make once and forget. It’s the kind you pass along to friends and scribble on a sticky note for your mom. It’s comfort food that actually delivers on its promise.
What Ingredients You Will Need
This recipe uses simple, everyday ingredients to build something that tastes anything but ordinary. Each one plays a specific role, and I’ll walk you through what to look for so you get the best results every time.
- All-Purpose Flour (1 ½ cups / 188 grams) – Standard all-purpose flour gives this bread the perfect structure. It’s sturdy enough to hold the bananas and walnuts without being heavy. Spoon and level your flour into the measuring cup—don’t scoop straight from the bag or you’ll end up with too much.
- Baking Soda (1 teaspoon) – This is your leavening agent. Baking soda reacts with the acidity in the bananas and brown sugar to help the bread rise. Make sure yours is fresh—if it’s been sitting in your cabinet for a year, it might not work as well.
- Salt (½ teaspoon) – Salt isn’t just for savory food. It balances the sweetness and enhances all the other flavors. I use fine sea salt for baking.
- Ground Cinnamon (1 teaspoon) – Cinnamon and banana are a classic pairing. It adds warmth without overpowering the fruit. You can skip it if you want a pure banana flavor, but I really recommend keeping it.
- Unsalted Butter (¼ cup / 57 grams, melted) – Melted butter gives this bread richness and that buttery flavor we all love. I use unsalted so I can control the salt level. Let it cool slightly after melting so it doesn’t cook the eggs when you mix them in.
- Vegetable Oil (¼ cup / 60 ml) – This is the secret to the moisture that lasts for days. Oil stays liquid at room temperature, so it keeps the crumb tender long after the bread has cooled. I use a neutral oil like canola or avocado.
- Brown Sugar (¾ cup / 150 grams, packed) – Brown sugar adds moisture and a deeper, almost caramel-like sweetness. I use light brown sugar, but dark brown works too if you want an even richer flavor. Pack it firmly into your measuring cup.
- Large Eggs (2, at room temperature) – Eggs bind everything together and add structure. Room temperature eggs mix more evenly into the batter, so take them out of the fridge about 30 minutes before you start.
- Vanilla Extract (1 ½ teaspoons) – Vanilla rounds out the flavors and makes everything taste more, well, baked. Use pure vanilla extract if you can—it really does make a difference.
- Very Ripe Bananas (3 medium, mashed) – This is the most important ingredient. Your bananas should be covered in brown spots, almost black in places. The riper they are, the sweeter and more flavorful your bread will be. Mash them with a fork until mostly smooth with a few small lumps.
- Plain Yogurt or Sour Cream (¼ cup / 60 grams) – This adds extra moisture and a tiny bit of tang that balances the sweetness. It also helps activate the baking soda. I use full-fat Greek yogurt, but sour cream works beautifully too.
- Walnuts (¾ cup / 90 grams, chopped and toasted) – Toasting the walnuts brings out their natural oils and makes them taste almost toasty and buttery. Chop them into small pieces so they distribute evenly through the batter. I buy raw walnut halves and chop them myself for the best texture.
I usually buy my bananas a few days ahead and let them sit on the counter until they’re perfect. If you’re in a hurry, you can ripen them in a low oven (300°F for about 15 minutes) or microwave them for 30 seconds, but honestly, waiting for naturally ripe bananas gives you the best flavor.
Equipment Needed
You don’t need a professional bakery setup for this recipe. Here’s what you’ll need to get the job done.
- 9×5-Inch Loaf Pan – This is the standard size for banana bread. A metal pan works great and gives you a nice golden crust. Glass or ceramic pans work too, but they can make the edges bake faster, so keep an eye on it.
- Mixing Bowls – You’ll need one large bowl for the dry ingredients and another for the wet ingredients. I use a medium and a large glass bowl.
- Whisk and Spatula – A whisk for combining the dry ingredients and a rubber spatula for folding everything together. A spatula is better than a mixer here because you want to avoid overmixing.
- Parchment Paper – Lining your loaf pan with parchment paper makes lifting the bread out so much easier. Leave a little overhang on the long sides to use as handles.
- Cooling Rack – Letting the bread cool in the pan for 10 minutes, then turning it out onto a wire rack, prevents the bottom from getting soggy.
- Small Skillet or Baking Sheet – For toasting the walnuts. A small skillet on the stovetop works in just a few minutes, or you can use a baking sheet in the oven.
If you don’t have a 9×5-inch pan, you can use an 8×4-inch pan, but you’ll need to increase the baking time by about 10 minutes. Just watch for the golden color and the toothpick test.
Preparation Method
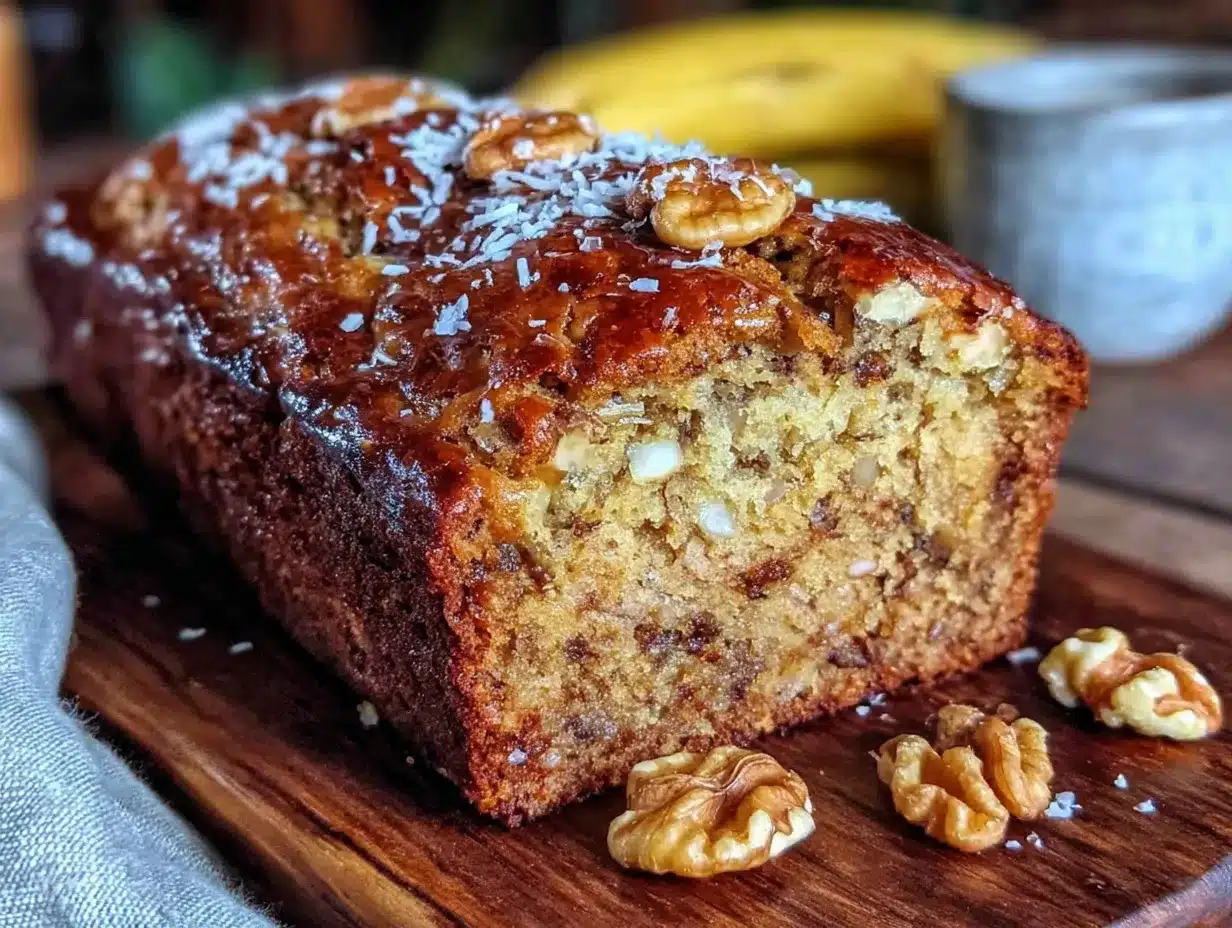
Let’s walk through this step by step. I’ll tell you exactly what to look for at each stage so you can bake with confidence.
- Preheat your oven to 350°F (175°C). Position the rack in the center. While the oven heats, toast your walnuts. Spread the chopped walnuts on a small baking sheet or in a dry skillet over medium heat. Toast for 3-5 minutes, shaking the pan occasionally, until they smell fragrant and look slightly darker. Watch them closely—they burn fast. Set them aside to cool.
- Prepare your loaf pan. Cut a piece of parchment paper long enough to hang over the two long sides of the pan. Spray the pan lightly with nonstick spray, then press the parchment in. This creates little handles that make lifting the finished bread out effortless.
- Whisk the dry ingredients. In a large bowl, whisk together the flour, baking soda, salt, and cinnamon until evenly combined. Set this aside while you work on the wet ingredients.
- Mix the wet ingredients. In a separate medium bowl, whisk together the melted butter, vegetable oil, and brown sugar until smooth. It should look like wet sand. Add the eggs one at a time, whisking well after each addition. Stir in the vanilla extract.
- Add the bananas and yogurt. Mash your bananas in a small bowl with a fork—leave a few small lumps for texture. Add the mashed bananas and the yogurt (or sour cream) to the wet mixture. Whisk until everything is combined. The mixture will look a little lumpy from the bananas, and that’s perfect.
- Combine wet and dry ingredients. Pour the wet mixture into the bowl with the dry ingredients. Use a rubber spatula to fold everything together gently. Stir just until you can’t see any more streaks of flour. A few small lumps are totally fine. Overmixing at this stage will make your bread tough, so be gentle.
- Fold in the walnuts. Add the toasted walnuts and fold them in with just a few strokes. Reserve a small handful to sprinkle on top if you want a prettier loaf.
- Pour the batter into the prepared pan. Scrape every last bit out of the bowl with your spatula. Spread the batter evenly, and if you saved some walnuts, sprinkle them over the top. Gently press them into the batter so they stick.
- Bake for 55-65 minutes. Place the pan in the center of the oven and bake until the top is deep golden brown and a toothpick inserted into the center comes out clean or with just a few moist crumbs. If the top is browning too quickly after 45 minutes, tent the pan loosely with aluminum foil.
- Cool properly. Let the bread cool in the pan for 10 minutes. Then use the parchment handles to lift it out and transfer it to a wire rack. Let it cool completely before slicing—this is the hardest part, I know, but it really matters. Slicing too early can make the bread crumble.
Your kitchen is going to smell incredible during that last 20 minutes of baking. The combination of banana, cinnamon, and toasted walnuts is one of those scents that just feels like home.
Cooking Tips & Techniques
I’ve made enough banana bread to know exactly where things can go wrong. Here are the lessons I learned the hard way so you don’t have to.
Don’t overmix the batter. This is the number one mistake I see. Once you add the dry ingredients to the wet, you only want to stir until the flour disappears. Overmixing develops gluten, and too much gluten makes your bread tough and dense. Use a gentle hand and a spatula, not a mixer.
Check your baking soda. Baking soda loses its potency over time. If yours has been open for more than six months, do a quick test: drop a teaspoon of it into a small bowl of vinegar. If it fizzes vigorously, it’s still good. If it barely reacts, buy a new box.
Use a kitchen scale for accuracy. I know measuring cups are convenient, but flour is notoriously easy to overmeasure. A cup of flour can vary by as much as 30 grams depending on how you scoop it. A kitchen scale gives you consistent results every time. If you don’t have one, spoon the flour into your measuring cup and level it off with a knife.
Room temperature ingredients matter. Cold eggs and cold yogurt can make your batter seize up, especially when you’re using melted butter. Leave your eggs and yogurt on the counter for 30 minutes before you start. It takes almost no planning and makes a real difference in how evenly the batter comes together.
Test for doneness properly. A toothpick inserted into the center should come out clean or with just a few moist crumbs attached. If it’s wet with batter, the bread needs more time. If the top is getting too dark, tent it with foil and keep baking. Every oven runs a little differently, so trust the toothpick over the timer.
I once forgot to toast the walnuts and made a loaf that was perfectly fine but honestly a little flat in flavor. Toasting takes five minutes and adds so much depth. Don’t skip it.
Variations & Adaptations
This recipe is forgiving enough to handle some creative twists. Here are a few ways to change it up depending on what you have or what you’re craving.
- Chocolate Chip Banana Walnut Bread – Fold in ½ cup of semi-sweet or dark chocolate chips along with the walnuts. The chocolate melts into little pockets of richness that pair beautifully with the banana. My kids go crazy for this version.
- Gluten-Free Option – Swap the all-purpose flour for a good quality 1-to-1 gluten-free baking flour blend. I’ve tested this with Bob’s Red Mill and King Arthur brands, and both work well. Don’t use almond flour or coconut flour unless you’re willing to adjust the liquid ratios significantly.
- Dairy-Free Adaptation – Use a dairy-free yogurt or sour cream alternative, and swap the butter for vegan butter or additional oil. The texture stays surprisingly close to the original.
- Spiced Version – Add ¼ teaspoon of nutmeg and ¼ teaspoon of ground ginger along with the cinnamon. It gives the bread a warm, almost chai-like flavor that’s perfect for fall. If you love fall flavors, you might also enjoy this cozy brown butter zucchini banana bread with walnut streusel topping.
- Lower Sugar Option – Reduce the brown sugar to ½ cup. The bananas add enough sweetness that the bread still tastes good, just a little less dessert-like. You can also use coconut sugar for a less processed option, though the flavor will be slightly different.
I once made a version with dried cranberries and orange zest thrown in, and it was surprisingly good. The tartness of the cranberries cuts through the sweetness in a really nice way. Don’t be afraid to experiment.
Serving & Storage Suggestions
This banana walnut bread is wonderful in so many ways. Here’s how to serve it and keep it fresh.
Serving Temperature: This bread is delicious at room temperature, but I actually prefer it slightly warm. Pop a slice in the microwave for about 10 seconds, or toast it lightly in a skillet with a tiny pat of butter. The warmth makes the walnuts taste even more toasty and the crumb feels extra tender.
Presentation Ideas: A simple dusting of powdered sugar makes this look fancy with zero effort. You can also spread a slice with honey butter, cream cheese, or even a little salted butter. For a more decadent treat, drizzle a simple glaze over the top made from ½ cup powdered sugar and 2 tablespoons of milk or cream.
What to Serve With It: This bread is perfect with a cup of coffee or tea. I love it alongside a creamy pumpkin chai spice latte for a cozy morning treat. It also pairs beautifully with fresh fruit and yogurt for a more complete breakfast.
Storage Instructions: Wrap the cooled bread tightly in plastic wrap or aluminum foil and store it at room temperature for up to 4 days. The moisture from the oil and yogurt keeps it soft the whole time. Do not refrigerate it—the cold air will dry it out faster.
Freezing Instructions: This bread freezes beautifully. Wrap the whole loaf or individual slices in plastic wrap, then place them in a freezer-safe bag or container. Freeze for up to 3 months. To thaw, leave it at room temperature for a few hours, or pop a frozen slice in the toaster for a quick treat.
I usually make two loaves at once—one for now and one for the freezer. It’s one of those recipes that’s just as good a week later as it is fresh out of the oven.
Nutritional Information & Benefits
Here’s an approximate nutritional breakdown for one slice (based on 10 slices per loaf). Keep in mind this is an estimate and will vary based on specific brands and substitutions.
| Nutrient | Amount Per Slice |
|---|---|
| Calories | 295 |
| Total Fat | 16g |
| Saturated Fat | 5g |
| Cholesterol | 55mg |
| Sodium | 230mg |
| Total Carbohydrates | 35g |
| Dietary Fiber | 2g |
| Sugars | 18g |
| Protein | 5g |
Bananas are a great source of potassium and vitamin B6, and walnuts provide healthy omega-3 fatty acids and antioxidants. This bread isn’t health food, but it does use real, whole ingredients that offer some nutritional value. If you’re looking for a lighter option, you can try these easy no-bake peanut butter oat energy bites for a quick snack.
This recipe contains gluten, dairy, eggs, and walnuts. For allergen-friendly variations, check the adaptations section above.
Conclusion
This perfect moist banana walnut bread is the recipe I keep coming back to, and I think you will too. It’s simple enough for a Tuesday morning but good enough to bring to a holiday brunch. The toasted walnuts add a crunch that makes every bite interesting, and the texture stays soft and tender for days. It’s the kind of bread that makes you feel like you actually know what you’re doing in the kitchen, even on days when you’re just winging it.
I’d love to hear how yours turns out. Did you add chocolate chips? Try it with pecans instead of walnuts? Did your family eat half the loaf before it even cooled? Drop a comment below and let me know what you think. And if you’re looking for another cozy baking project, try this brown butter banana bread with walnut crunch and honey glaze for a slightly more elevated twist.
Happy baking, friend. Your kitchen is about to smell amazing.
Frequently Asked Questions
Can I use frozen bananas for this recipe?
Absolutely. Thaw them completely first, then drain off any excess liquid before mashing. Frozen bananas actually break down really easily and can make the bread even more moist. Just don’t skip the draining step or the extra liquid might throw off the texture.
Why did my banana bread sink in the middle?
This usually happens when the batter is overmixed or the bread is underbaked. Make sure you’re only stirring until the flour disappears, and always test with a toothpick before pulling it out of the oven. Another possible cause is too much banana—stick to three medium bananas.
Can I make this into muffins instead?
Yes! Grease a 12-cup muffin tin or line it with paper liners. Fill each cup about ¾ full and bake at 350°F for 18-22 minutes, or until a toothpick comes out clean. The muffins will be ready faster than the loaf, so start checking at 18 minutes.
How do I know when my bananas are ripe enough?
Look for bananas with plenty of brown spots on the peel. The peel should be mostly yellow with brown patches, or even mostly brown. They should feel soft when you squeeze them gently. If they’re still firm and yellow, they’re not ready yet. Give them another day or two on the counter.
Can I leave out the walnuts?
Of course. You can simply omit them for a plain banana bread, or swap them for an equal amount of chocolate chips, pecans, or even dried fruit. If you’re baking for someone with a nut allergy, this is an easy adjustment.
Pin This Recipe!
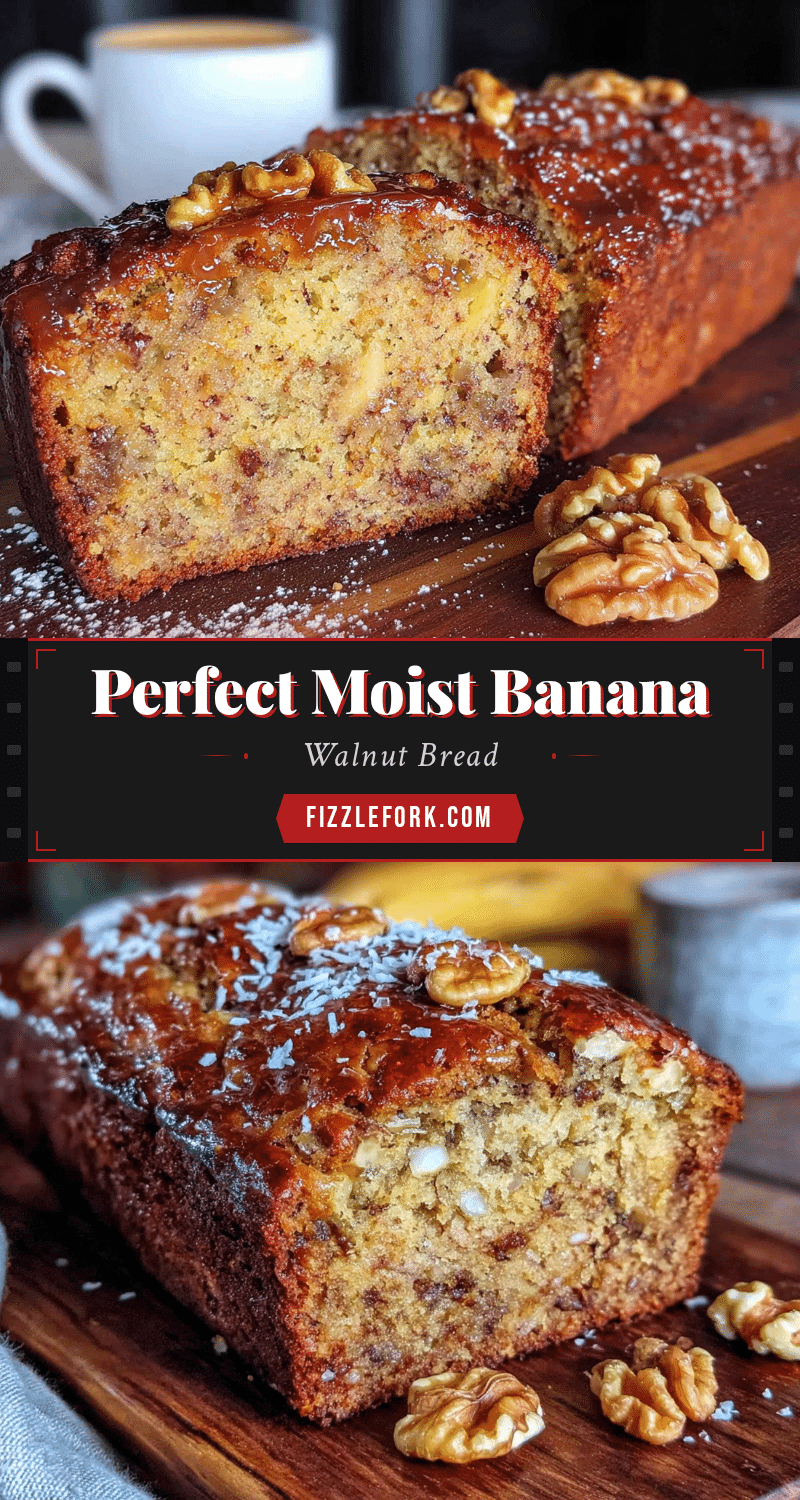
Perfect Moist Banana Walnut Bread – Best Homemade Recipe
This banana walnut bread is unbelievably moist, perfectly balanced with toasted walnut crunch, and packed with real banana flavor. It’s a simple, beginner-friendly recipe that stays soft for days and is family-approved.
- Prep Time: 15 minutes
- Cook Time: 55-65 minutes
- Total Time: 1 hour 10 minutes - 1 hour 20 minutes
- Yield: 10 servings 1x
- Category: Dessert
- Cuisine: American
Ingredients
- 1 ½ cups (188 grams) all-purpose flour
- 1 teaspoon baking soda
- ½ teaspoon fine sea salt
- 1 teaspoon ground cinnamon
- ¼ cup (57 grams) unsalted butter, melted and cooled slightly
- ¼ cup (60 ml) vegetable oil (canola or avocado)
- ¾ cup (150 grams) light brown sugar, packed
- 2 large eggs, at room temperature
- 1 ½ teaspoons pure vanilla extract
- 3 medium very ripe bananas, mashed (about 1 cup)
- ¼ cup (60 grams) plain yogurt or sour cream, at room temperature
- ¾ cup (90 grams) walnuts, chopped and toasted
Instructions
- Preheat your oven to 350°F (175°C). Position the rack in the center. Spread the chopped walnuts on a small baking sheet or in a dry skillet over medium heat. Toast for 3-5 minutes, shaking occasionally, until fragrant and slightly darker. Set aside to cool.
- Prepare your loaf pan: Cut a piece of parchment paper long enough to hang over the two long sides of a 9×5-inch loaf pan. Spray the pan lightly with nonstick spray, then press the parchment in.
- In a large bowl, whisk together the flour, baking soda, salt, and cinnamon until evenly combined. Set aside.
- In a separate medium bowl, whisk together the melted butter, vegetable oil, and brown sugar until smooth. Add the eggs one at a time, whisking well after each addition. Stir in the vanilla extract.
- Mash the bananas in a small bowl with a fork, leaving a few small lumps. Add the mashed bananas and yogurt (or sour cream) to the wet mixture. Whisk until combined.
- Pour the wet mixture into the bowl with the dry ingredients. Use a rubber spatula to fold together gently until no streaks of flour remain. A few small lumps are fine. Do not overmix.
- Fold in the toasted walnuts with just a few strokes. Reserve a small handful to sprinkle on top if desired.
- Pour the batter into the prepared pan and spread evenly. If using, sprinkle reserved walnuts on top and gently press them into the batter.
- Bake for 55-65 minutes, until the top is deep golden brown and a toothpick inserted into the center comes out clean or with a few moist crumbs. If the top browns too quickly after 45 minutes, tent loosely with aluminum foil.
- Let the bread cool in the pan for 10 minutes. Use the parchment handles to lift it out and transfer to a wire rack. Cool completely before slicing.
Notes
Don’t overmix the batter to avoid tough bread. Check baking soda freshness by testing with vinegar. Use a kitchen scale for accurate flour measurement. Room temperature ingredients help the batter come together evenly. Test doneness with a toothpick; if top browns too quickly, tent with foil. Toasting walnuts is essential for best flavor.
Nutrition
- Serving Size: 1 slice
- Calories: 295
- Sugar: 18
- Sodium: 230
- Fat: 16
- Saturated Fat: 5
- Carbohydrates: 35
- Fiber: 2
- Protein: 5
Keywords: banana walnut bread, moist banana bread, homemade banana bread, easy banana bread recipe, banana walnut loaf


